
How to propagate heirloom chrysanthemums: overview and a quick and easy way
Why grow heirloom chrysanthemums?
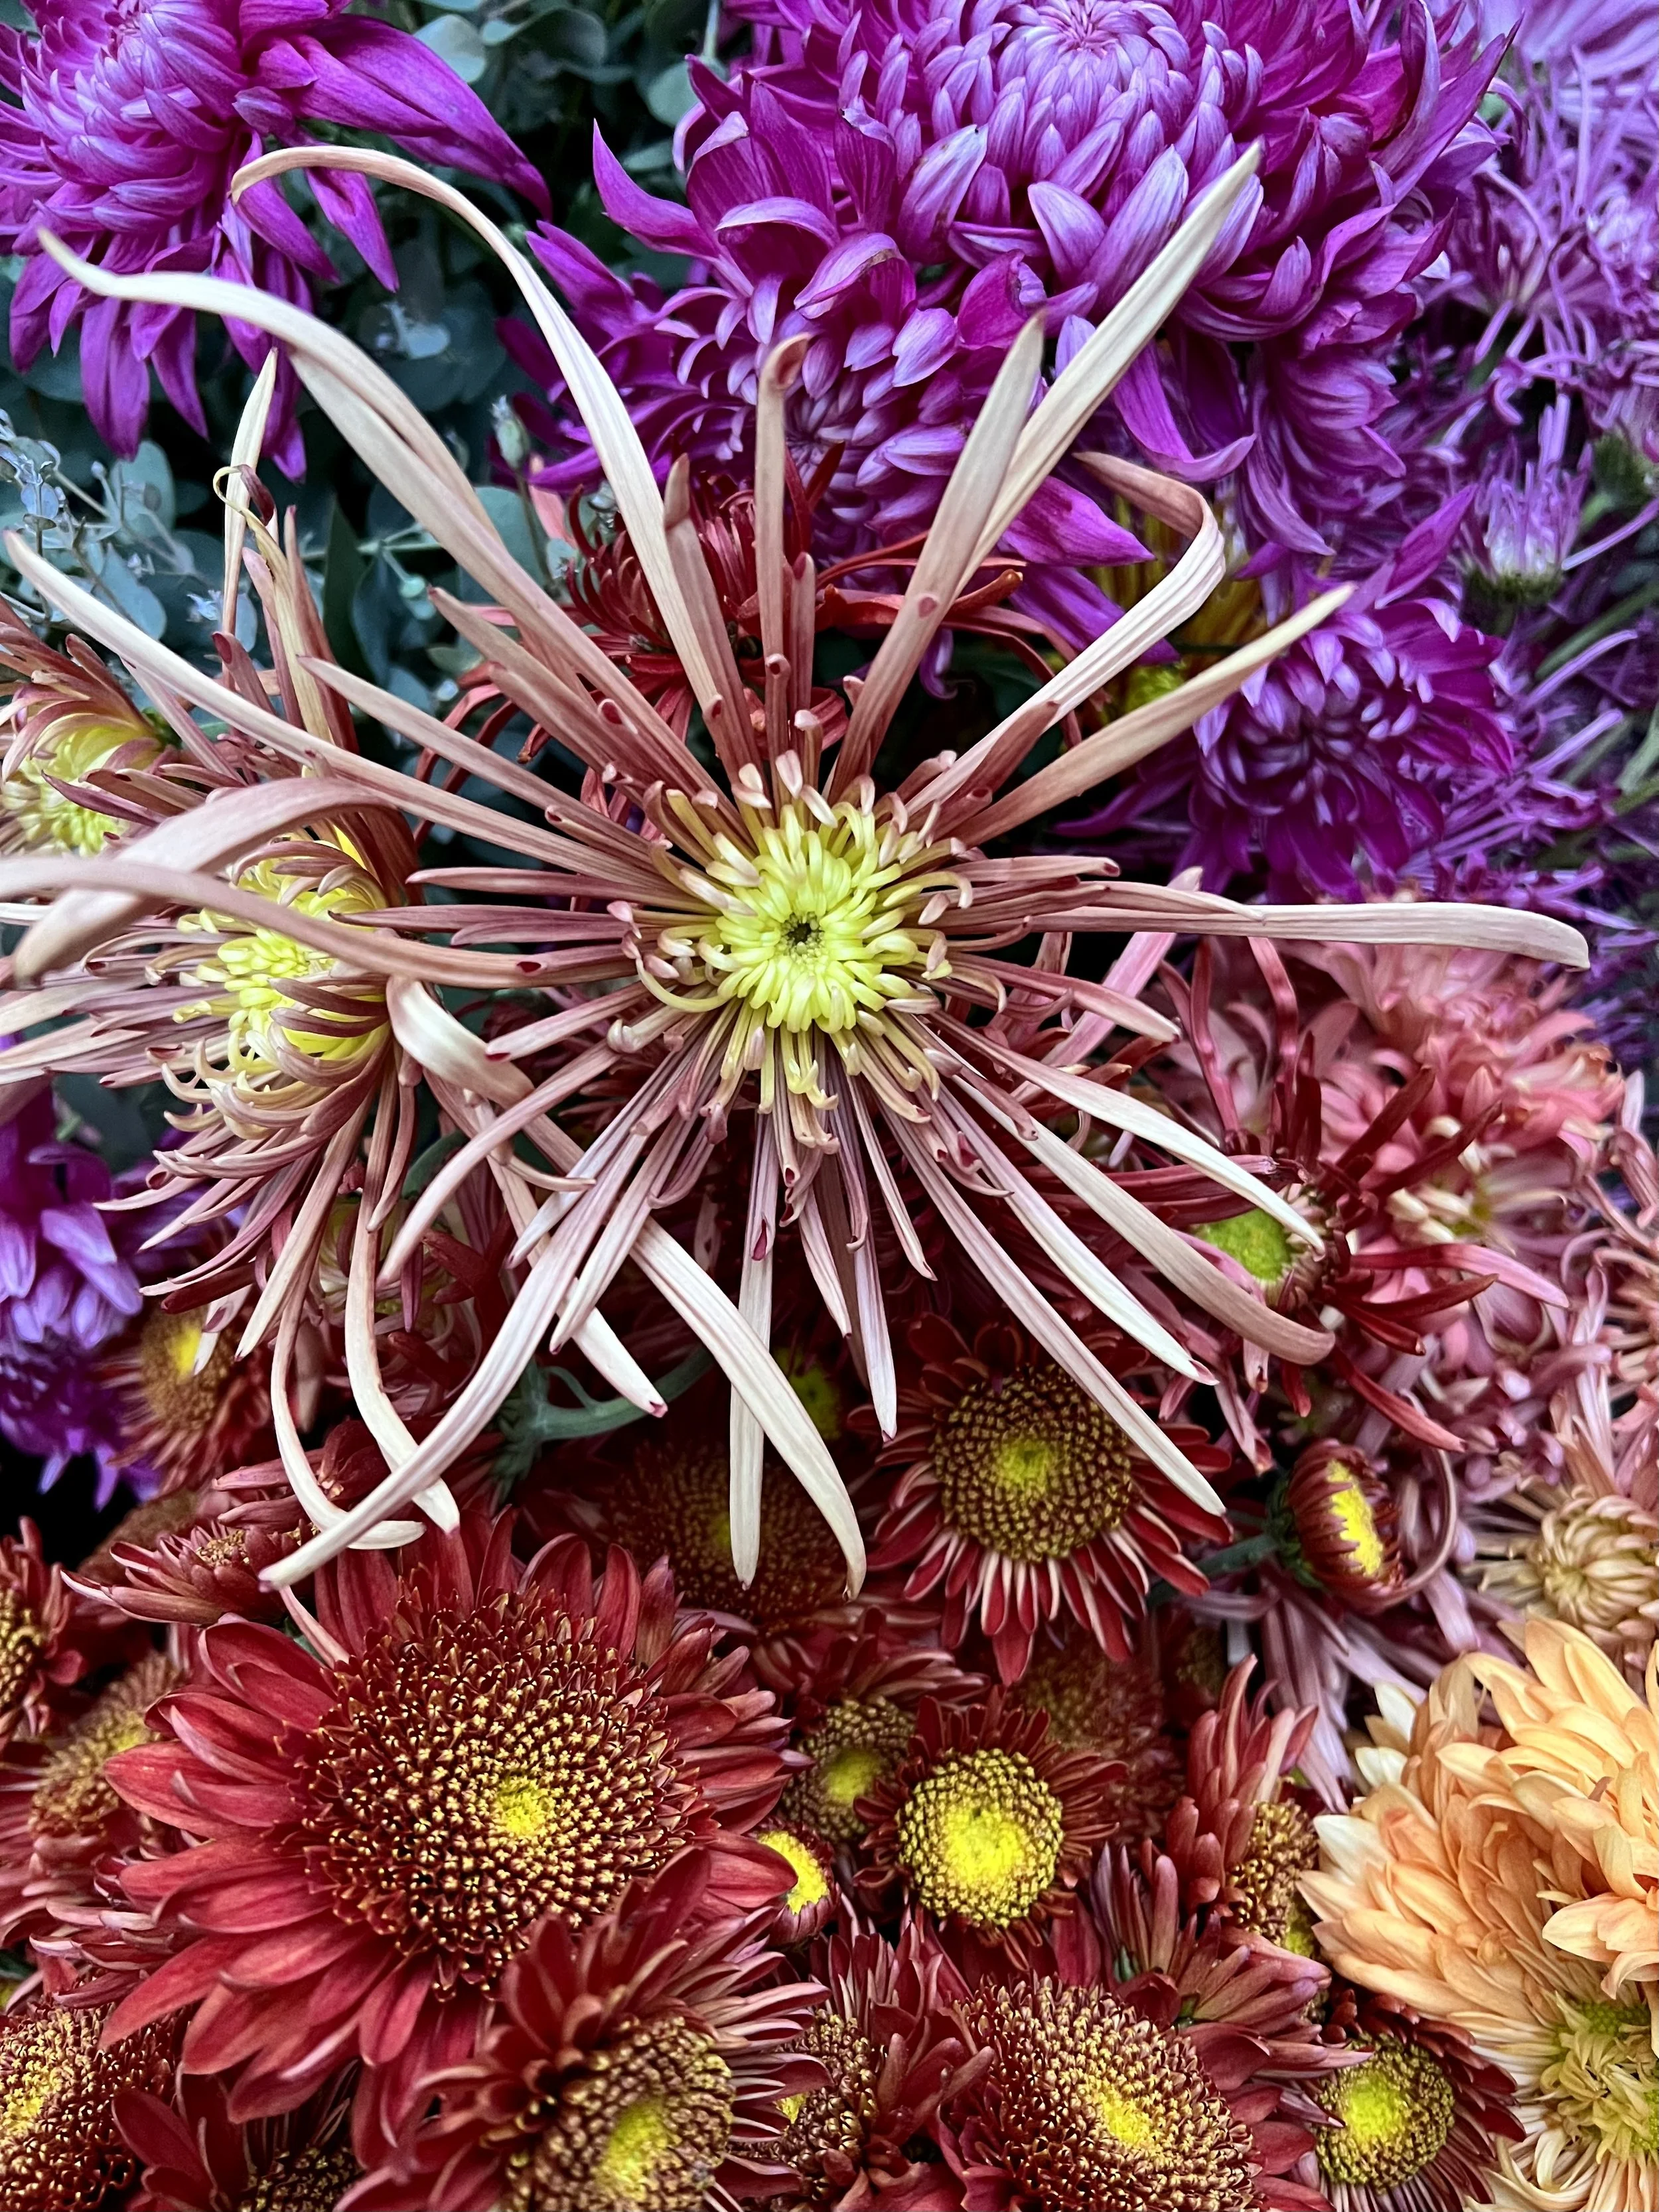
Heirloom chrysanthemums are a show stopping focal flower for autumn weddings, events and seasonal bouquets. They are enjoying a recent surge in popularity and appreciation. Rest assured, they are a completely different breed of mum than the ubiquitous (and let’s frankly admit, boring) “pot mums” for sale in the fall. Heirloom mums make long lasting cuts and come in a wide array of dazzling forms, shapes, sizes and desirable colors. With cultural practices like disbudding, one can cultivate large single blooms or branching stems, or there are cultivars that bloom as sprays. Heirloom chrysanthemums are very versatile and start to shine when daylight hours wane, seamlessly taking the baton from dahlias after they are kissed by frost. Late winter is the time to start propagating for the coming season’s crop.
Can you provide a protected environment?
Though chrysanthemum plants are more hardy than dahlias, the blooms need protection from frost, ideally a high tunnel or hoop house, or they are likely to sustain damage with frost or light freezes. In climates like mine (zone 6b, eastern PA), protected conditions increase the likelihood of reaching successful harvest. If attempting to grow without a high tunnel in similar zones, it is important to pay attention to bloom time when selecting varieties. For example, choose “early” varieties that will initiate bloom September to early October. Mature height is also an important consideration as many cultivars will grow too tall for a low tunnel. The mums I naturally gravitate towards are later to flower, hitting peak bloom time mid to late October into mid November.
Where to obtain mother plants?
The gold standard nursery to obtain cuttings from is the renowned King’s Mums, the respected steward of unusual and exotic specimens. Fortunately, there are new suppliers coming into the market like Harmony Harvest Farm, Clara Joyce Flowers and others. However, the angst spurred by shortages in spring 2022 propelled many growers to place more attention on propagating their own stock. The good news is that heirloom mums are incredibly easy to propagate!
Mum propagation via cuttings is standard: a brief recap of cuttings methodology
Not going into too much detail because the point of this post was the quick and easy way, but for comparison’s sake, the classic way in a nutshell is:
Dig up mother plants at the end of the growing season to nurse throughout the winter in a frost free environment. (Con: figuring out where to store all these plants and keep them alive through the winter.)
Once growth resumes in late winter/early spring, take cuttings when the growth has reached about 4 nodes high. Make clean cuts just above a leaf node at the top and below a leaf node at the bottom, sections should be around 3” long.
With each cutting segment, remove any leaves that will be below the soil media. The set of leaves at the top of each cutting should remain.
Place moistened media (sterile potting mix or vermiculite) into 50 or 72 cell plug trays. Poke a sufficiently sized hole in each cell using a pencil to receive the cuttings.
Dip cutting in hormone rooting powder, place in hole being careful to avoid displacement of rooting powder and firm soil around the cutting.
Place tray on heat mat in a non-draining tray filled 1/3 way with water, cover with humidity dome.
Keep around 70F for 7-10 days until rooted. Once rooted the dome can come off, cuttings can be potted up into a 4” pot and grown on in a bright environment (under lights indoors or in a frost free hoop or greenhouse).
Alternative method for mum propagation is via division, and it is easy!
The process above is relatively straightforward, but there is an easier way! In my field, a single layer of plastic suspended over the plants provides sufficient protection from winter freezes and excessive winter moisture (which can lead to crown rot, particularly in heavy soils). By early February, new growth has appeared around the crown. Many varieties also produce stolons (horizontal, fleshy stems that can root and go on to produce new stems) that pop up several inches away. This characteristic makes propagation simple!
Suggested Supplies
Plant labels and garden marker
Digging fork or shovel
Snips and/or pruners
Alcohol or other sanitizer to clean snips between plants
Neem oil
Potting mix, slightly damp and evenly moistened
4” or similar sized pots, or larger sizes to accommodate the divided plants
Rooting hormone (optional)
Seedling heat mat (if ambient temperatures are not frost free)
(Click on each photo to get a bigger view)
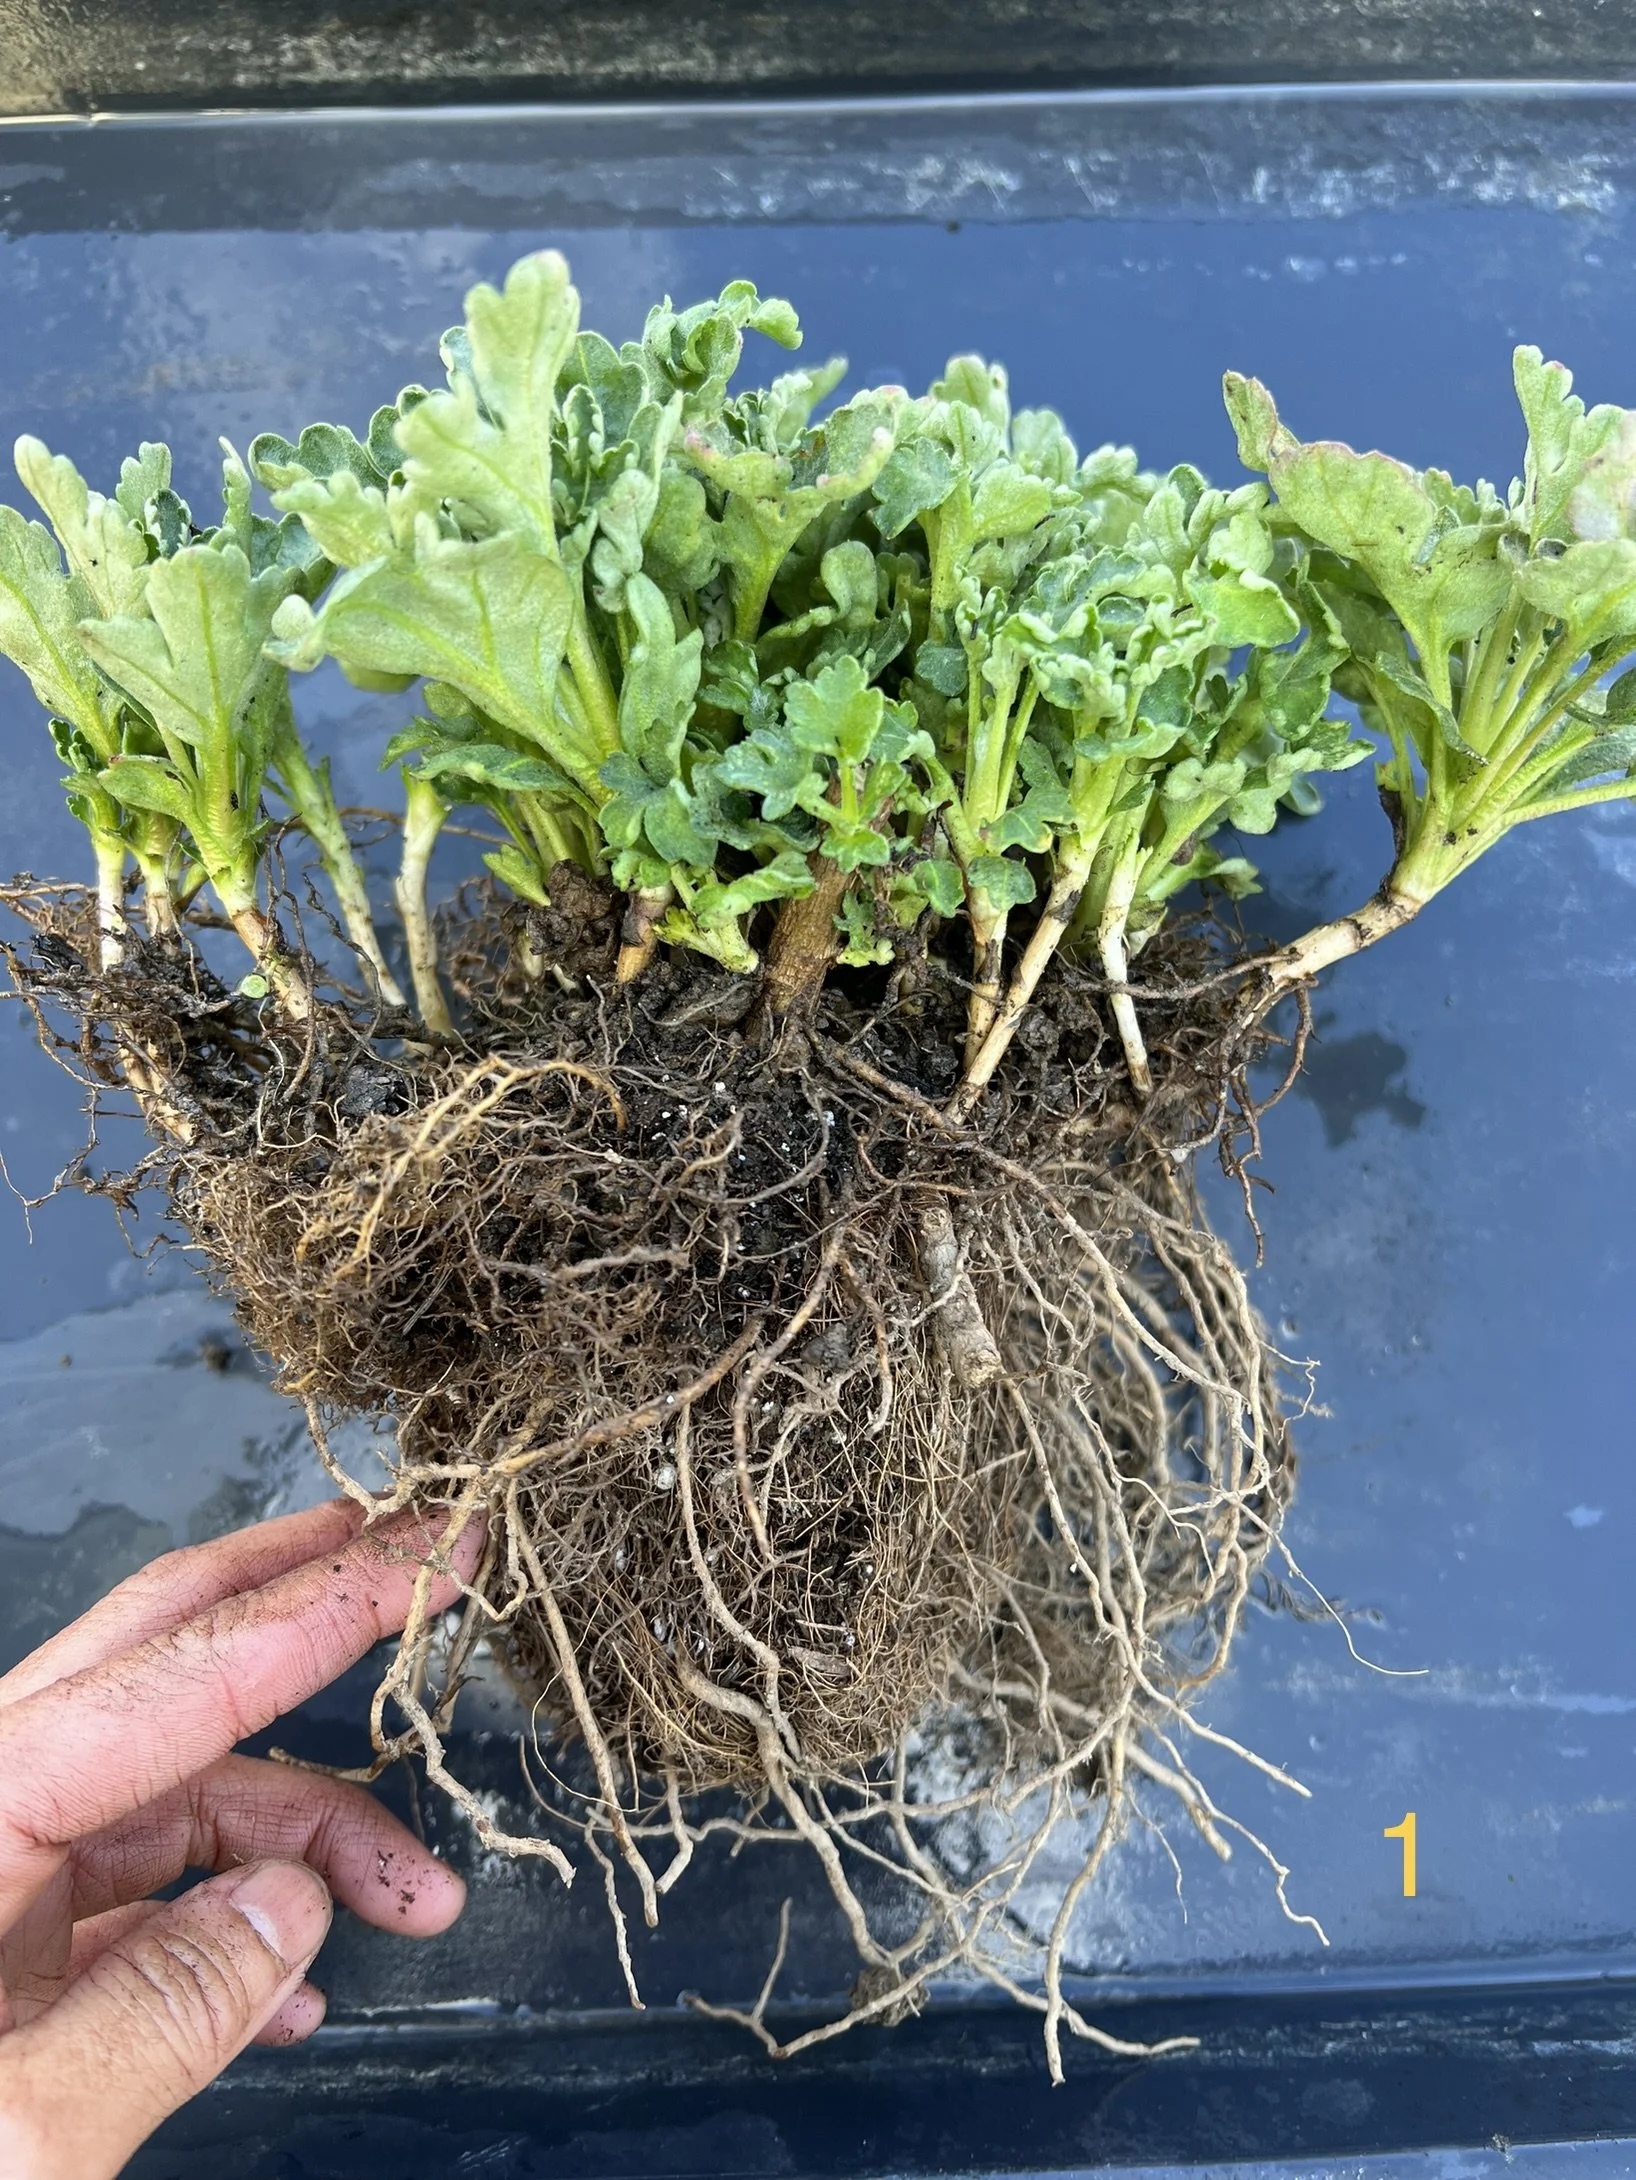
Step 1: Dig up mother plants by inserting fork or shovel 4-6” away from circumference of the crown and stolons. Lift to remove as much root mass as possible. Shake soil loose and mist roots to keep moist. Label your mothers as you go. Photo #1 shows a mother ready to be divided.
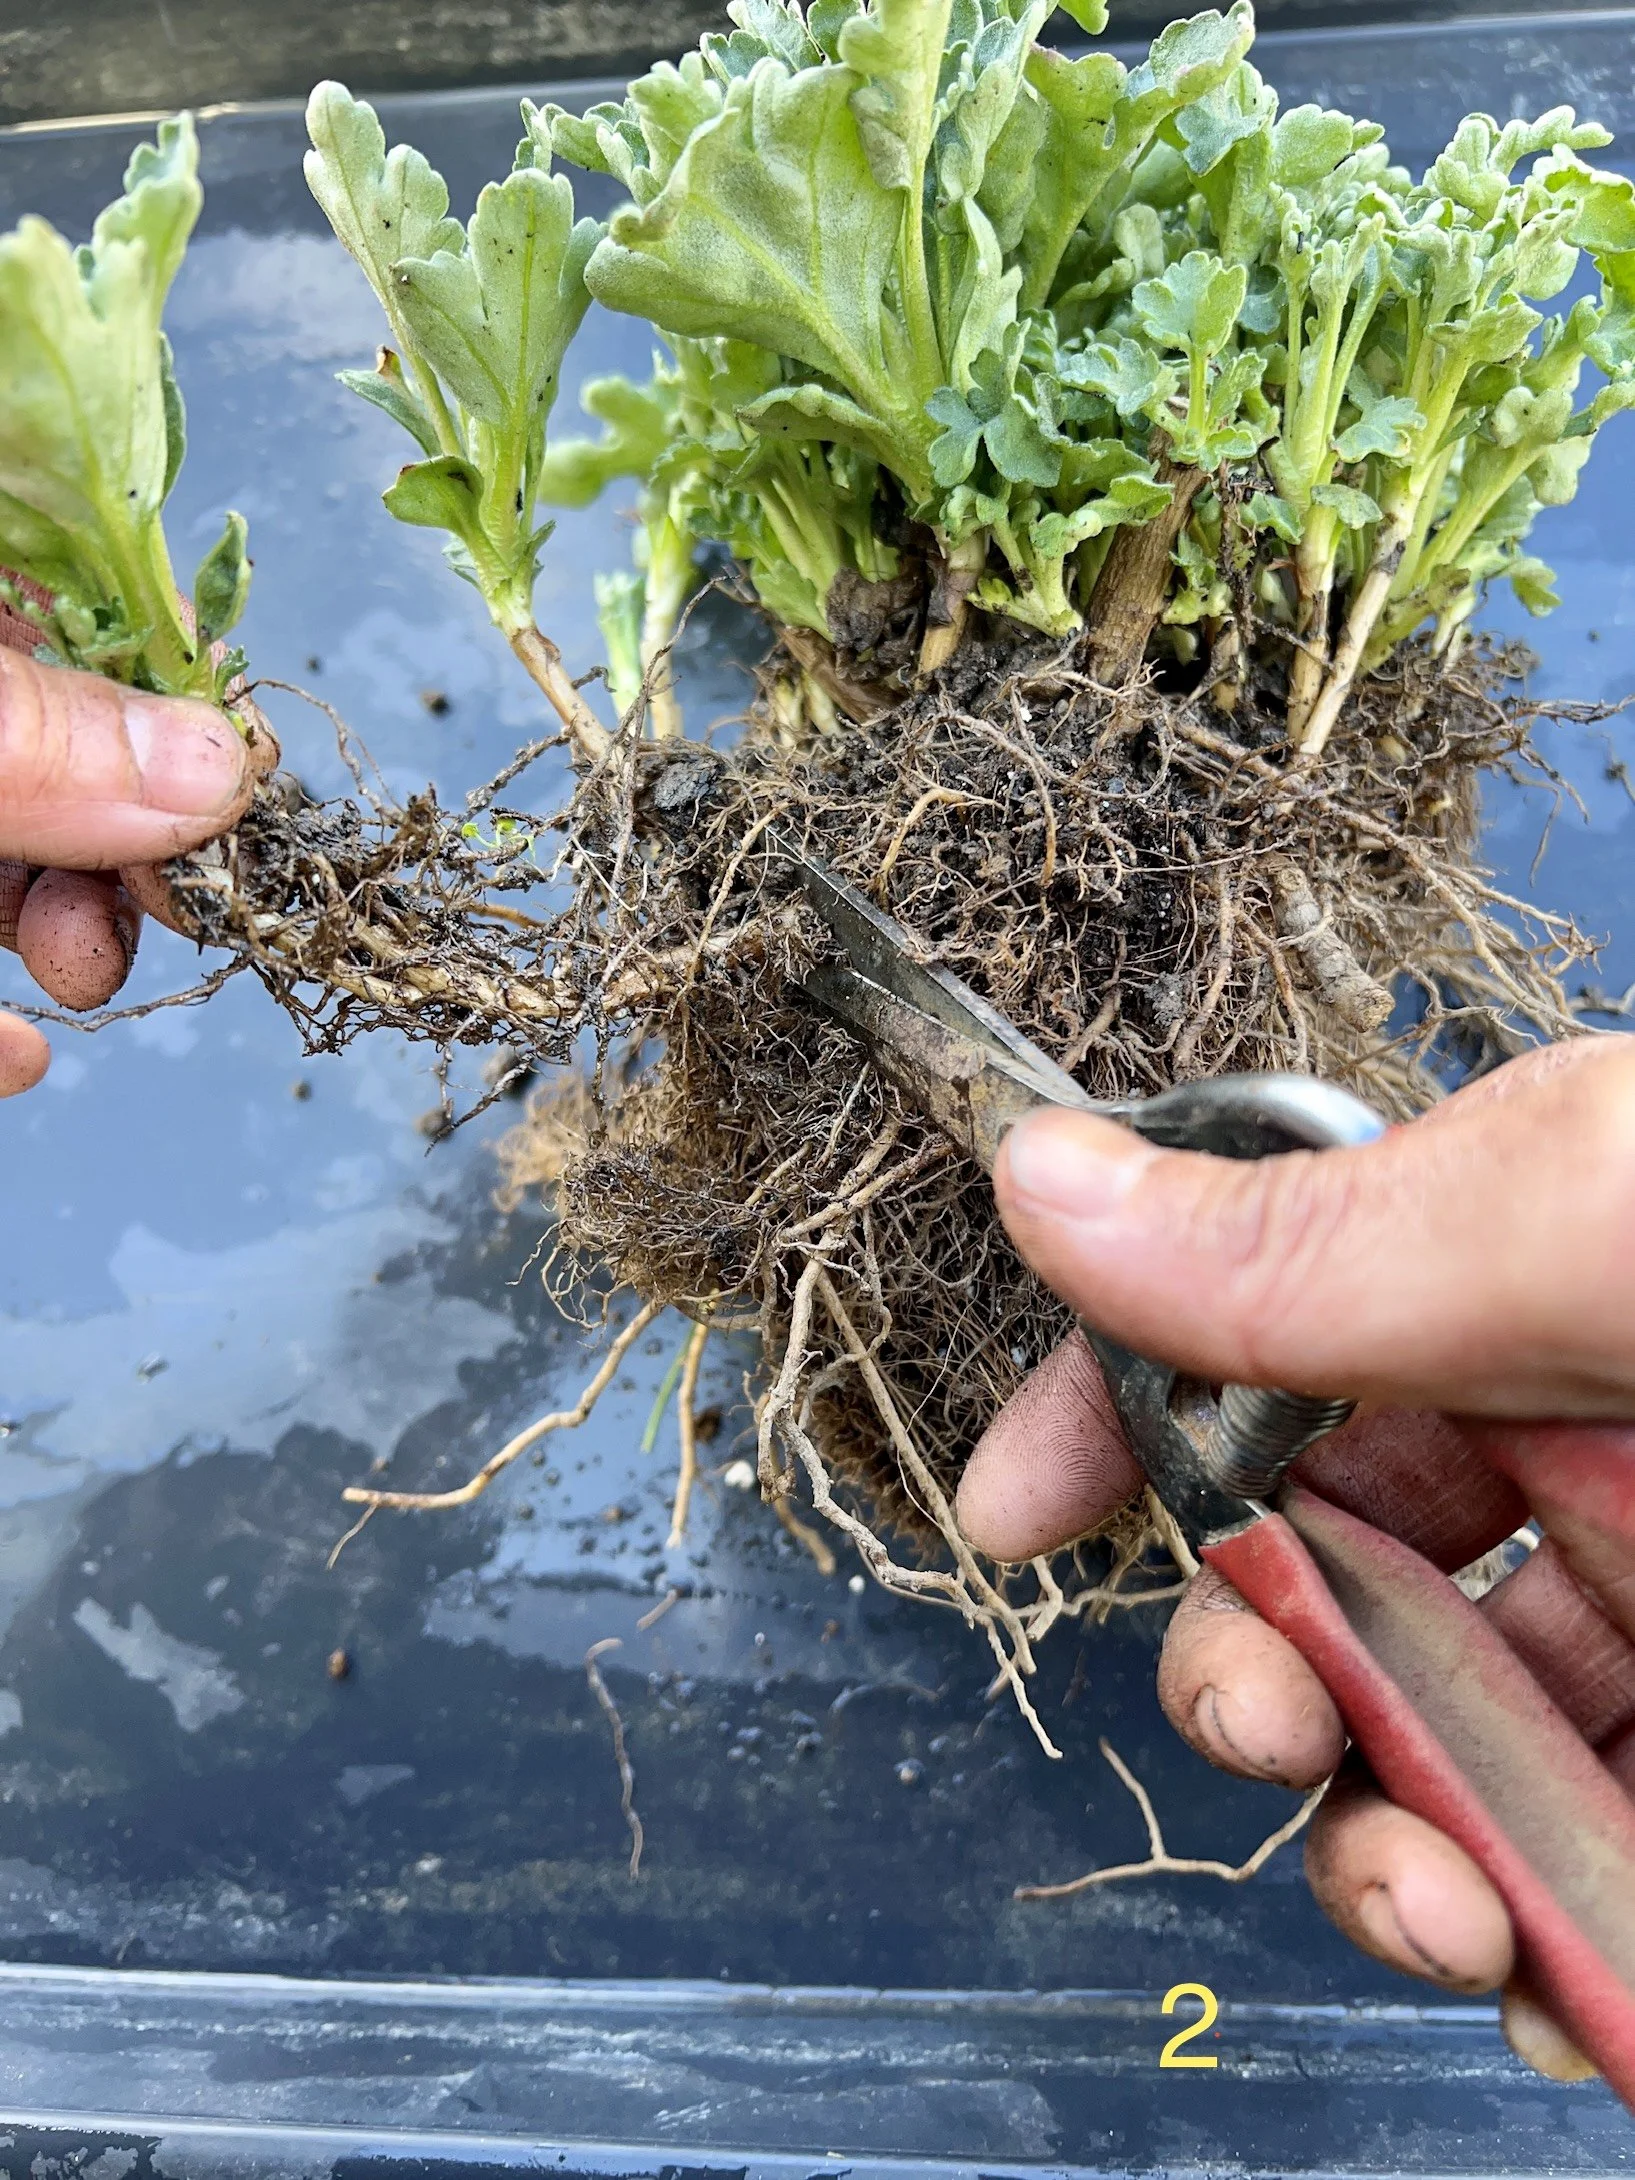
Step 2: Mums send up fleshy sprouts that will become new flowering stems from the root mass. Some of these sprouts will extend a few inches away from the main clump (stolons). Using clean tools, begin to snip stolons with some root mass attached as shown in Photo #2. You are aiming to have at least 3” of plant material to be buried by potting mix.
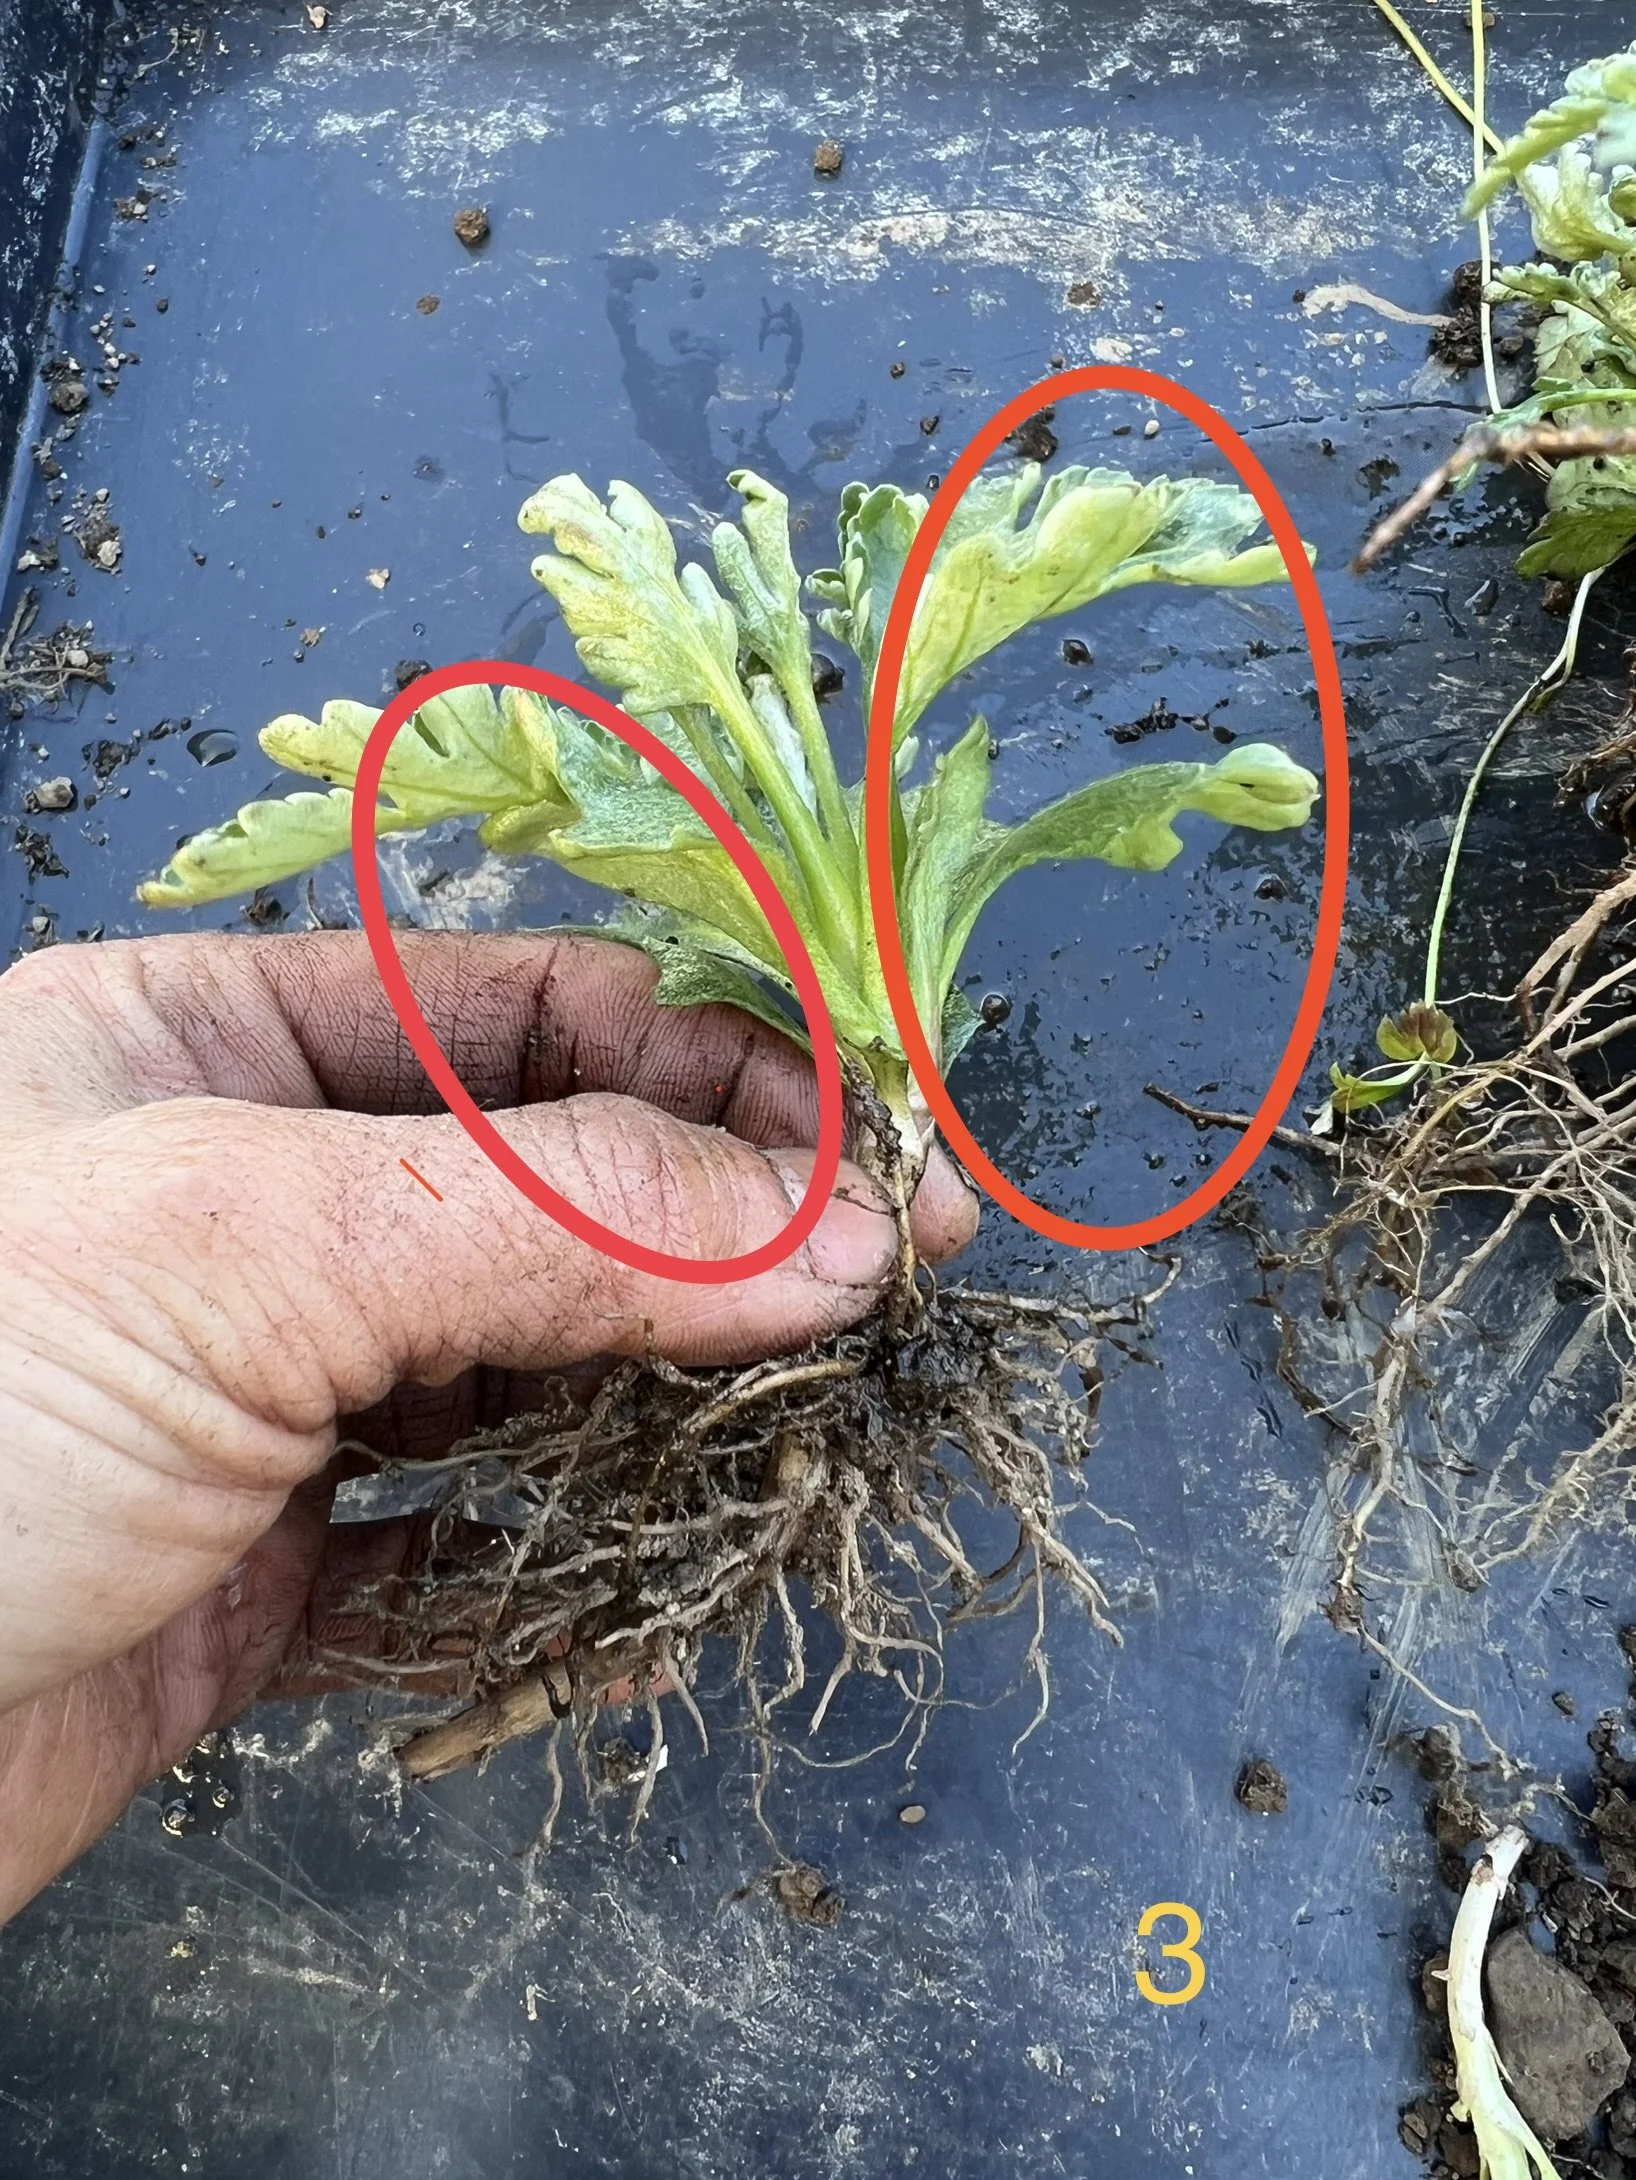
Step 3, Clean up the division: Remove any suspect foliage; anything buggy or speckled, all mushy residue. You want clean, healthy plant material. It is also beneficial to remove some of the lower leaves on the cutting so that the foliage is in balance with the smaller root mass (see Photo #3). Otherwise the plant will struggle to keep its foliage hydrated and the division will wilt and experience more stress.
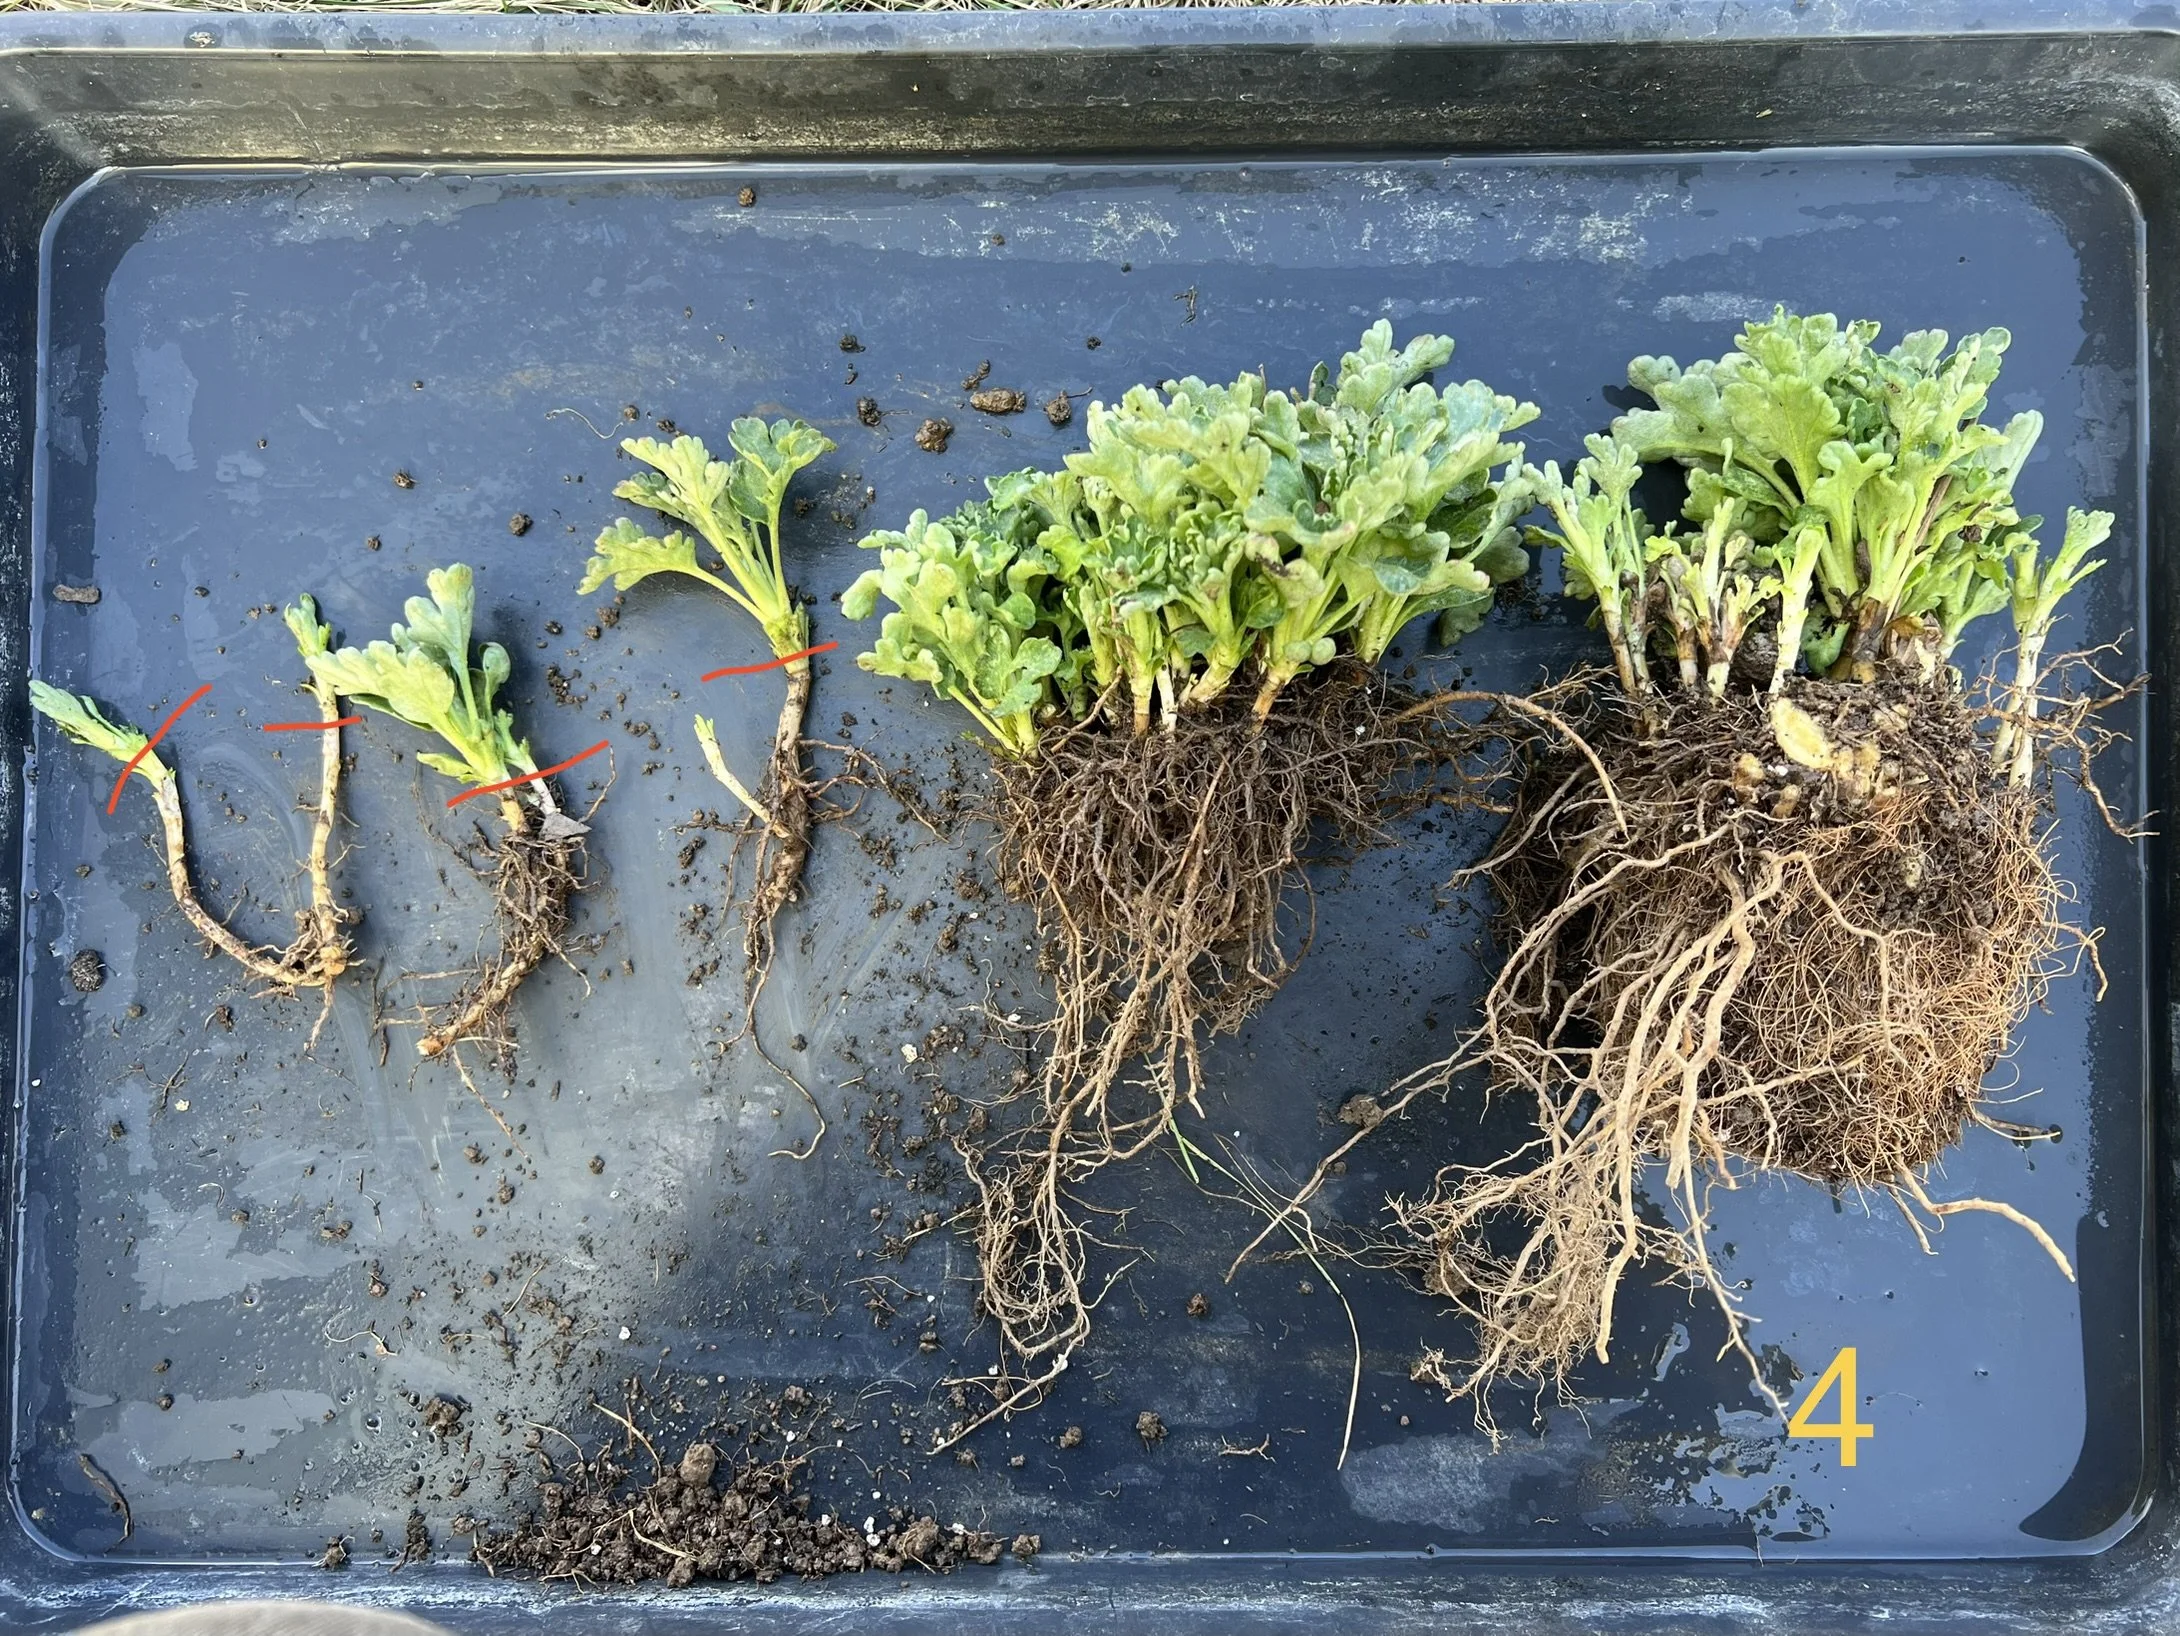
Step 4, Continue dividing the Mother. Photo #4 shows various sizes of divisions, with red lines indicating the soil line when potted. Heirloom chrysanthemums root so readily that you don’t need much root mass at all to have success. If you are apprehensive about dividing too aggressively, just leave divisions a bit larger and take more cuttings the conventional way from subsequent growth as spring progresses. If there is plenty of new growth, I cut away any woody stems from the previous year, all the way to the base of the plant. New basal growth always performs better for me.
Step 5: Treat plants for insects and potential fungal issues with a neem solution dunk. I find mums to be susceptible to bugs, so I like to treat for eggs and tiny insects that may have overwintered. Dilute neem oil according to package directions in a container large enough to swish your divisions in the liquid upside down. Give the foliage a good, thorough treatment as you definitely do not want insect pests infiltrating a prop house or indoor space!
Step 6: I have success without the use of root hormone, but if you have some on hand, feel free to use. One also could brew up a batch of willow water to help facilitate rooting if you happen to have a tree nearby (see note at end of post). Dip bottom of division into rooting hormone and pot up in a container slightly larger than your division’s root mass. (In general, plants can struggle if put into a container that is too large for its size. It is difficult to maintain the right moisture levels when a plant is “swimming” in too large of a space). Firm medium up around the division and water well. Label the babies! Place in a frost free environment with sufficient light (frost free prop house or inside under grow lights).
Benefits of this method
* It’s easier and less work to leave plants in the ground to overwinter.
* I’ll be honest, I hate bumping things up. If I can save myself a round, I’ll do it.
* Plants are not as finicky about maintaining even soil temperatures. By forgoing heat mats for mums, it’s less monitoring for moisture and frees up my heat mats for seedlings.
* Success rate is practically 100%.
Growing on till early summer
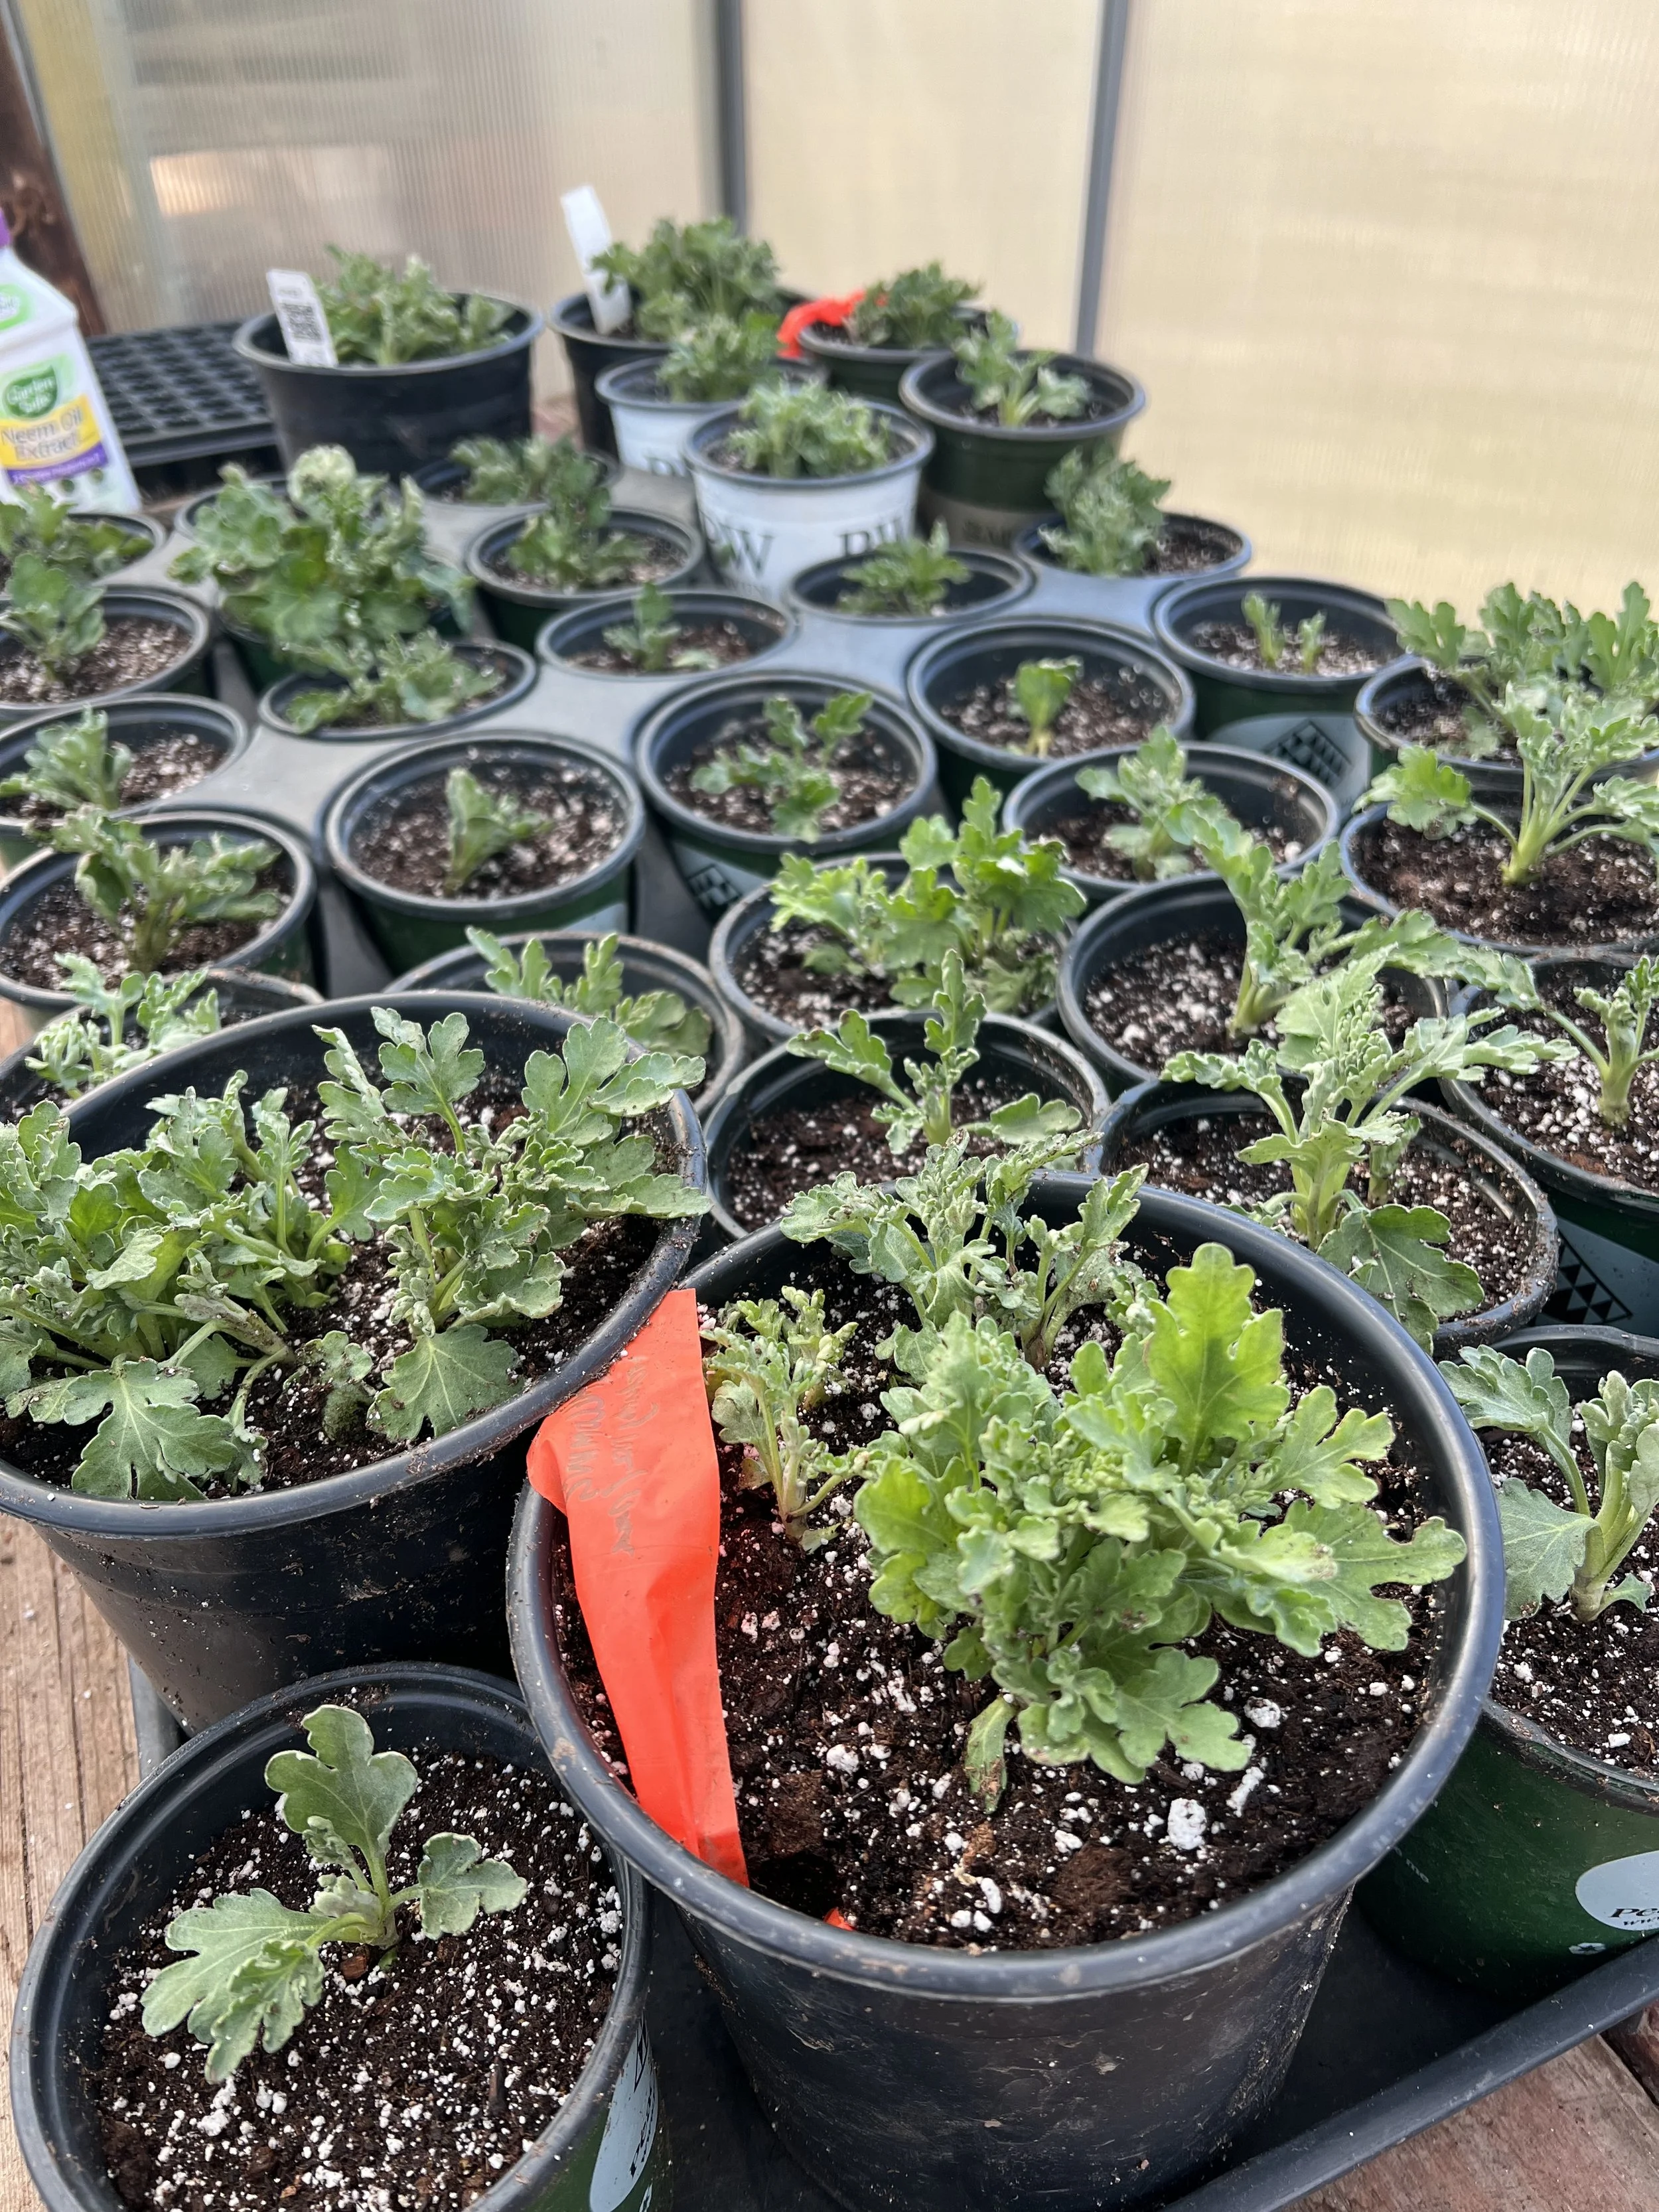
As plants continue to grow throughout spring, you can take cuttings as you pinch your plants to develop good branching. Be diligent about monitoring for pests like aphids and whiteflies. Be proactive because they can ruin your work! If you are growing on in an enclosed outdoor space, the use of beneficial insects like green lacewing eggs or ladybugs is very effective since they remain contained. The photo below shows the yield from just 2 mother plants.
Plant out in early summer, stake or support well, stop pinching by July 4th, continue to watch for pests, disbud if you want whopper blooms, water and feed, and come fall you will be rewarded with stunning flowers as the rest of the field is bowing out!
* WILLOW WATER is a natural rooting solution you can make at home. It can be used to aid rooting with many varieties of plants. Willows contain a plant hormone that promotes rooting (indolebutyric acid) as well as salicylic acid which helps the plant mount an immune response to bacterial or fungal agents. To make willow water, cut up young stems or twigs into 1” pieces (no leaves) and place into large, wide-mouth mason jars. (Stem tips contain the most compounds.) Boil water and fill the jars, cover with lids. Allow to steep overnight or keep for a couple weeks in the fridge. The strength of the brew is dependent on duration of steep and ratio of willow to water, it’s not feasible or necessary to measure the concentration. I water cuttings or small divisions with it and have never experienced adverse effects.