
How to disassemble, clean and sharpen Felco pruners (a tutorial with photos)
You likely know how important it is to maintain your garden pruners (this applies to all tools of course). Having sharp pruning tools is important for many reasons: plant health; cut flower quality; to save labor time and wear on your joints. Dull blades can crush stems or cause other damage like splitting or jagged cuts that take longer to heal and are inviting entry points for bacteria/fungi. Sharp cuts do not block xylem (plants’ vascular tissue that conduct water and nutrients up to the bloom), which improves vase life. It will take less force and time to make each cut with sharp tools. Multiply that by thousands of cuts and that saves a lot of time and wear and tear on your joints.
Cleaning, sharpening and oiling tools frequently during the season is an important task. During the off season, however, tools get a makeover which includes disassembly so I can clean and sharpen all parts more thoroughly. Some folks are intimidated by disassembling their Felco pruners but it’s very easy! Since it’s not something I do all the time, I thought it would be helpful to have a photo tutorial to refer to as a refresher.
Note: not all brands of pruners are meant to be disassembled. This tutorial is for the Felco line. I am a Felco fan and all opinions are my own and gleaned from over 15 years of experience.
Suggested supplies:
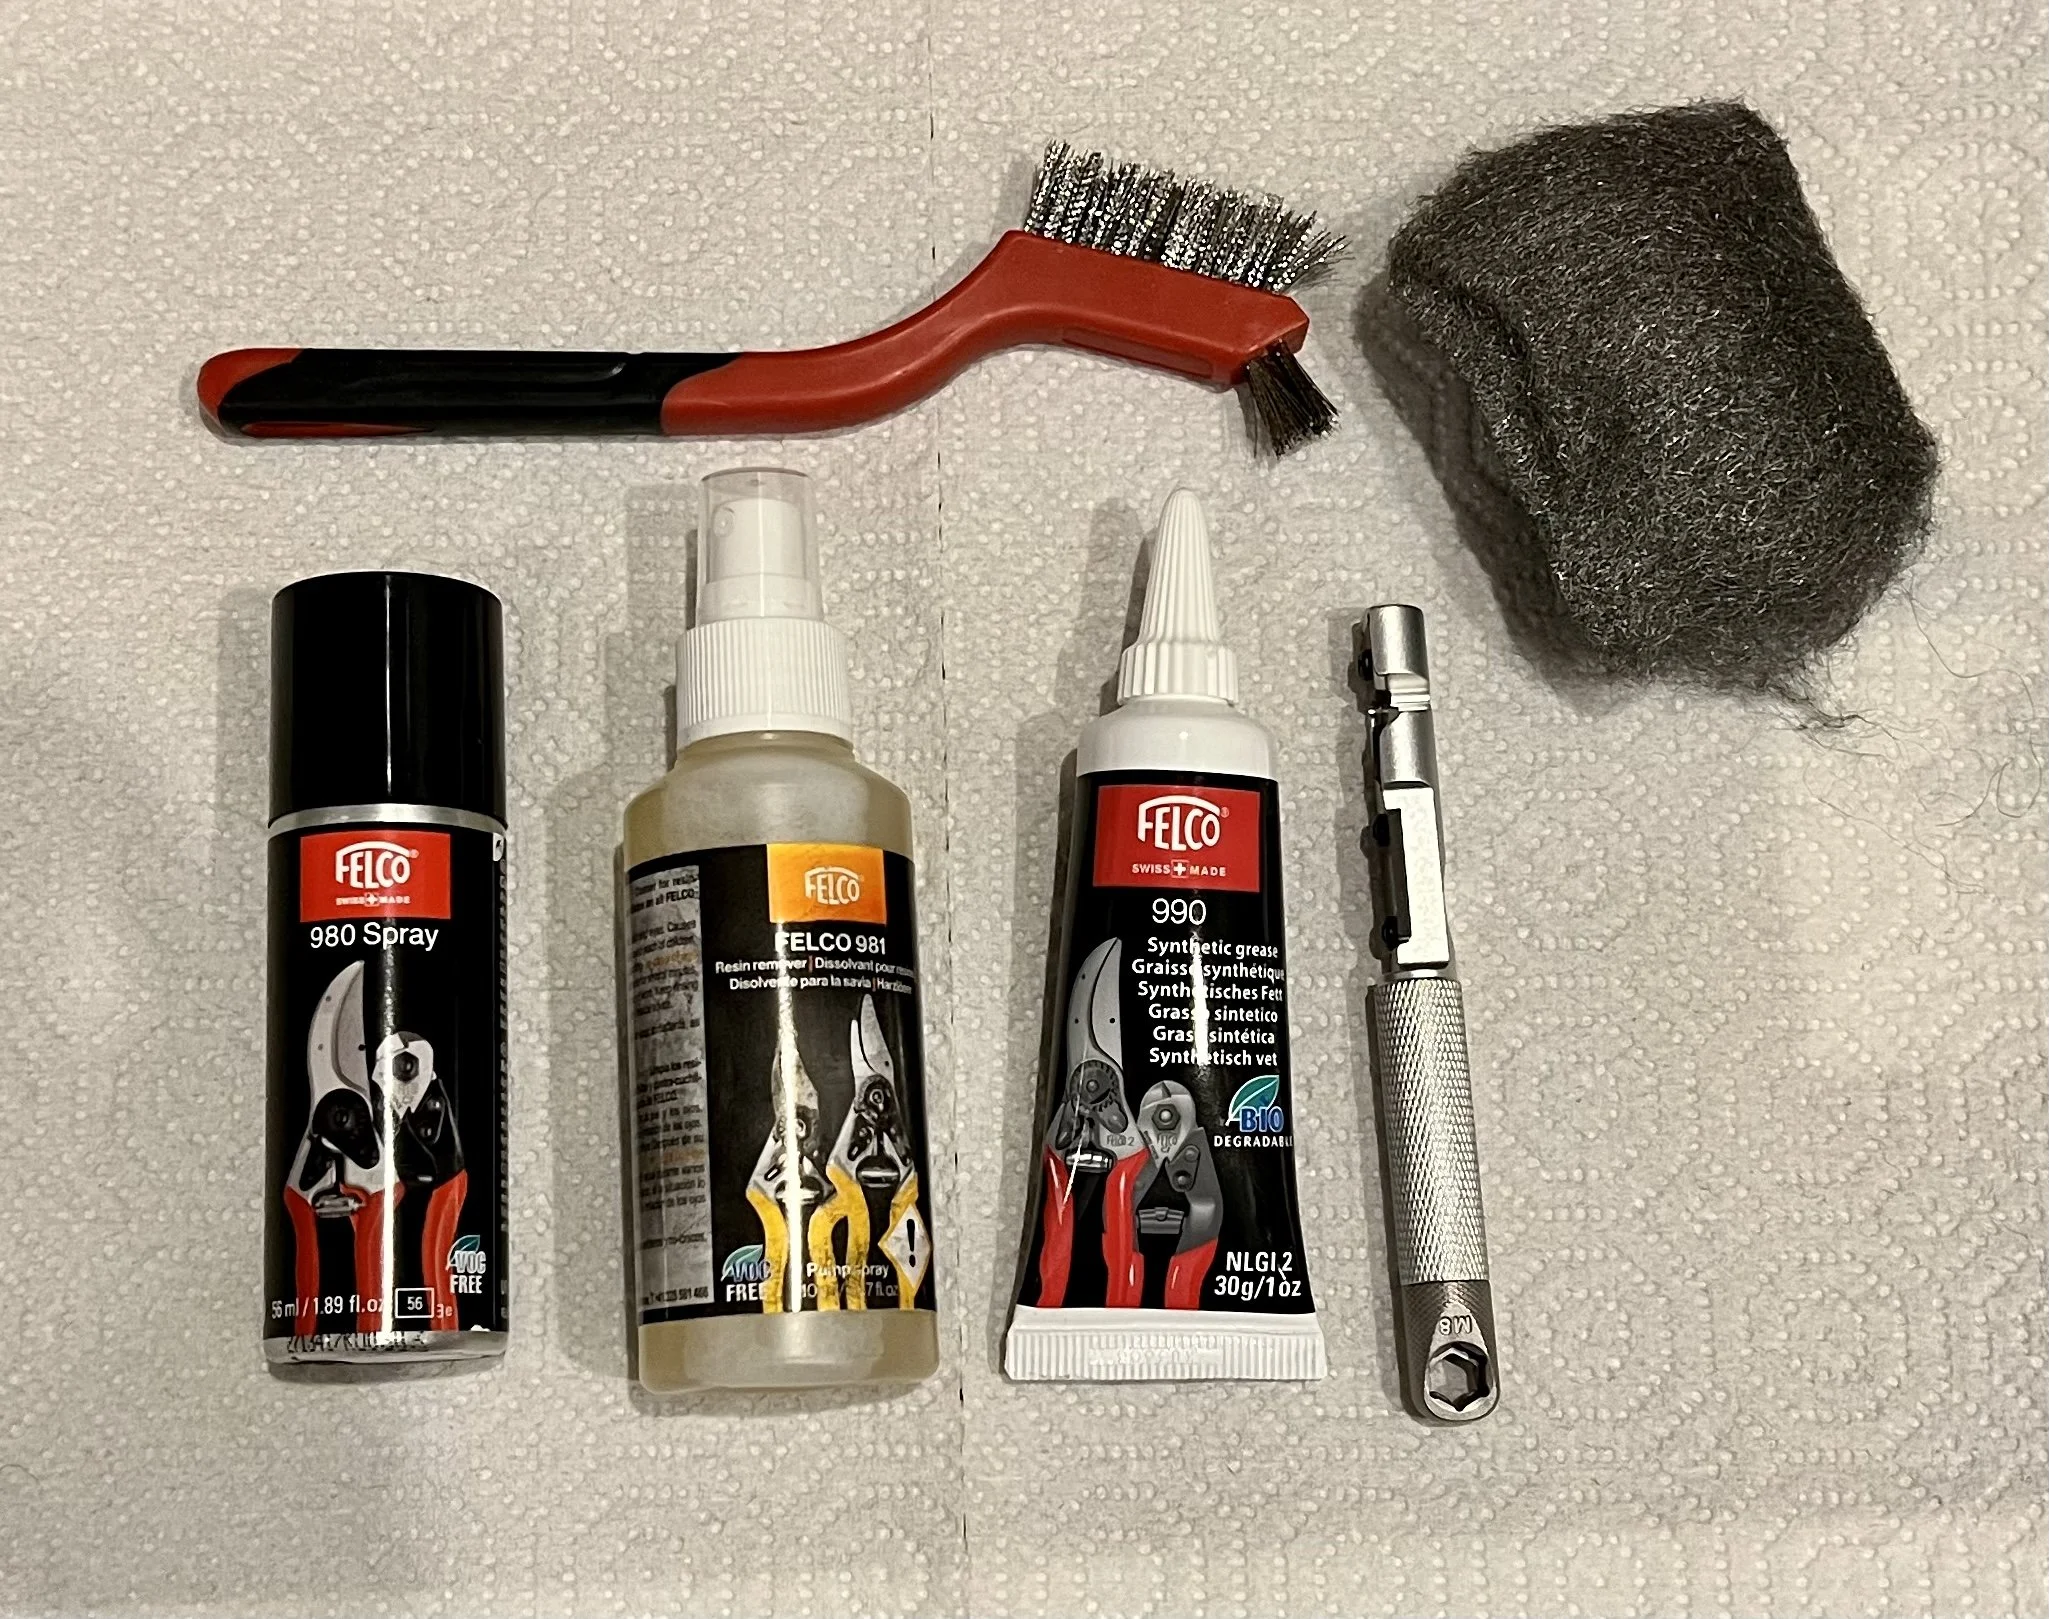
Mini brush (nylon or, if you don’t care about minor scratching, stainless steel), scrubby sponge and/or steel wool (again, if you don’t mind minor scratching. I like size 00 mesh)
Dish soap and/or Felco 981 spray (for resin, sap removal)
Synthetic grease (I like Felco 990, less mess)
Felco 980 spray (light clean and to protect from rust) or light vegetable oil, honing oil
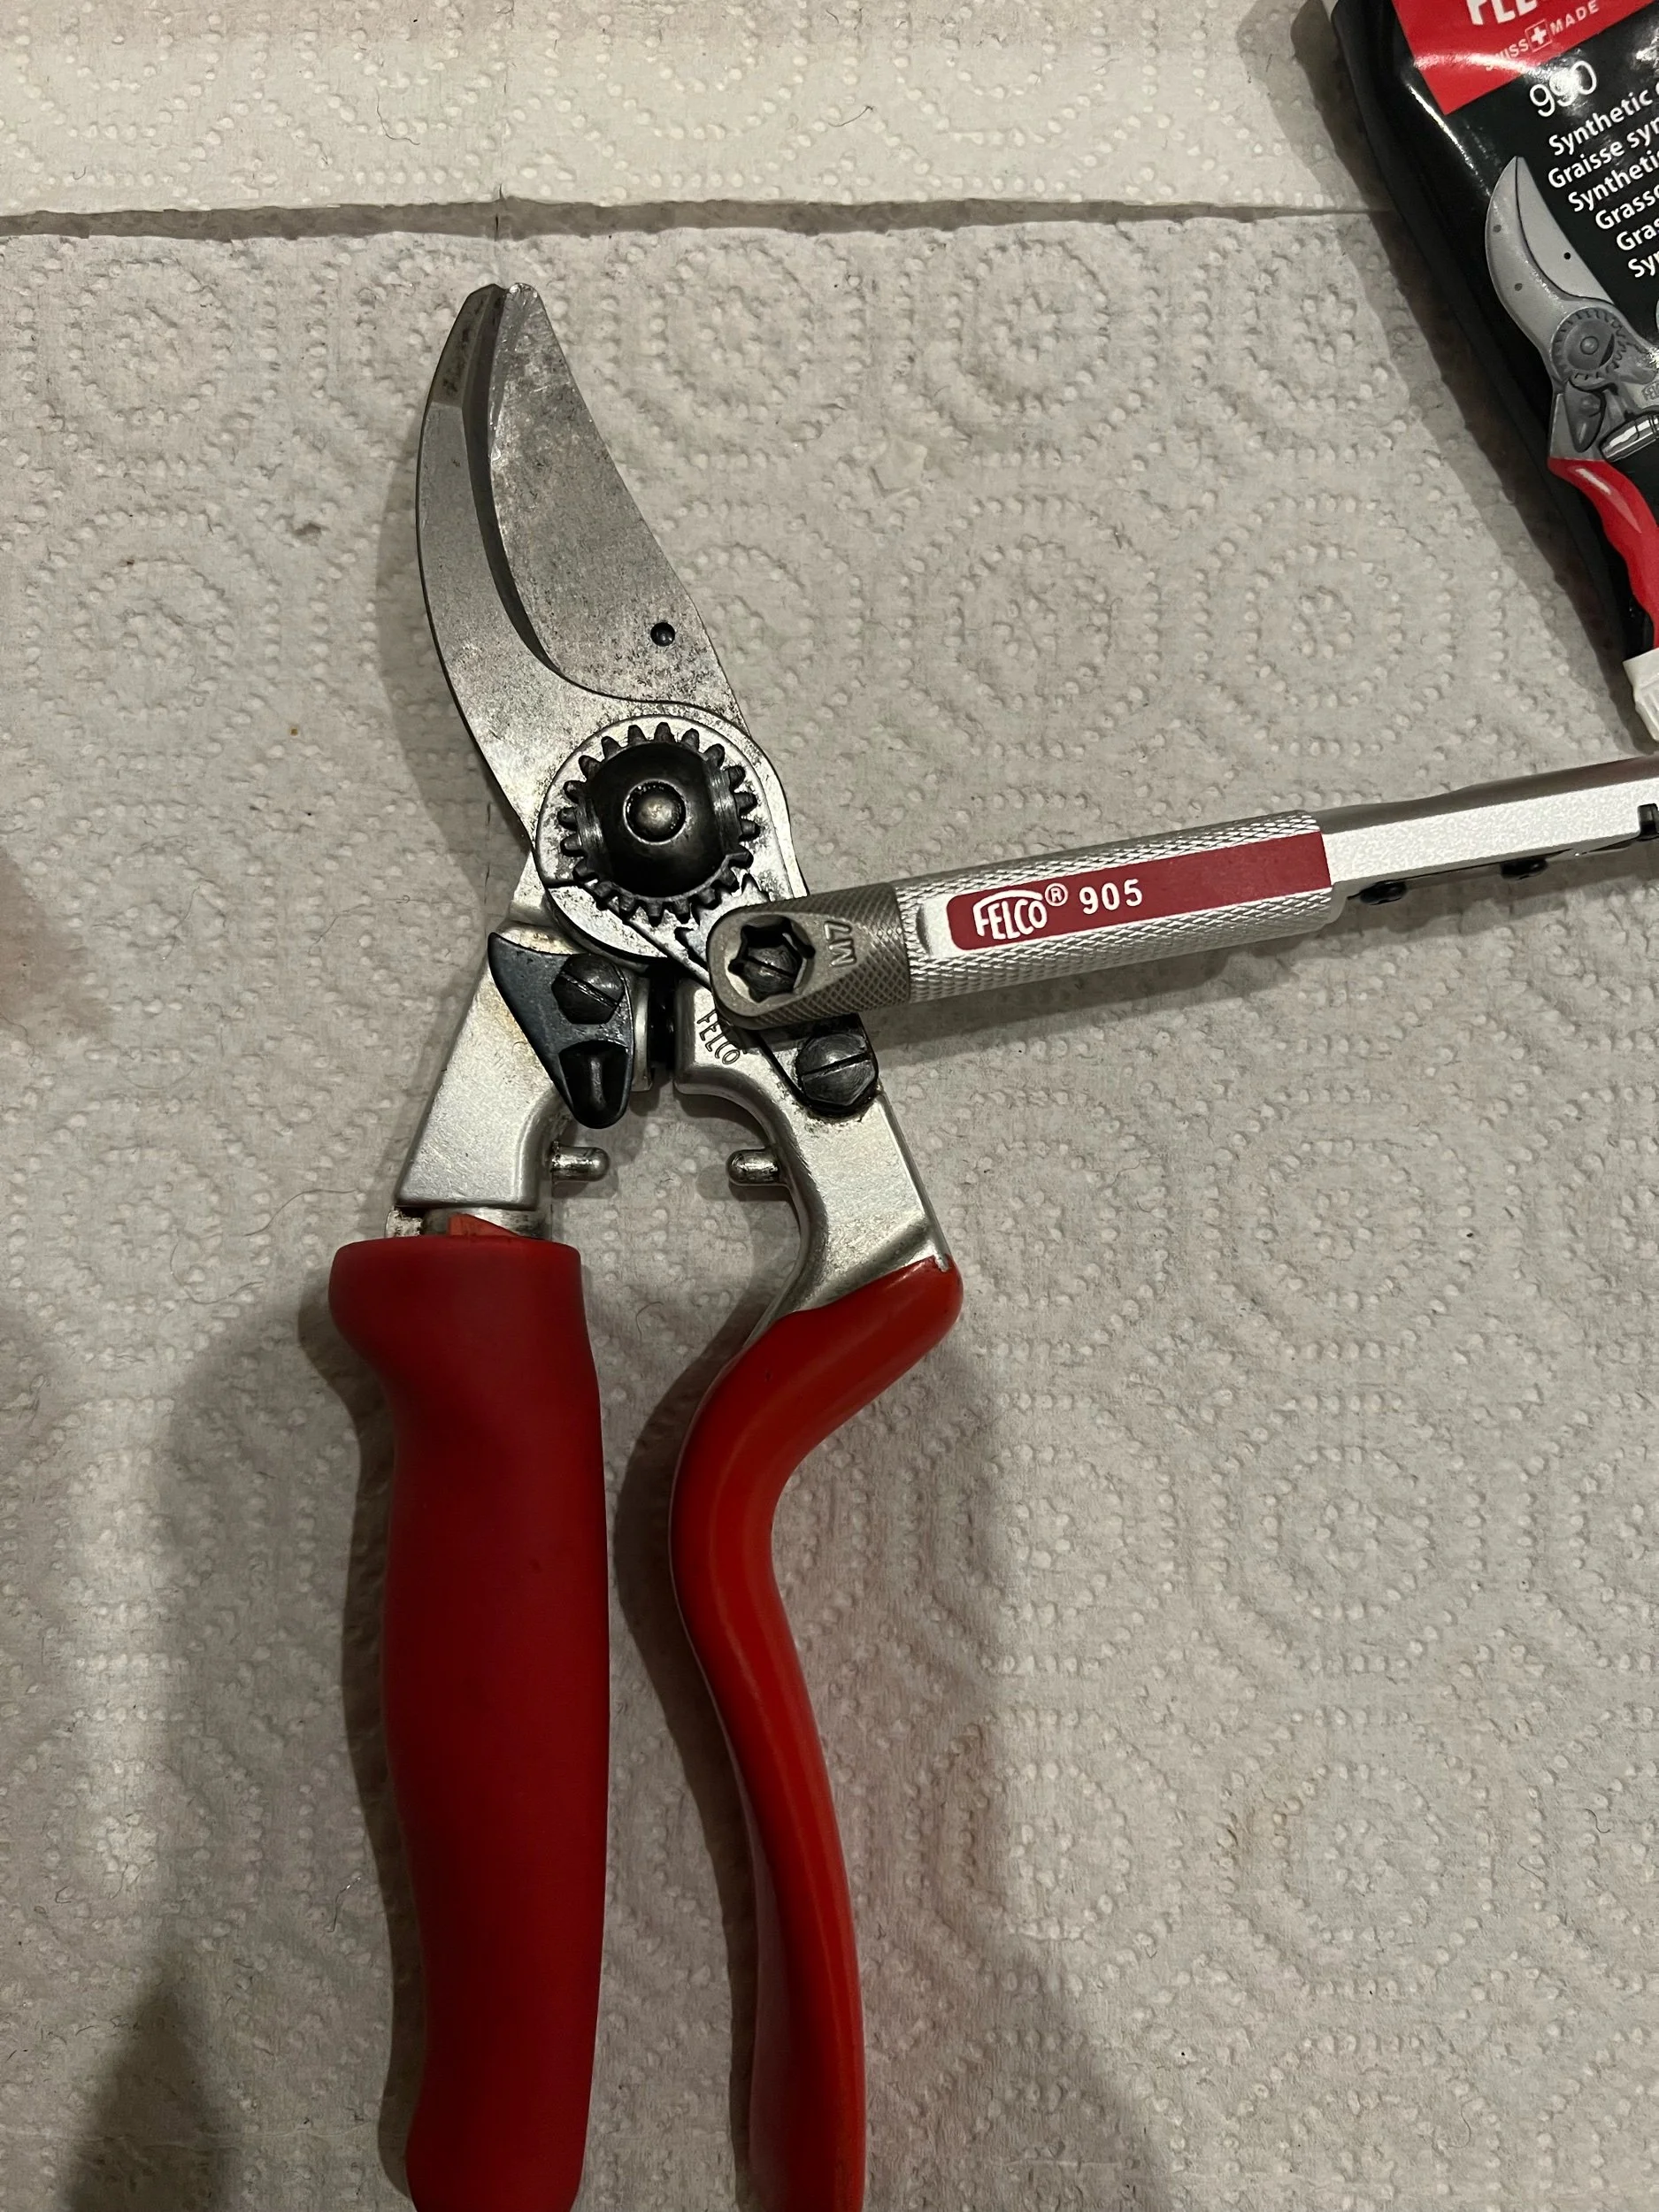
Felco 905 all in one tool OR 5/16” nut driver for the blade bolt and sharpening stone for blade
Disassembly steps
This pruner has obviously been put through the wringer the last couple months with cutting back debris, splitting dahlia tubers and constantly being wiped down with alcohol or bleach. It’s in a disgraceful state! Let’s get started!
Numbers on photos correspond with the steps outlined below. You can tap on the photo to get a larger view.
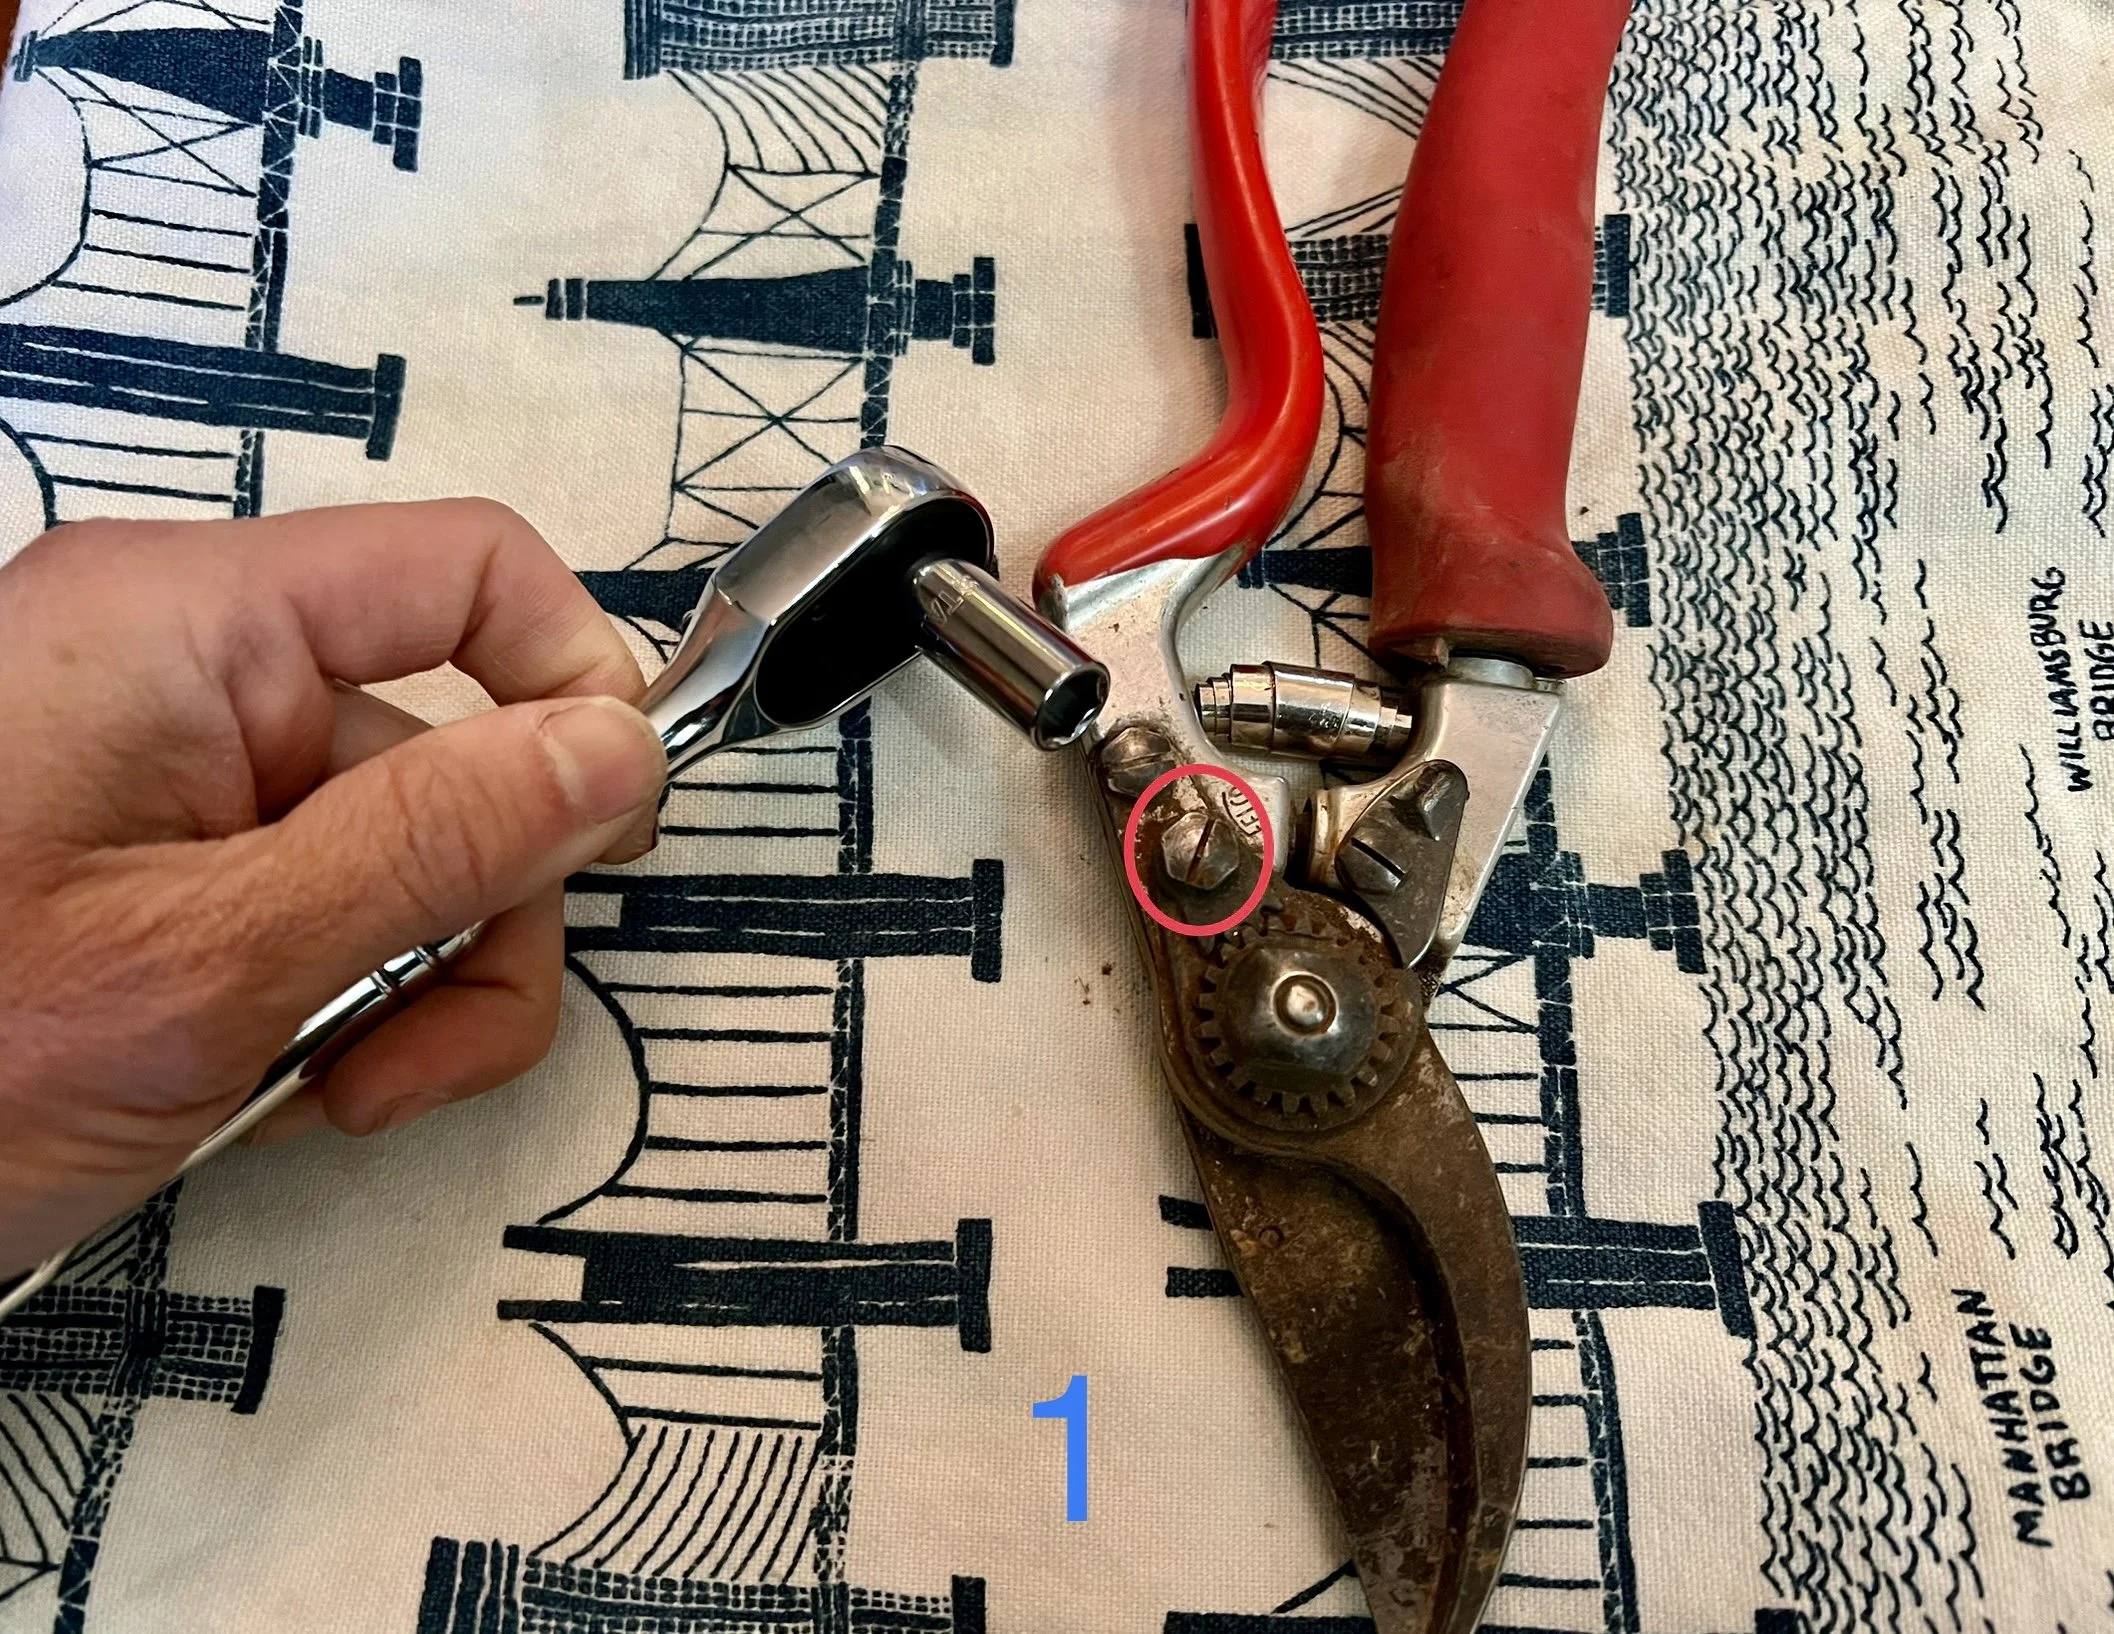
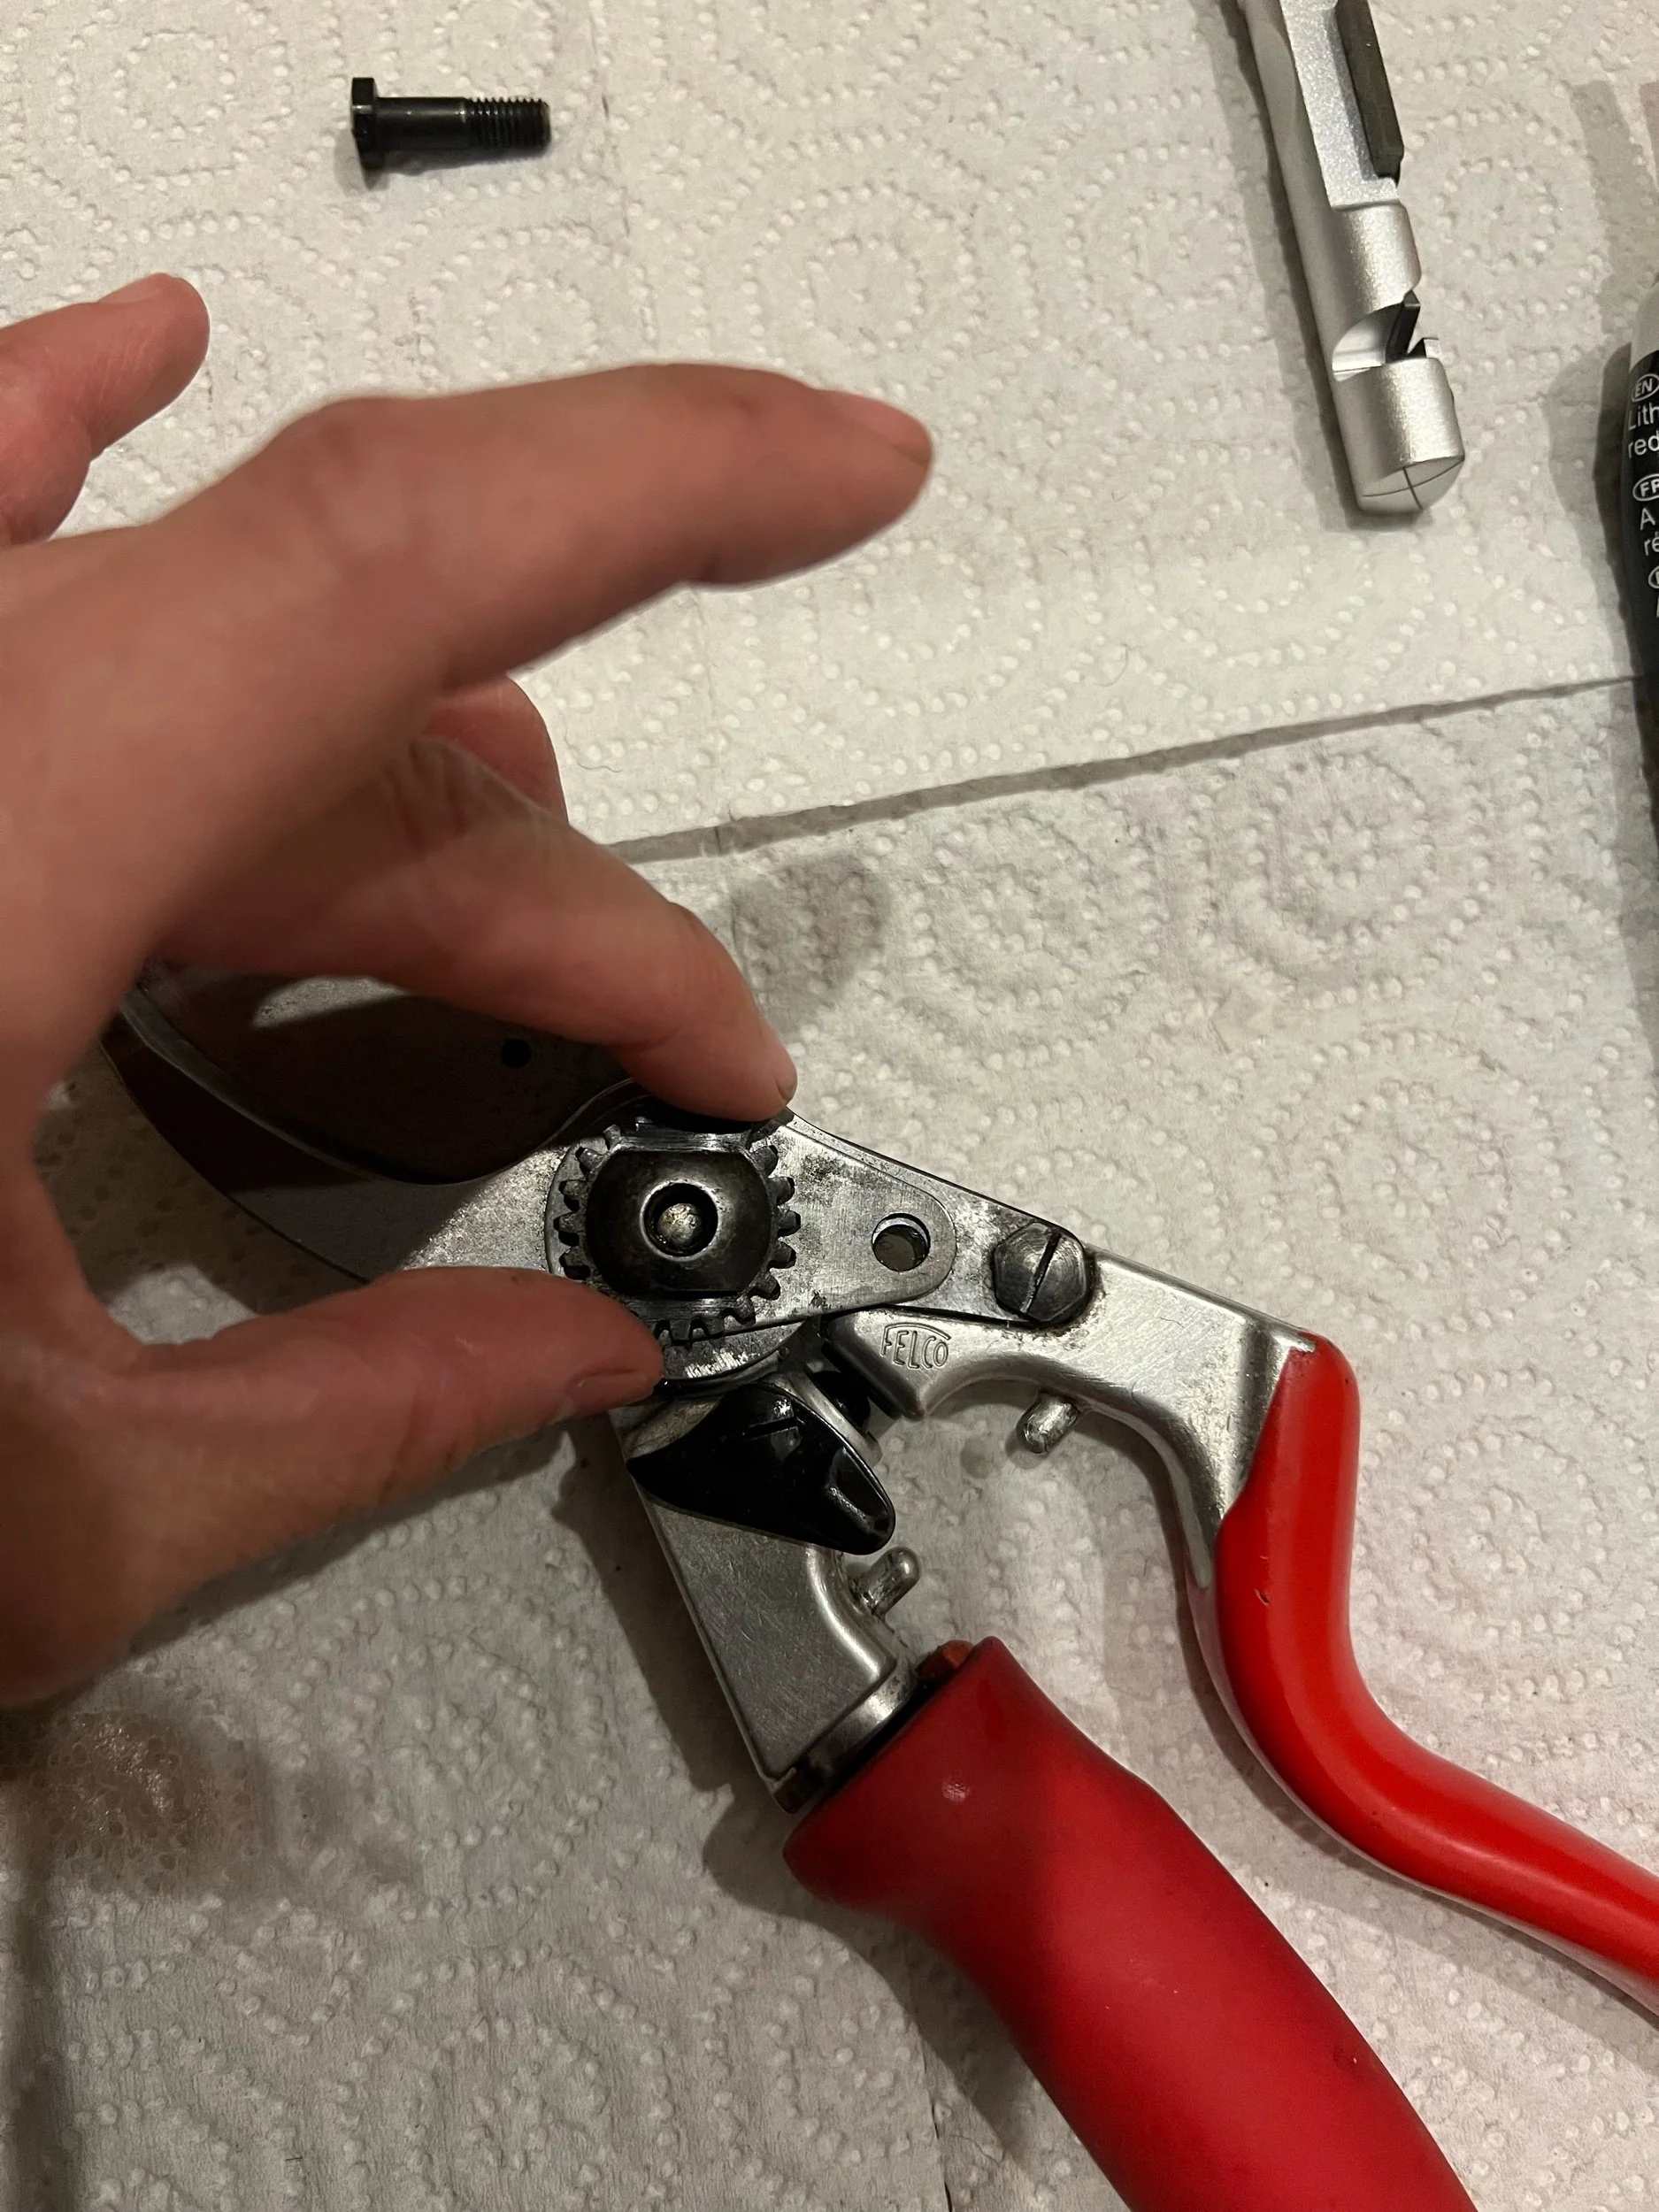
Step 1: Take the 5/16” nut driver or Felco 905 to remove the screw circled in photo 1. I recommend laying out pieces in a line in the order of removal so you can snap a pic before soaking (see below).
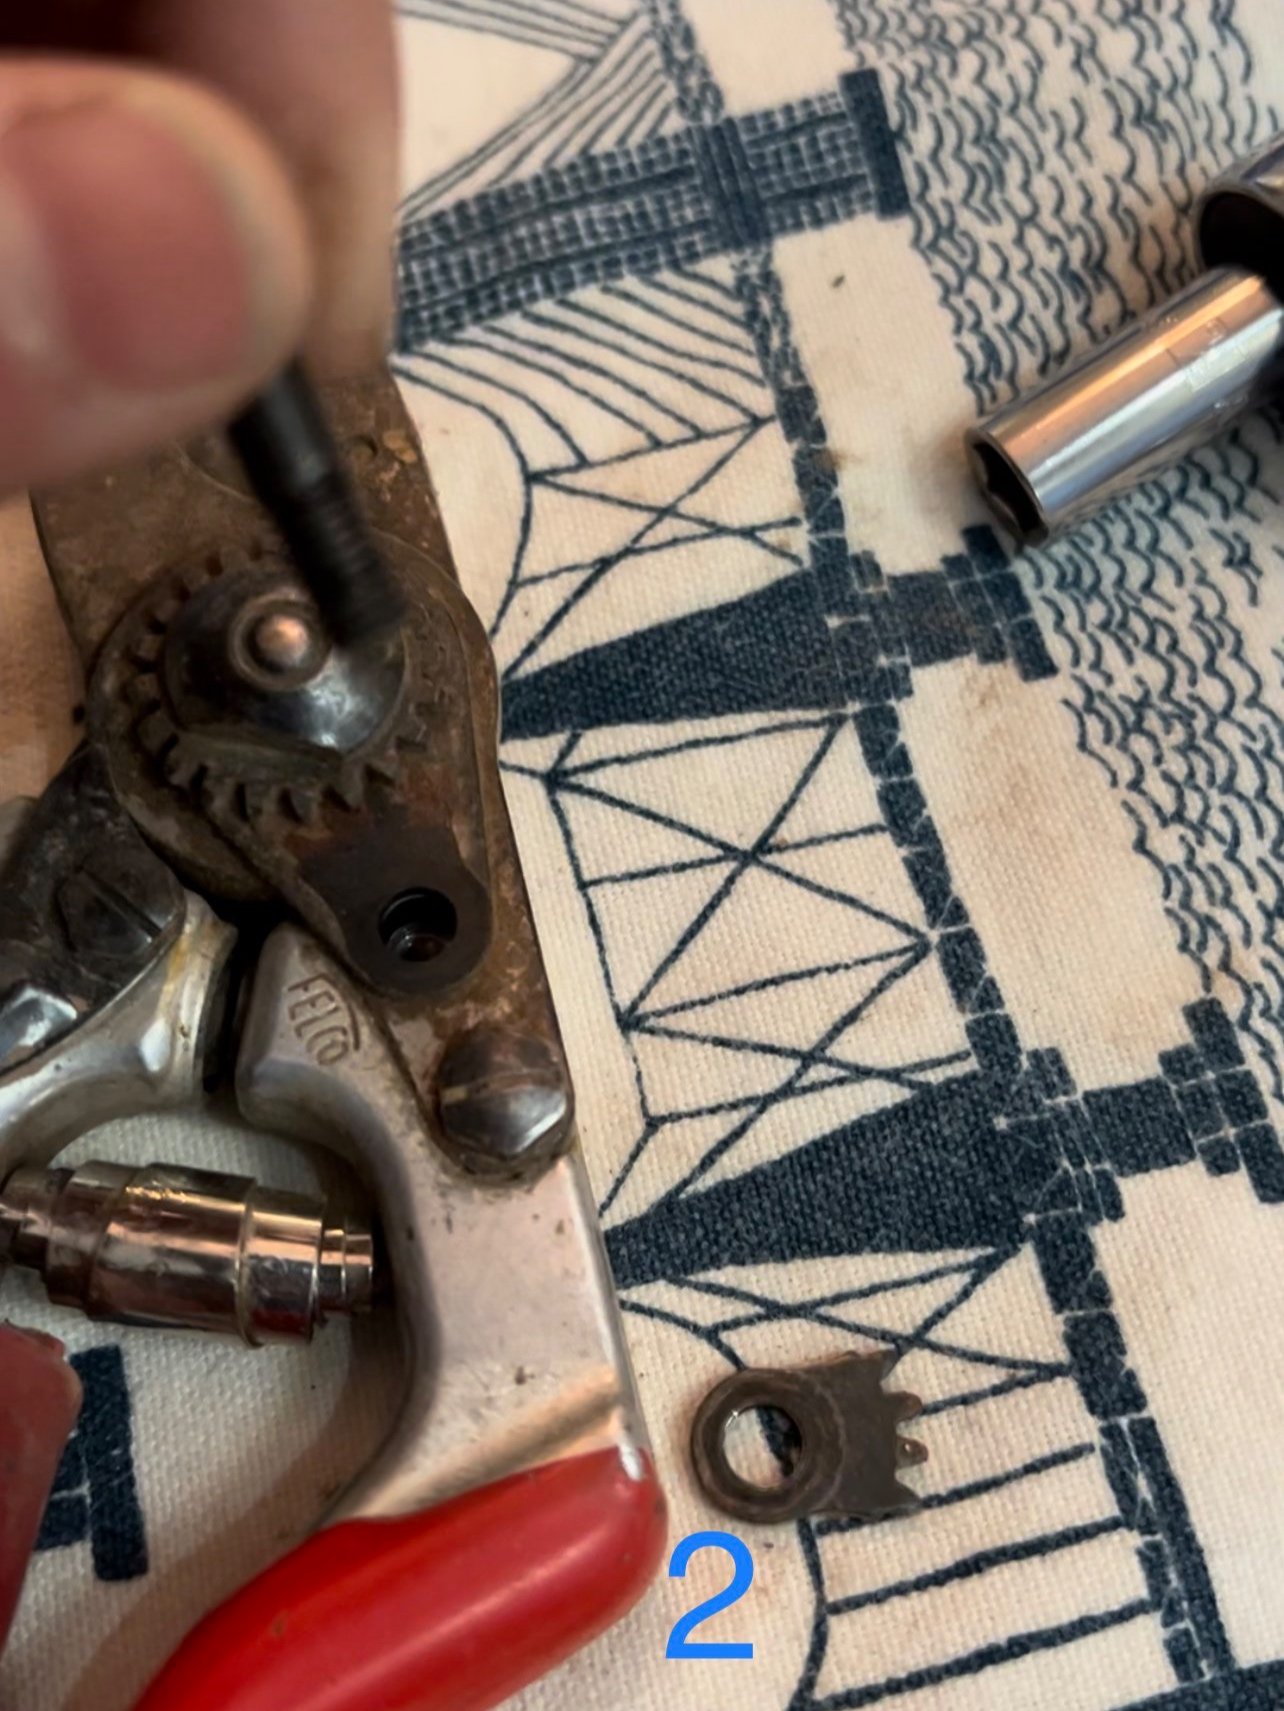
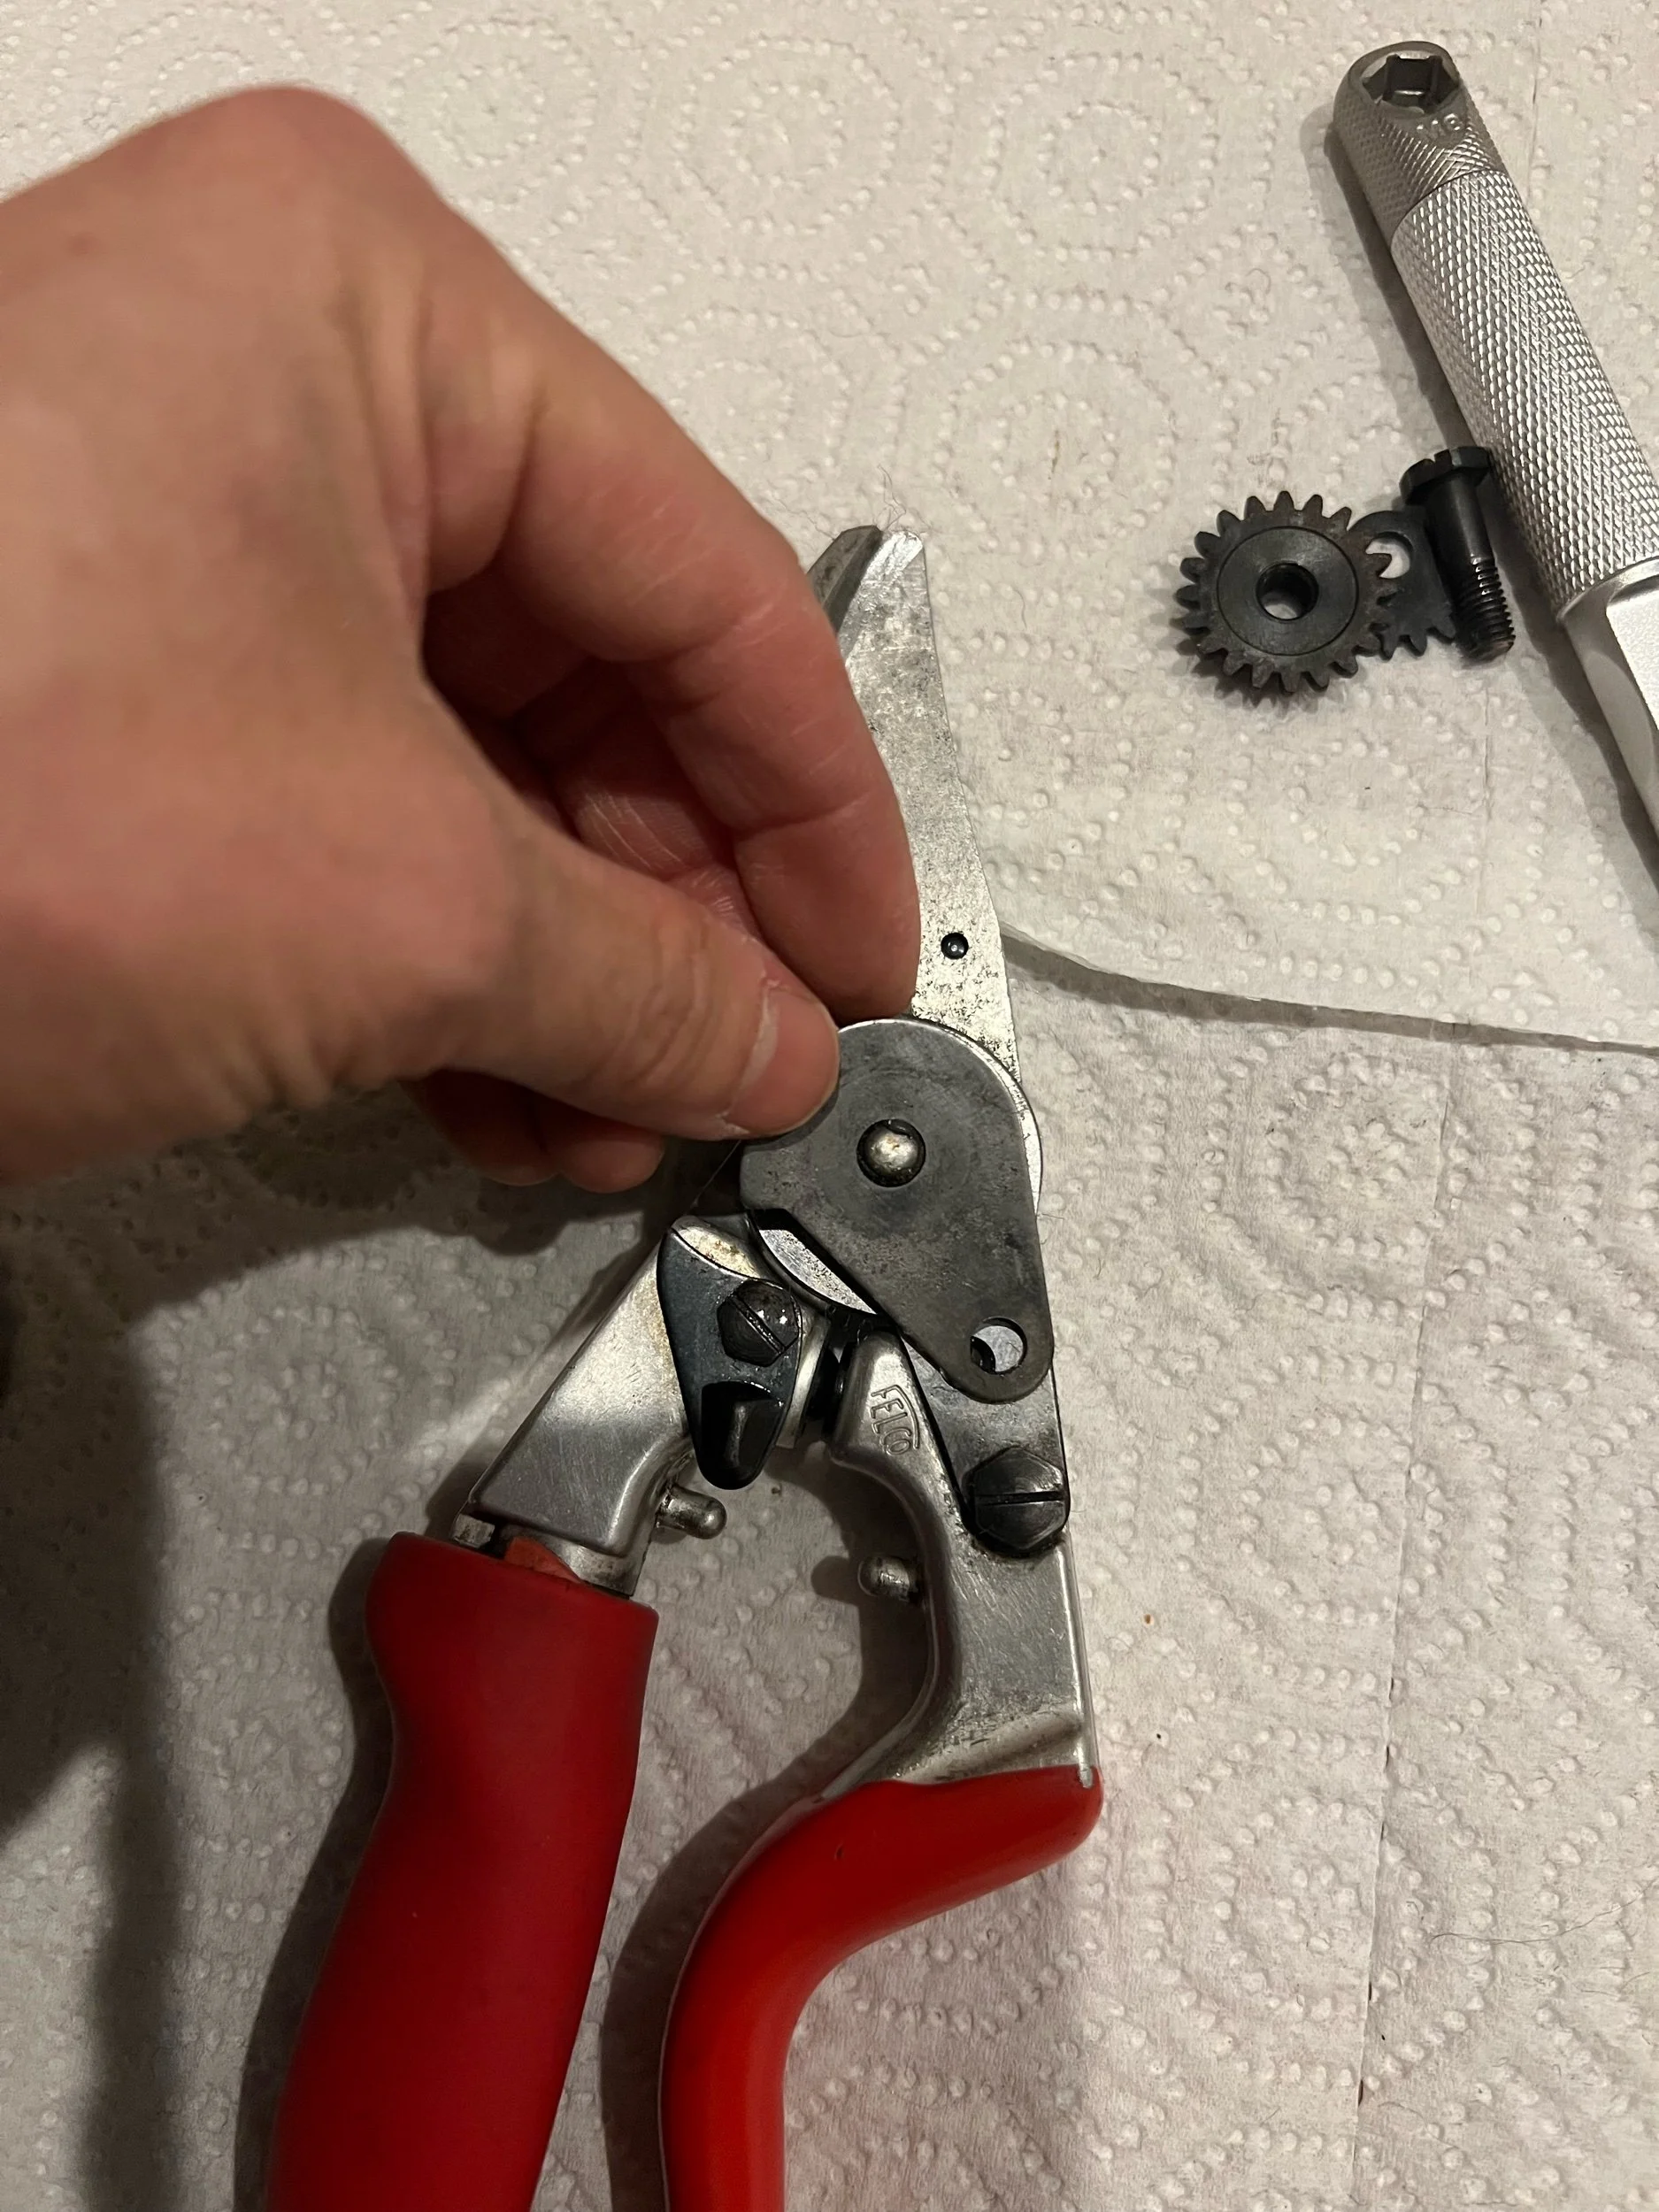
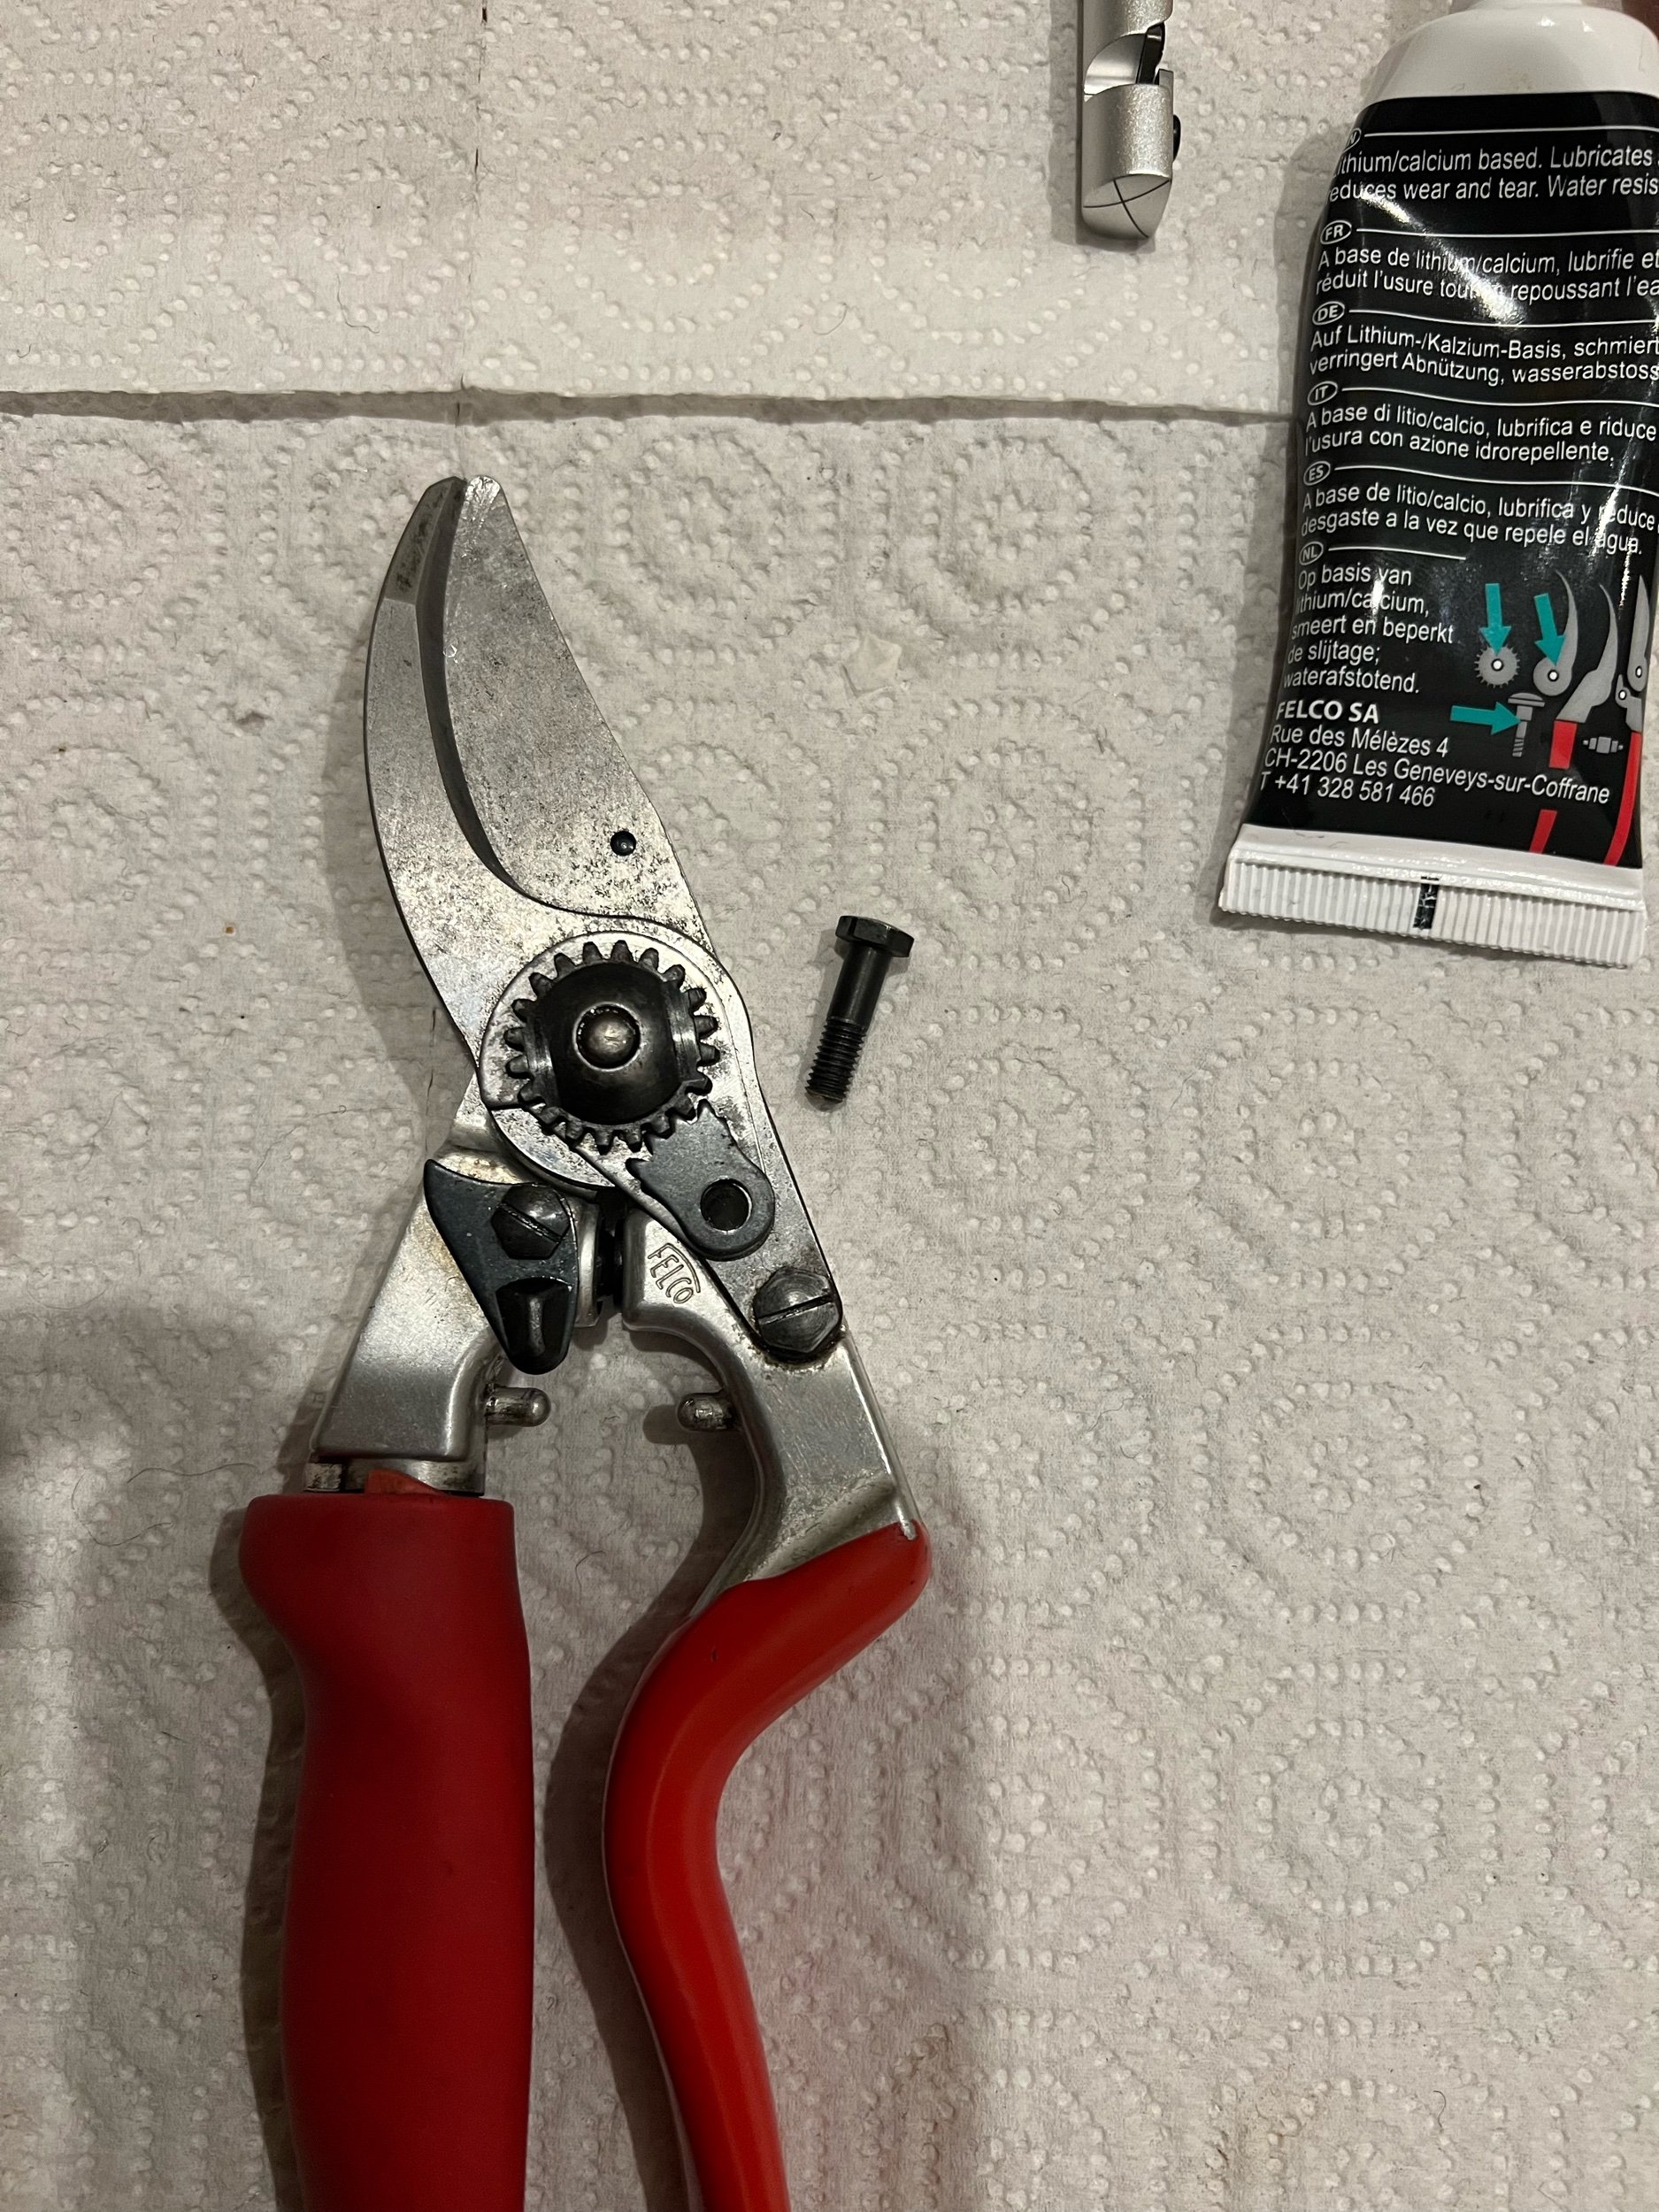
Step 2: remove the loosened screw and the toothed segment (claw shaped piece).
Step 3: Unscrew the toothed nut. You may need pliers to get it loose enough to turn.
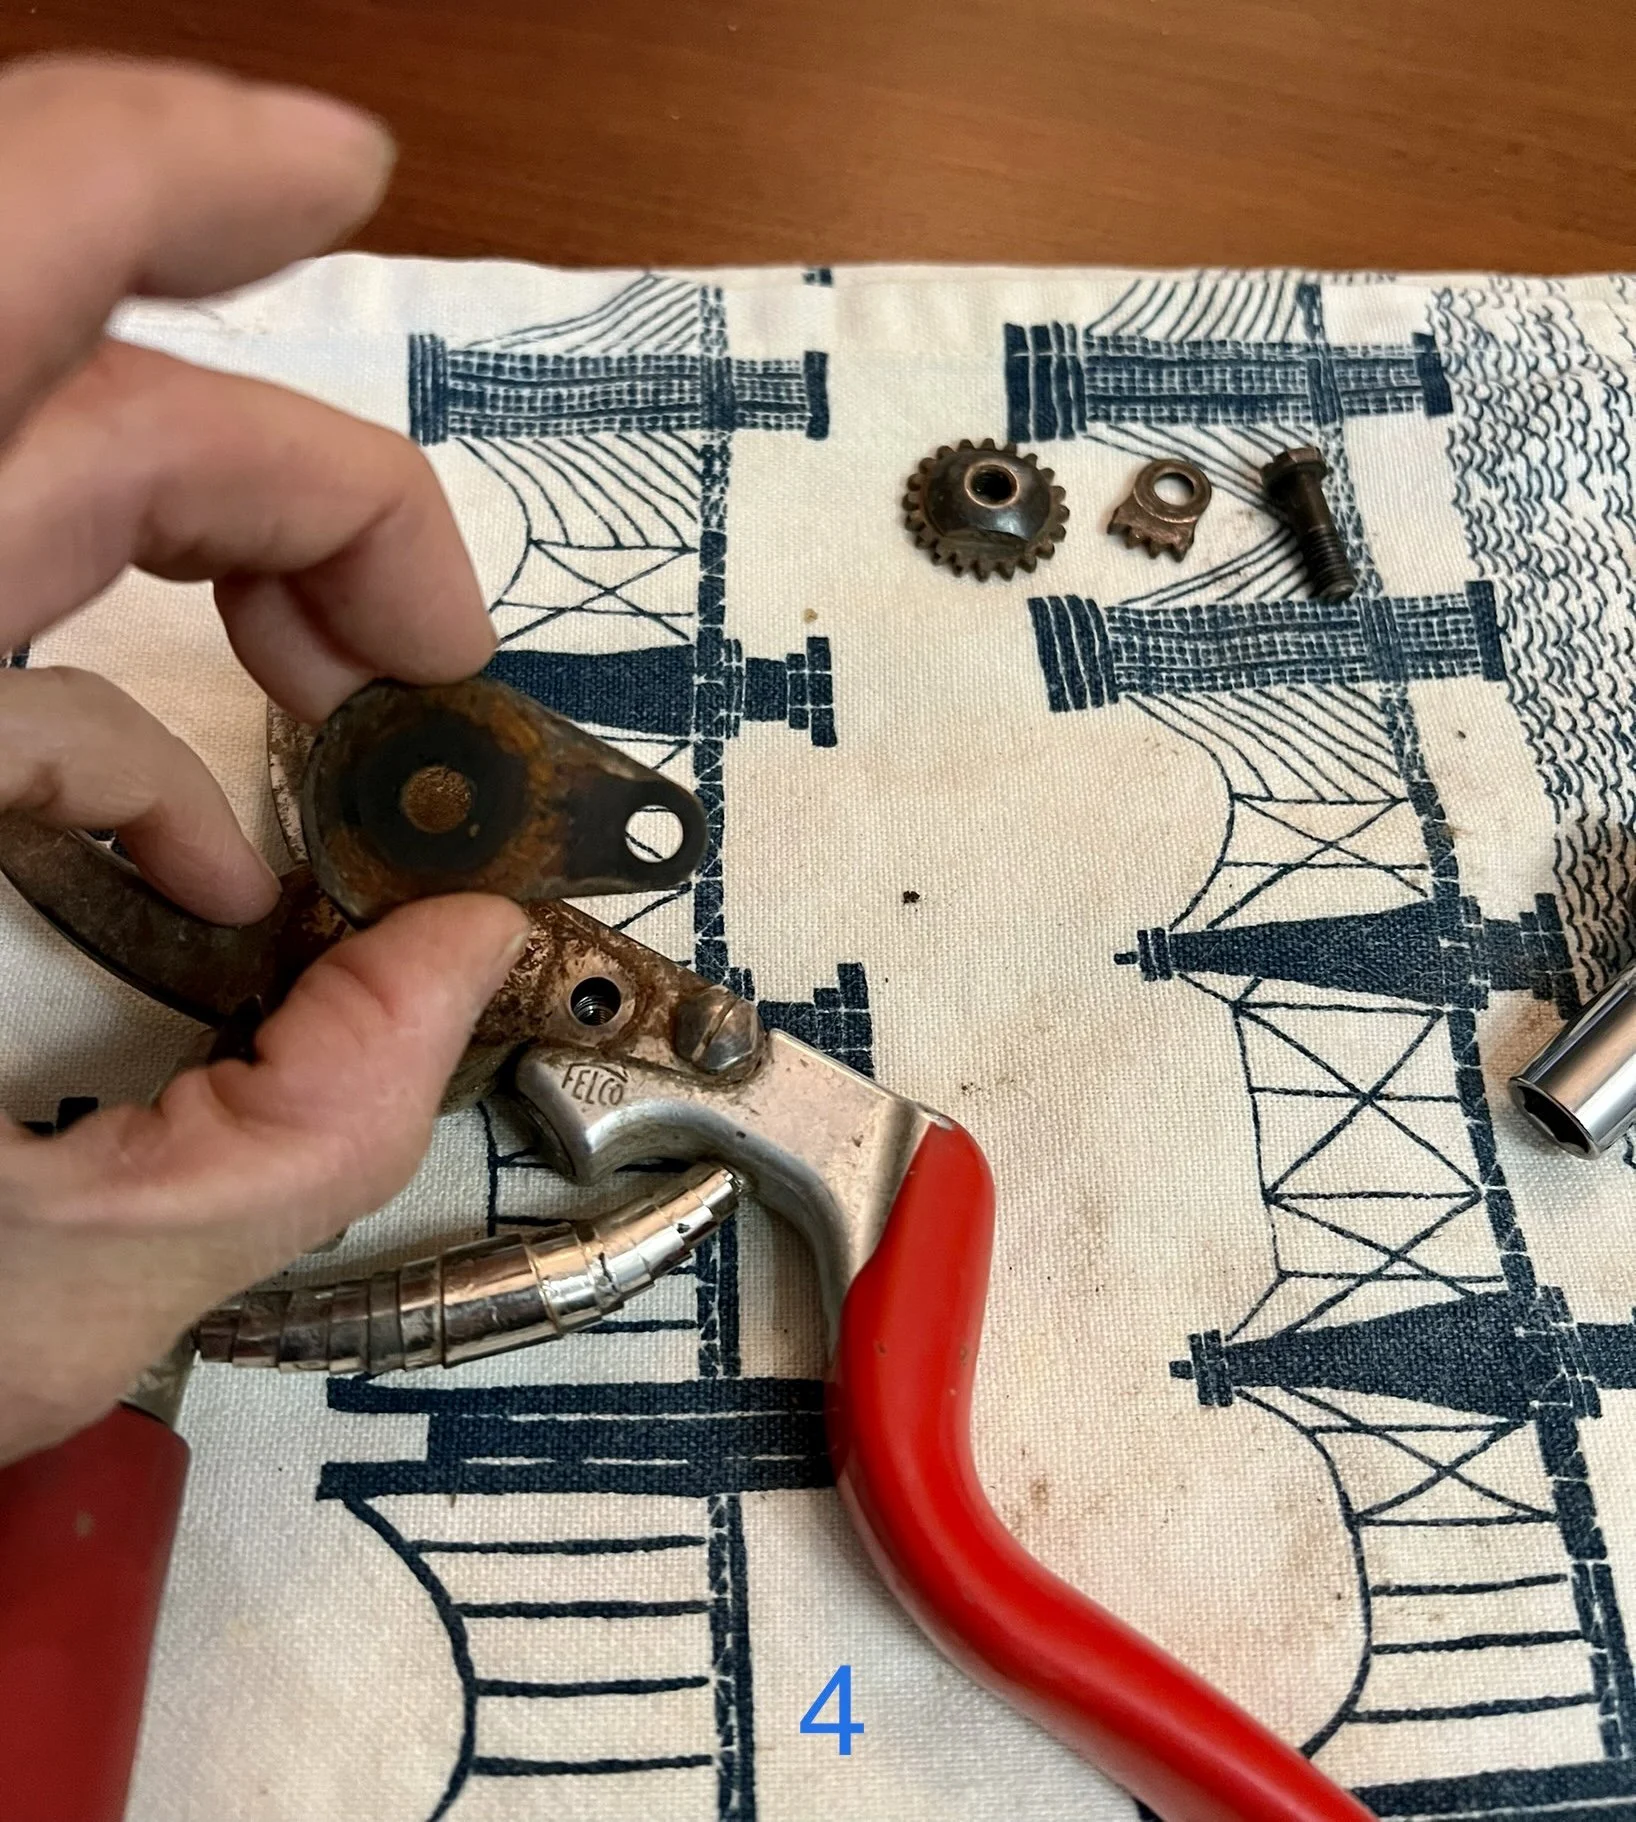
Step 4: Remove the base plate.
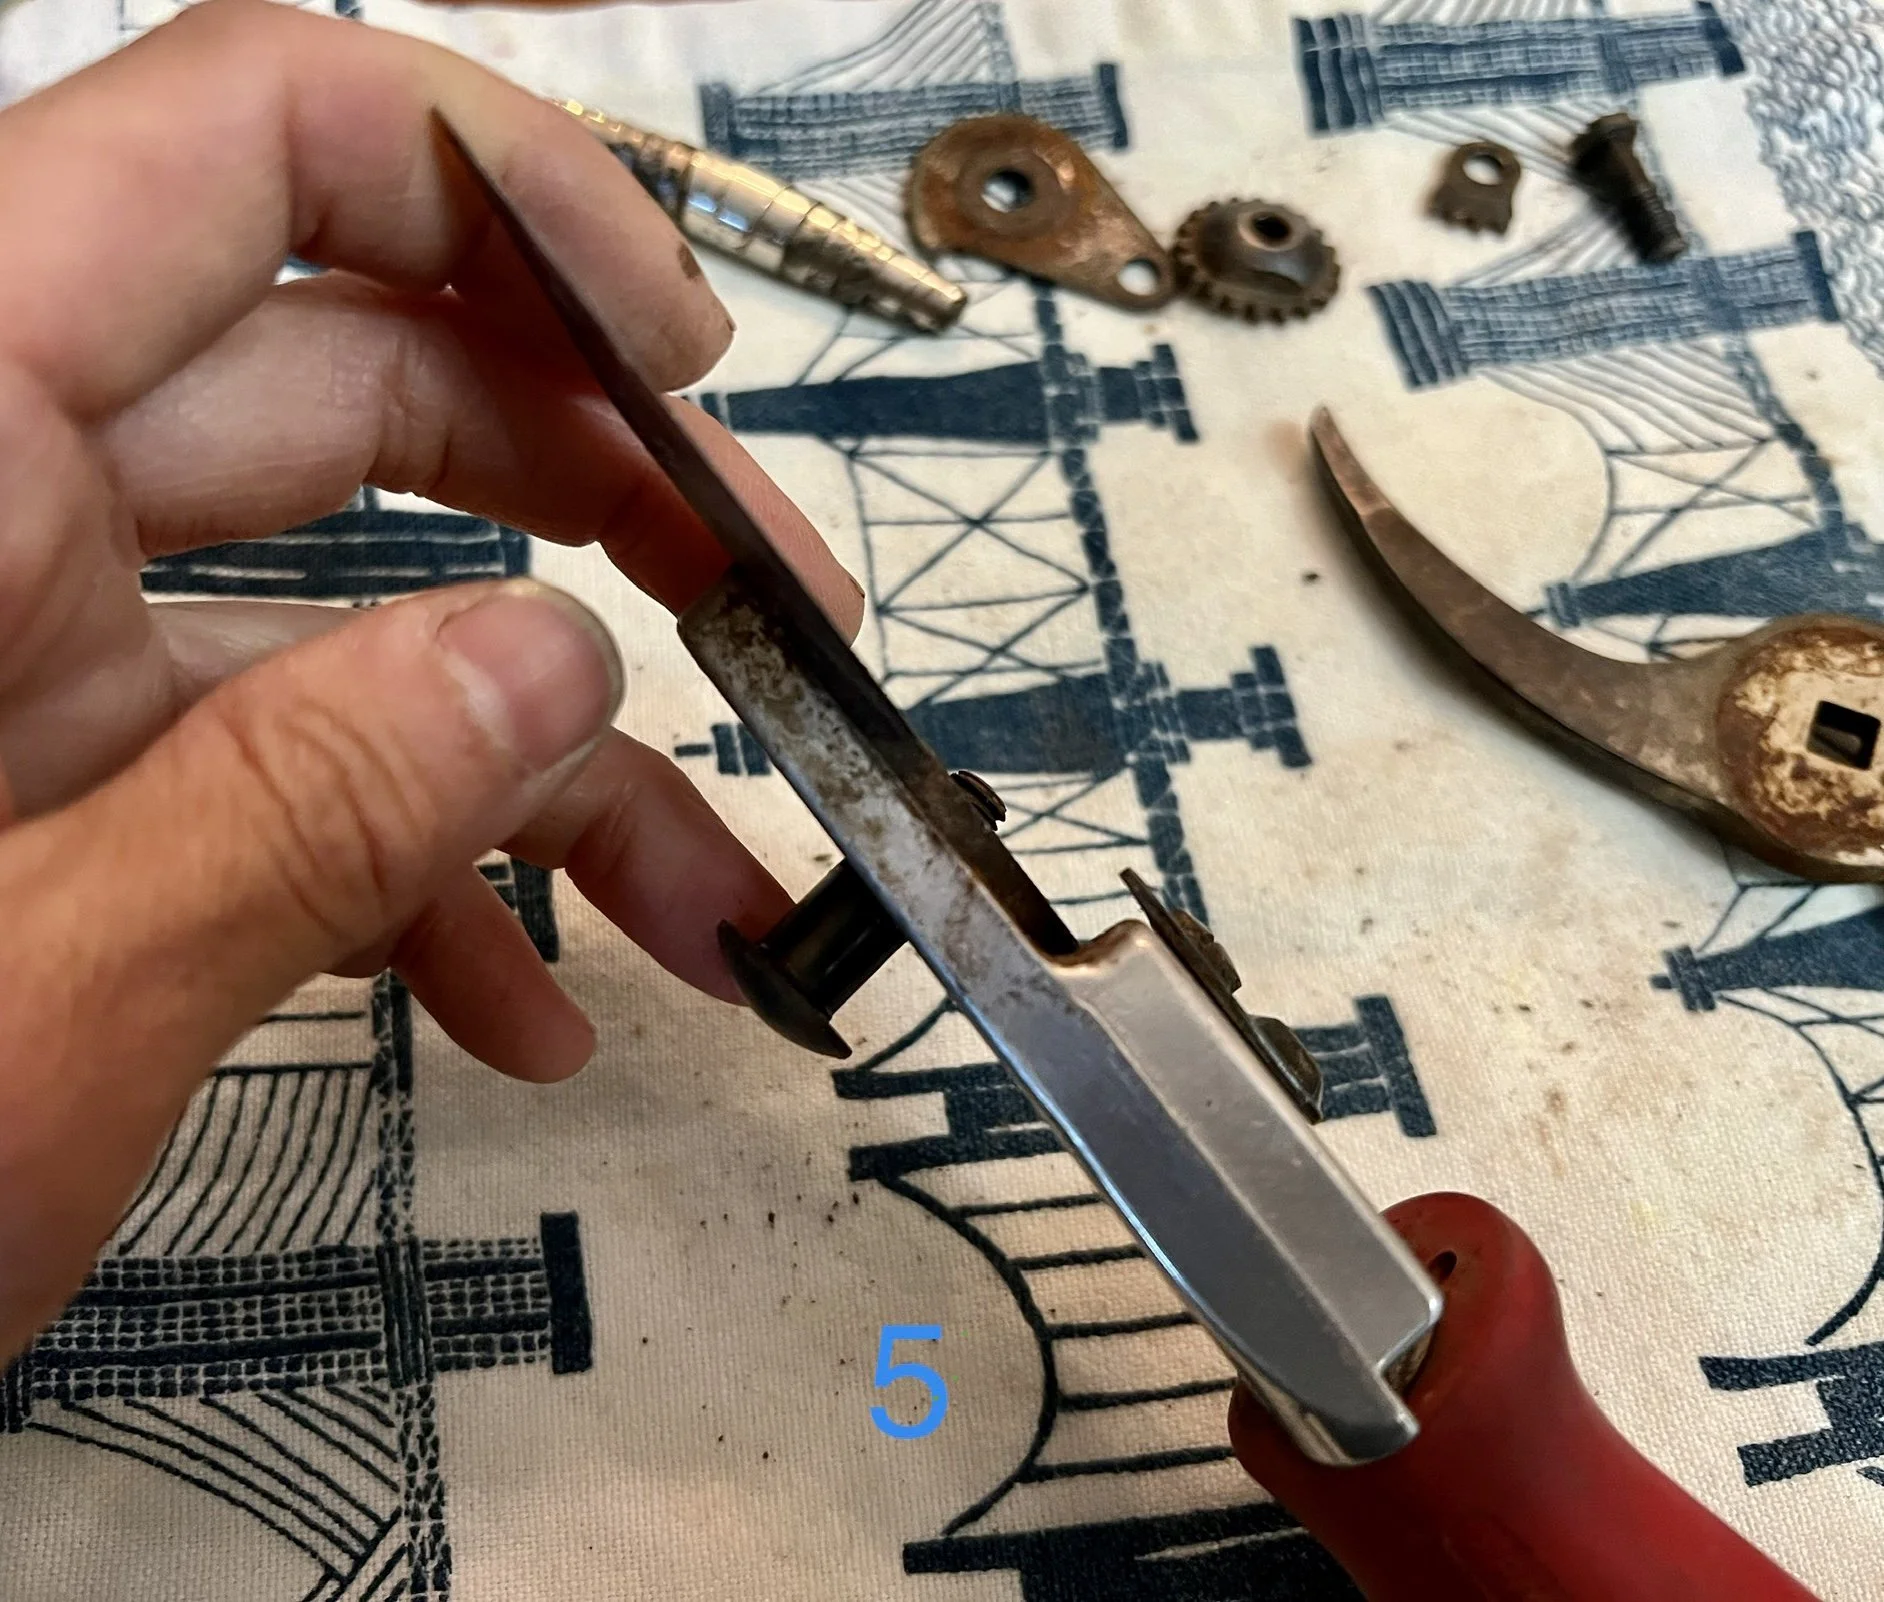
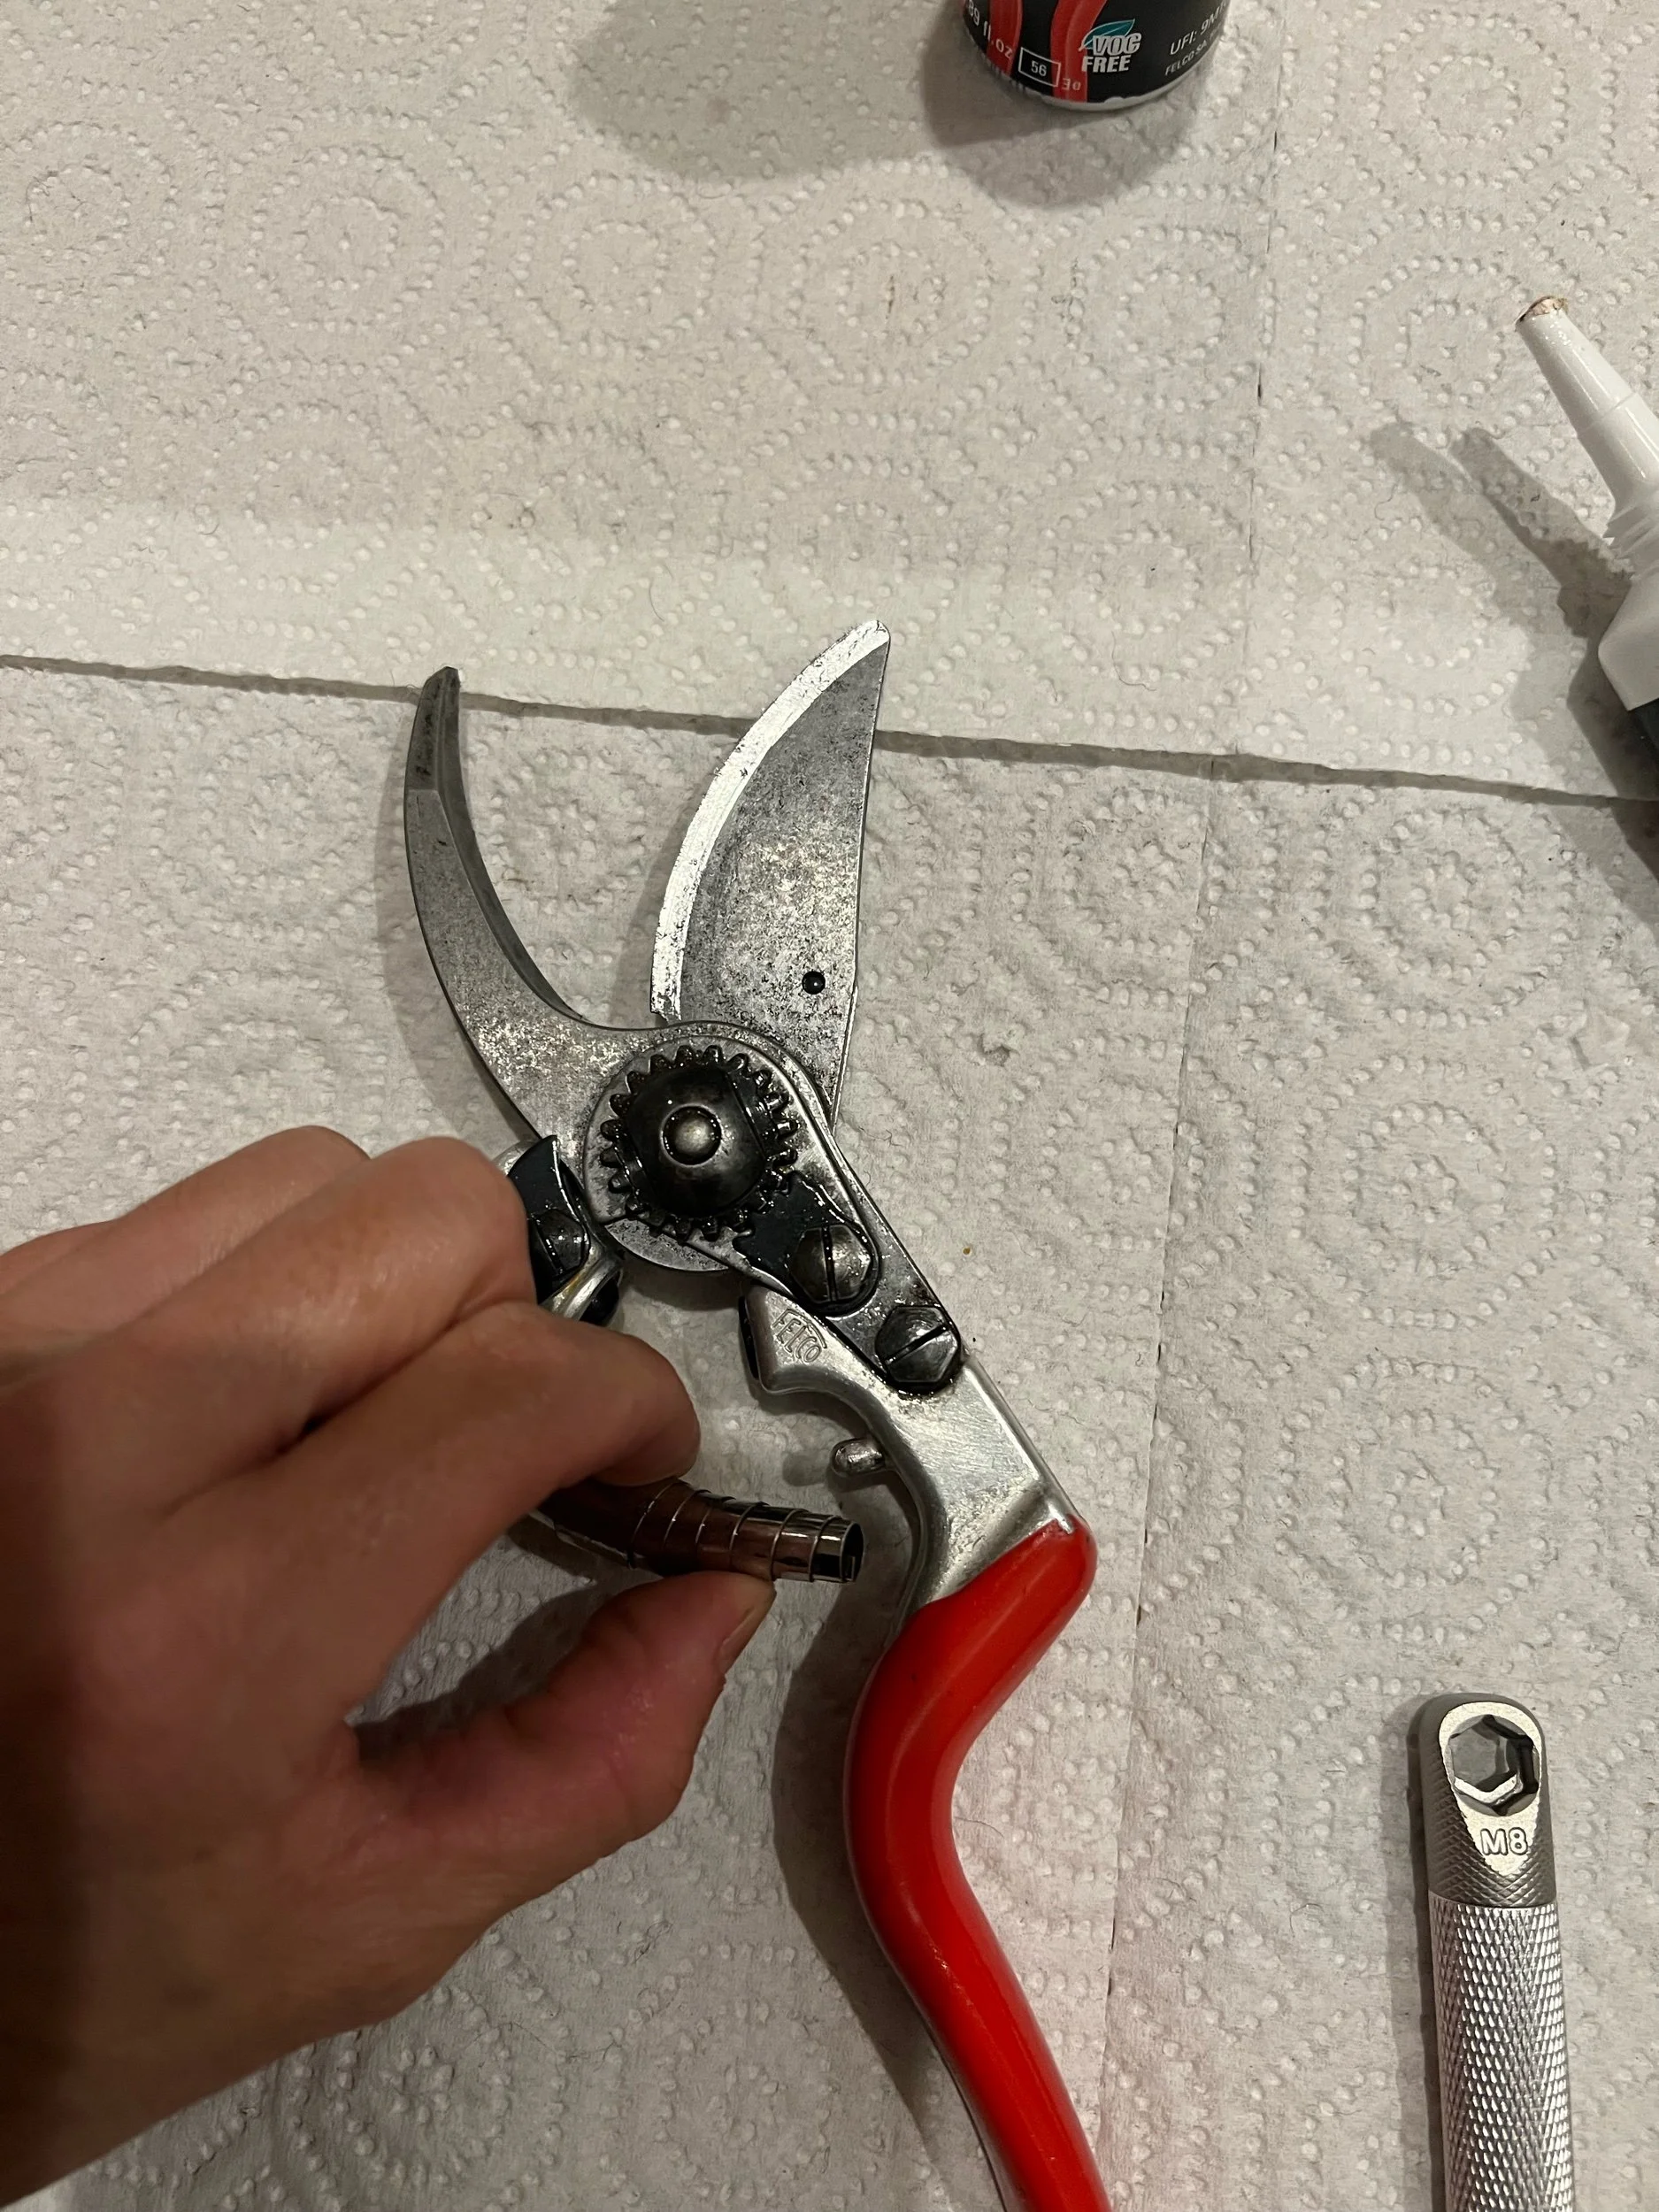
Step 5: Photo 5 shows the pruners flipped over to remove the bolt. Separate both handles from each other and remove blade. You may need to gently tap the metal blades with a mallet to separate them.
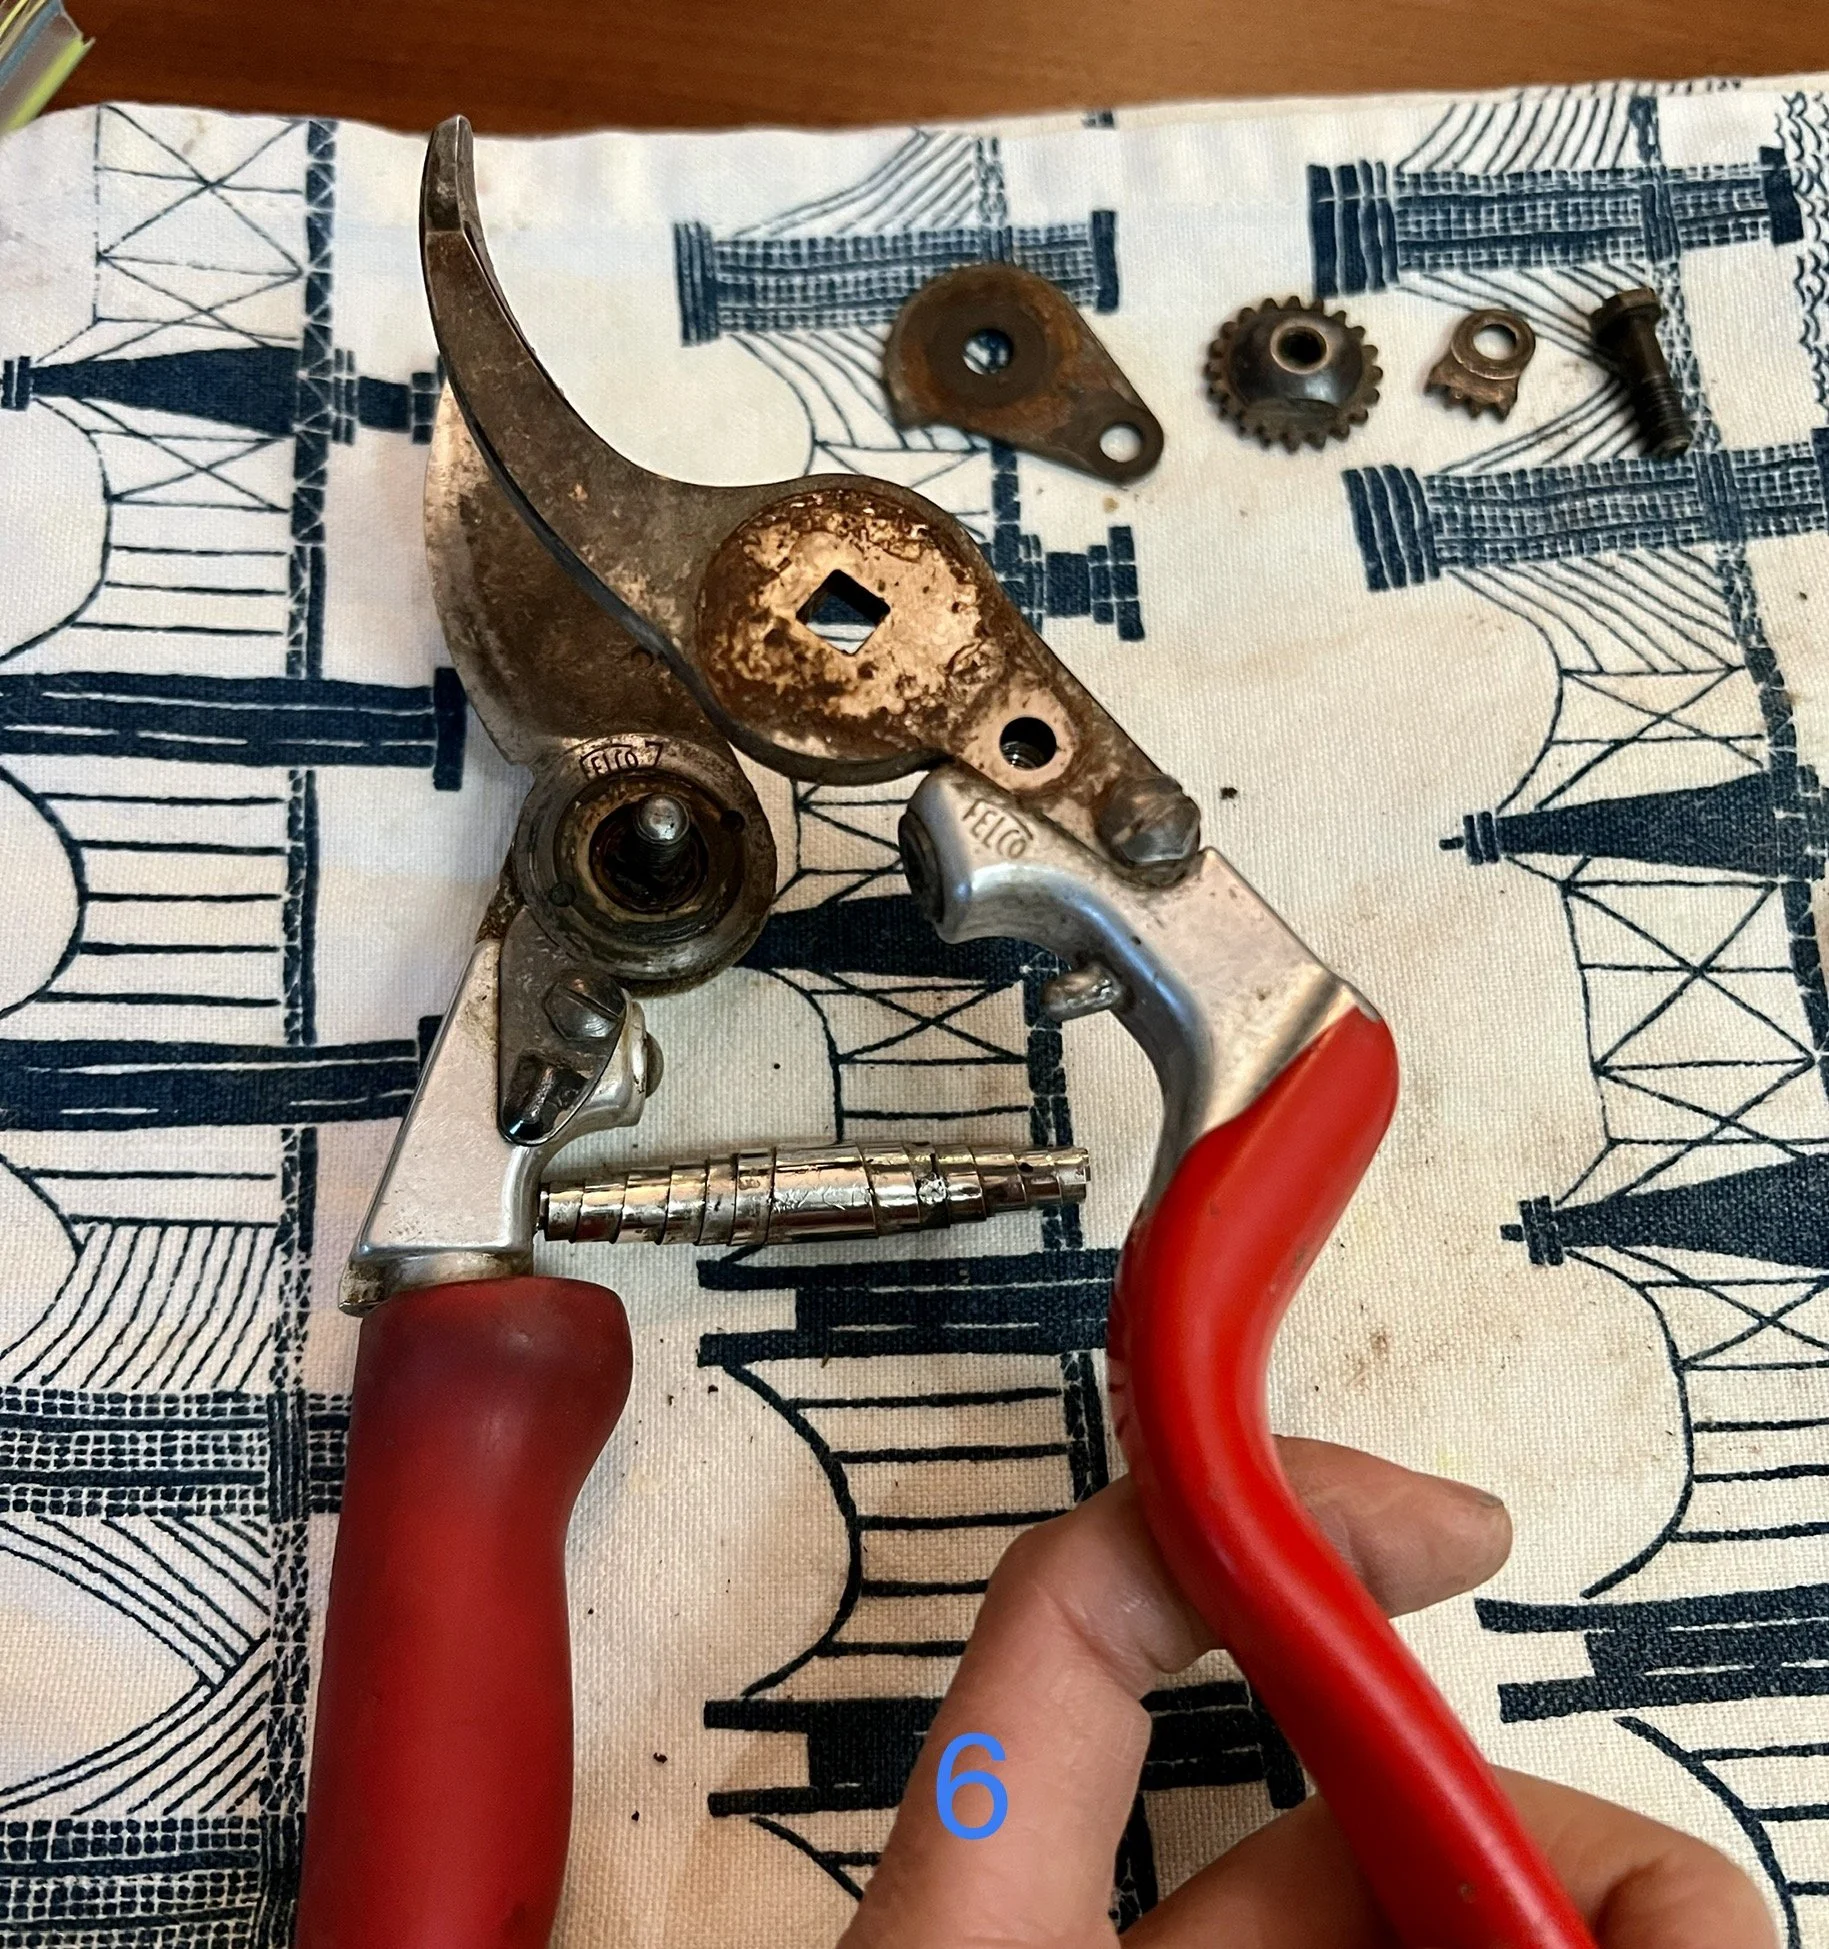
Step 6: The metal spring between the handles detaches easily from the little nubs.

Cleaning your pruner parts
Spray with 981 and let sit for 15-20 minutes (optional). I like the 981 spray because it’s easier to use than other things like mineral spirits, is biodegradable, free from VOC etc. However, it is a dissolvent so I like to spray and let it sit outside under cover. Otherwise, just use soap, hot water and a lot of elbow grease.
Soak all parts again in super hot, soapy water for another 15-20. Scrub all parts really well and don’t lose any! Dry thoroughly.
Sharpen the blade
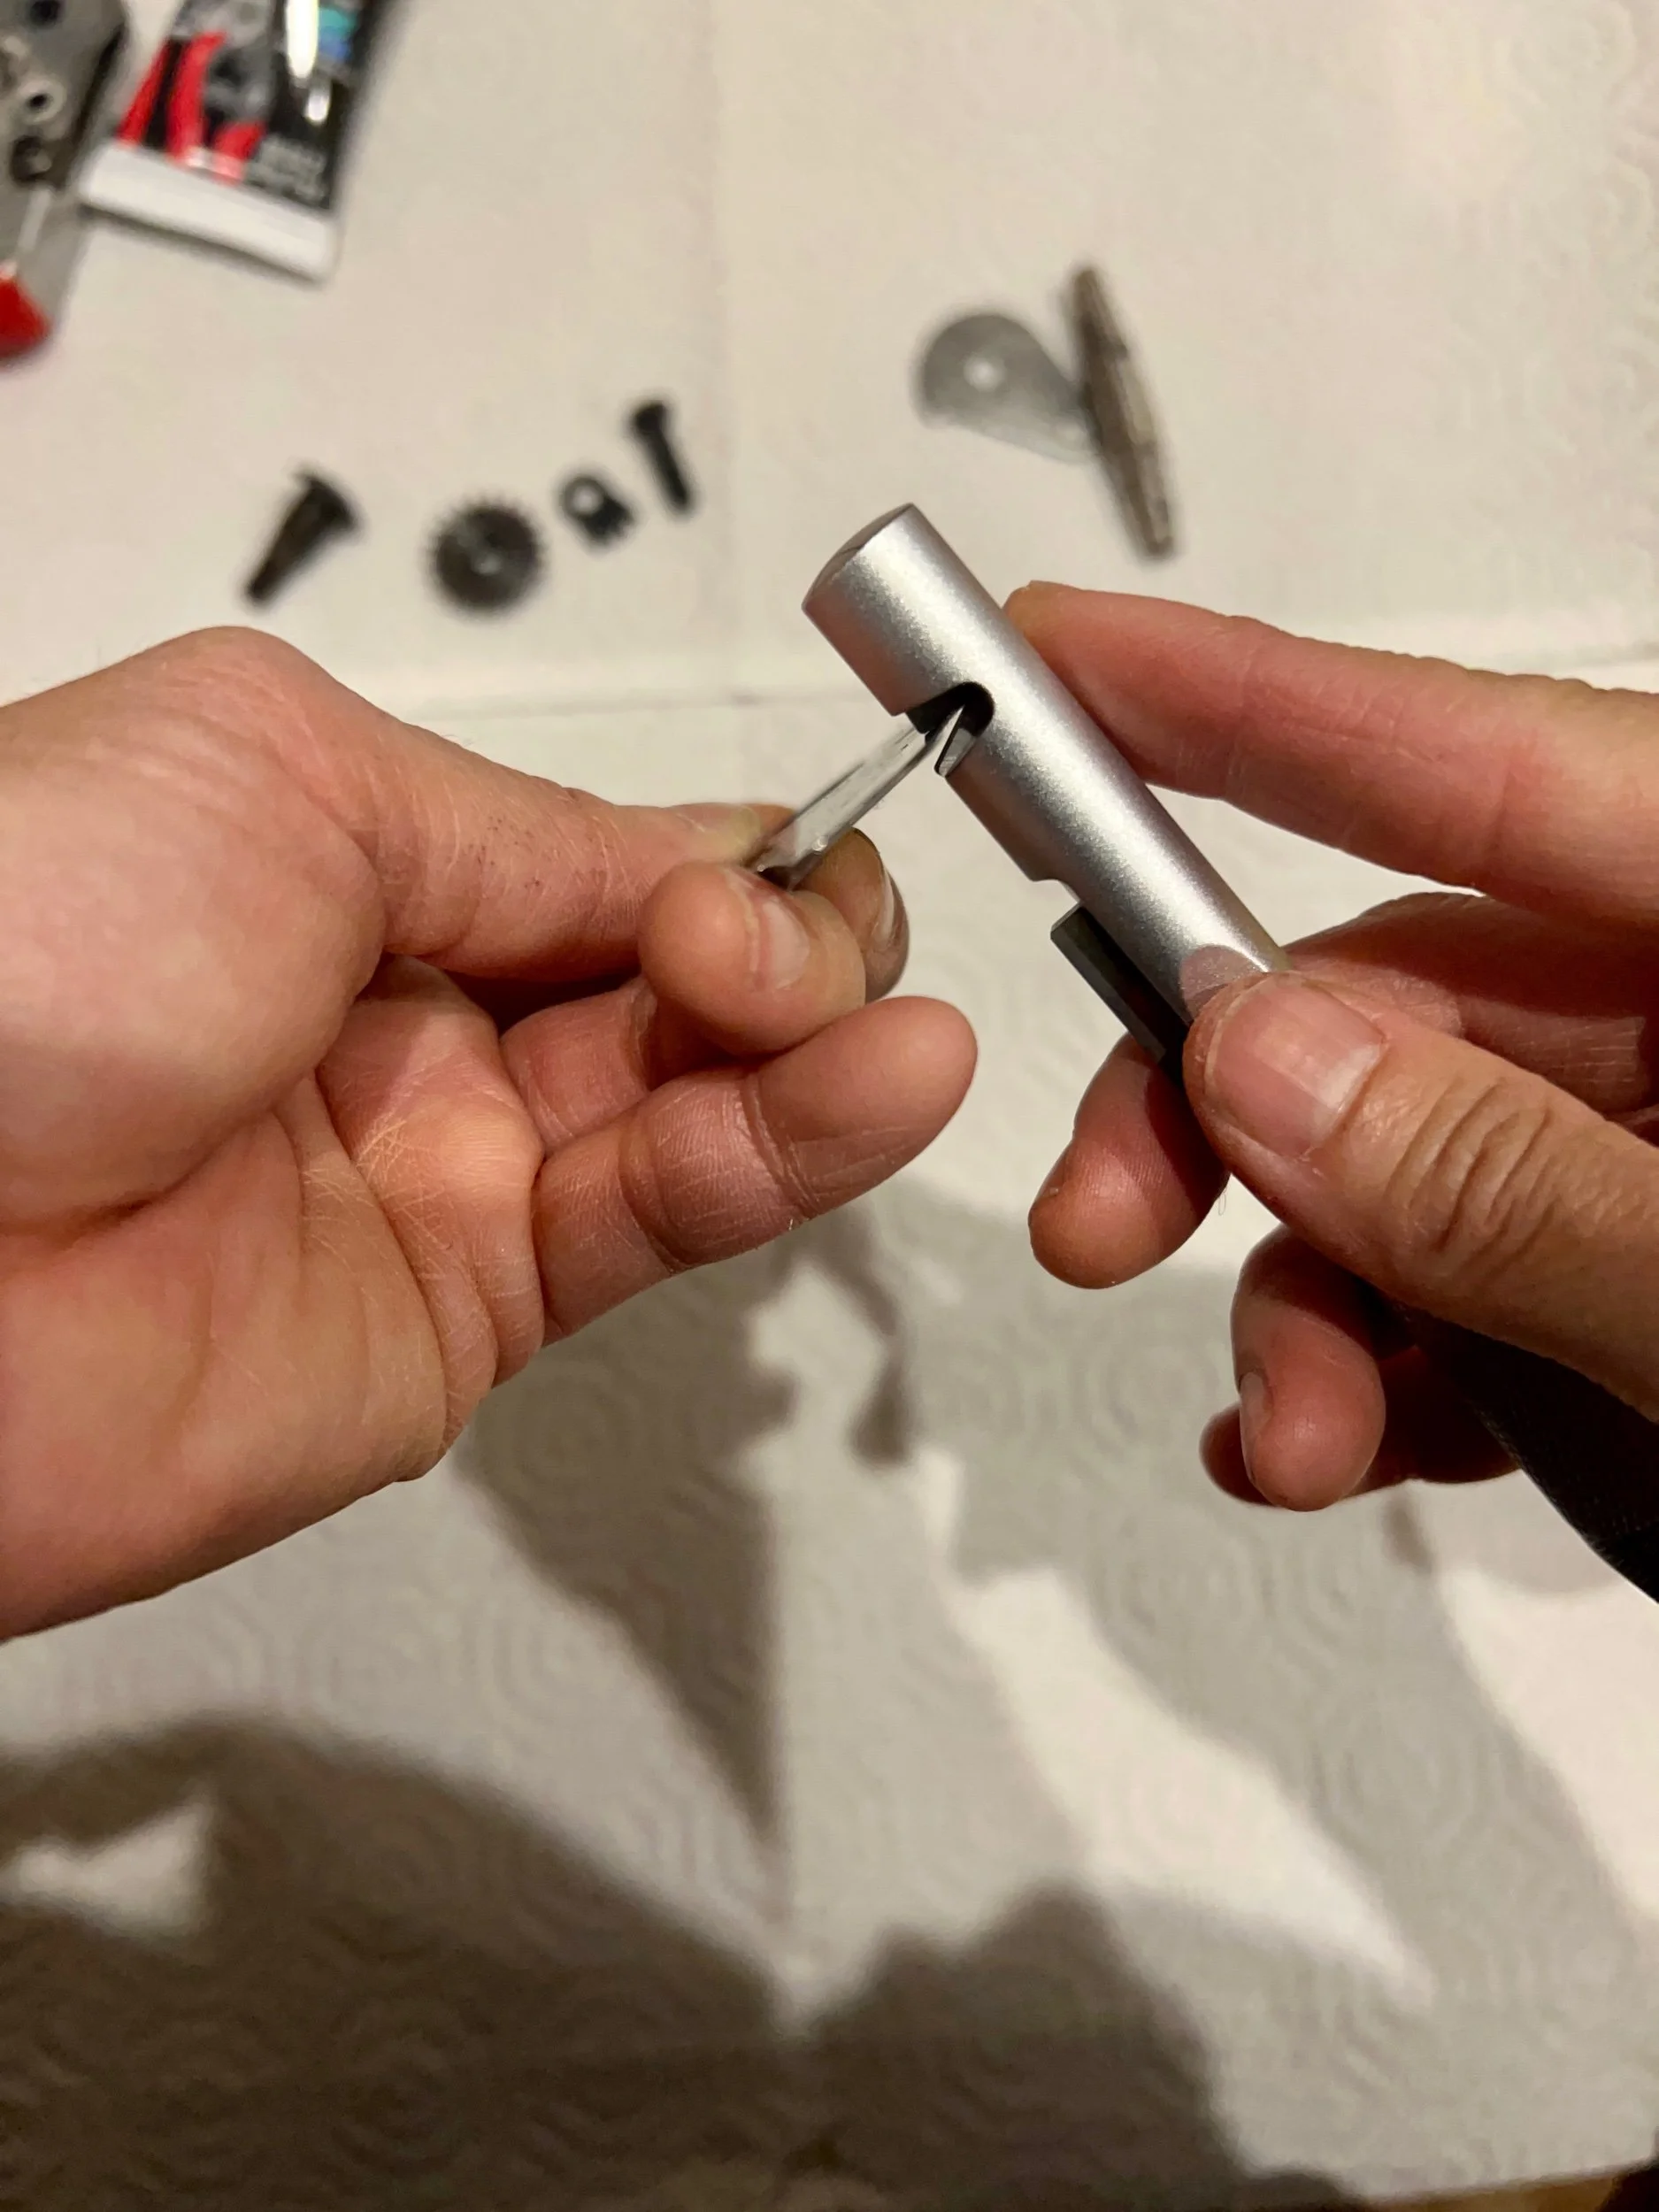
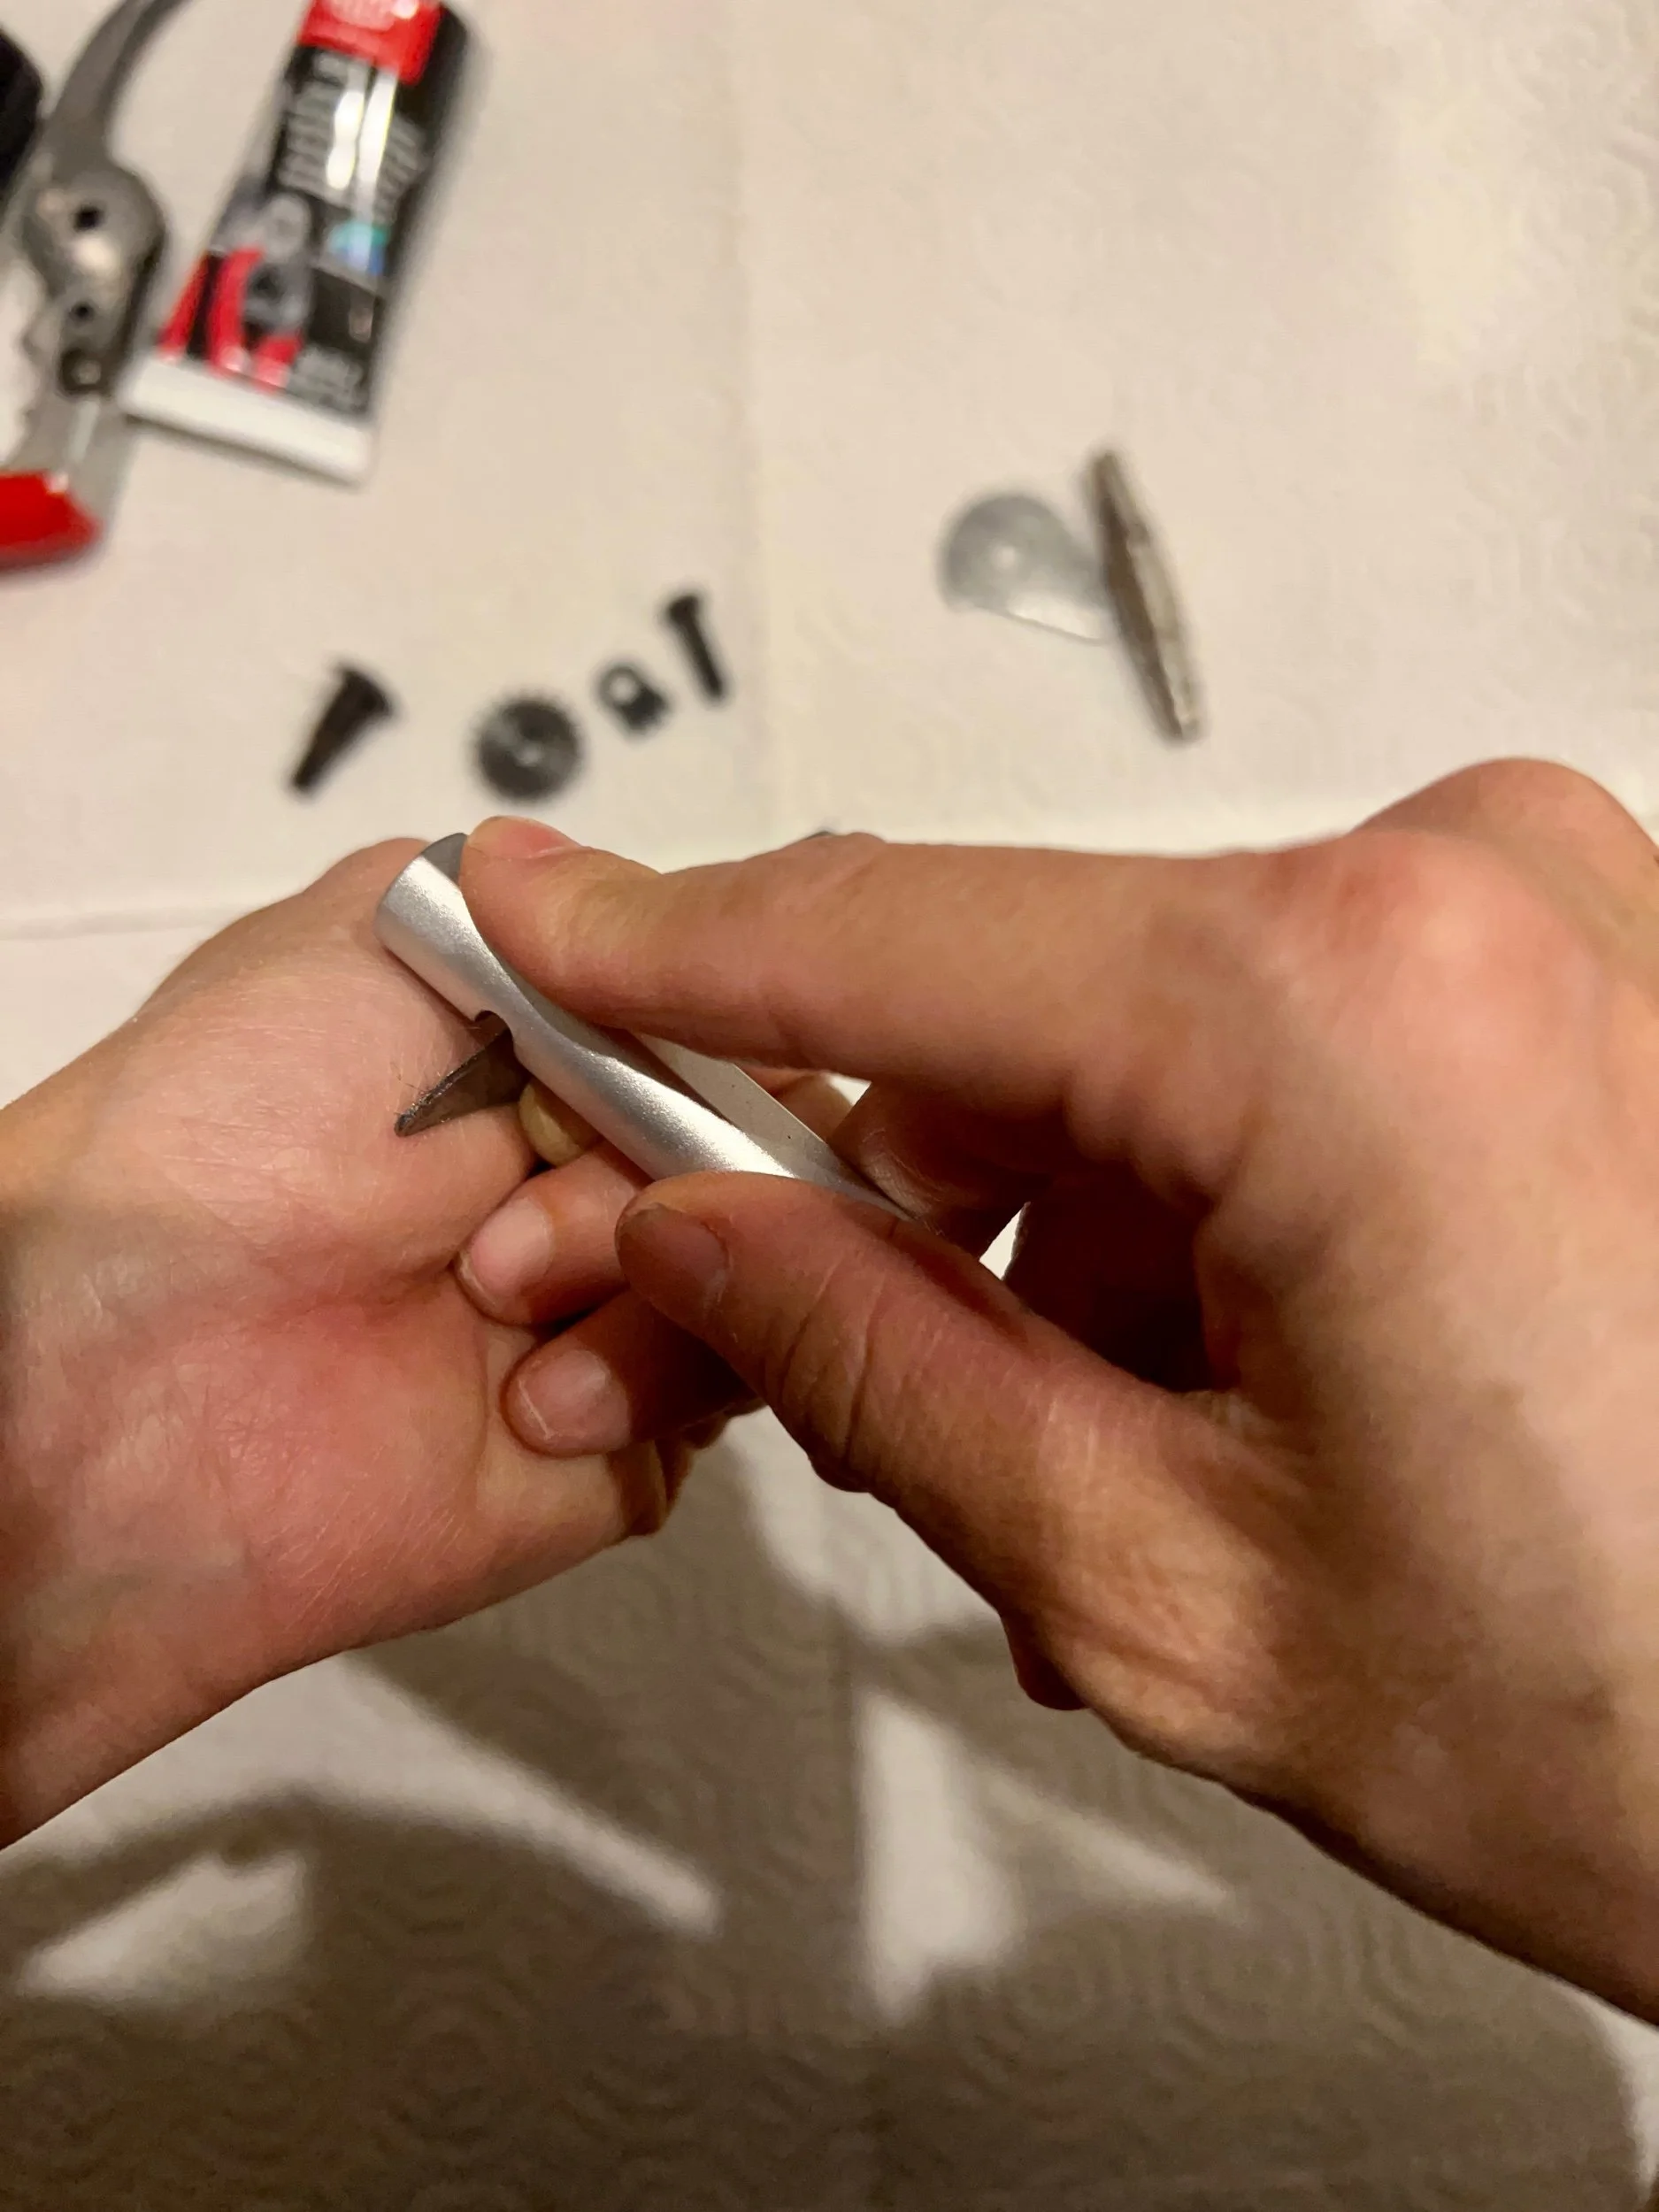
I recently got the Felco 905 and I love it! It has a groove that automatically gives you the same bevel that came from the factory. It only works for right handed tools unfortunately. Of course, you can use whatever stone you feel comfortable with, just follow the existing bevel of the cutting blade. I prefer to use long strokes from one end to the other. Here’s how to use the 905:
Hold blade in your left hand with the point facing you. You will notice that the notch has one side that is perpendicular and the other at an angle that corresponds with the bevel. Keep the perpendicular side tightly against the flat part of the blade as you draw it from back to front in a continuous motion with light, even pressure. Repeat until the blade is as sharp as you like it (able to cut a piece of paper is nice).
Grease and oil relevant parts
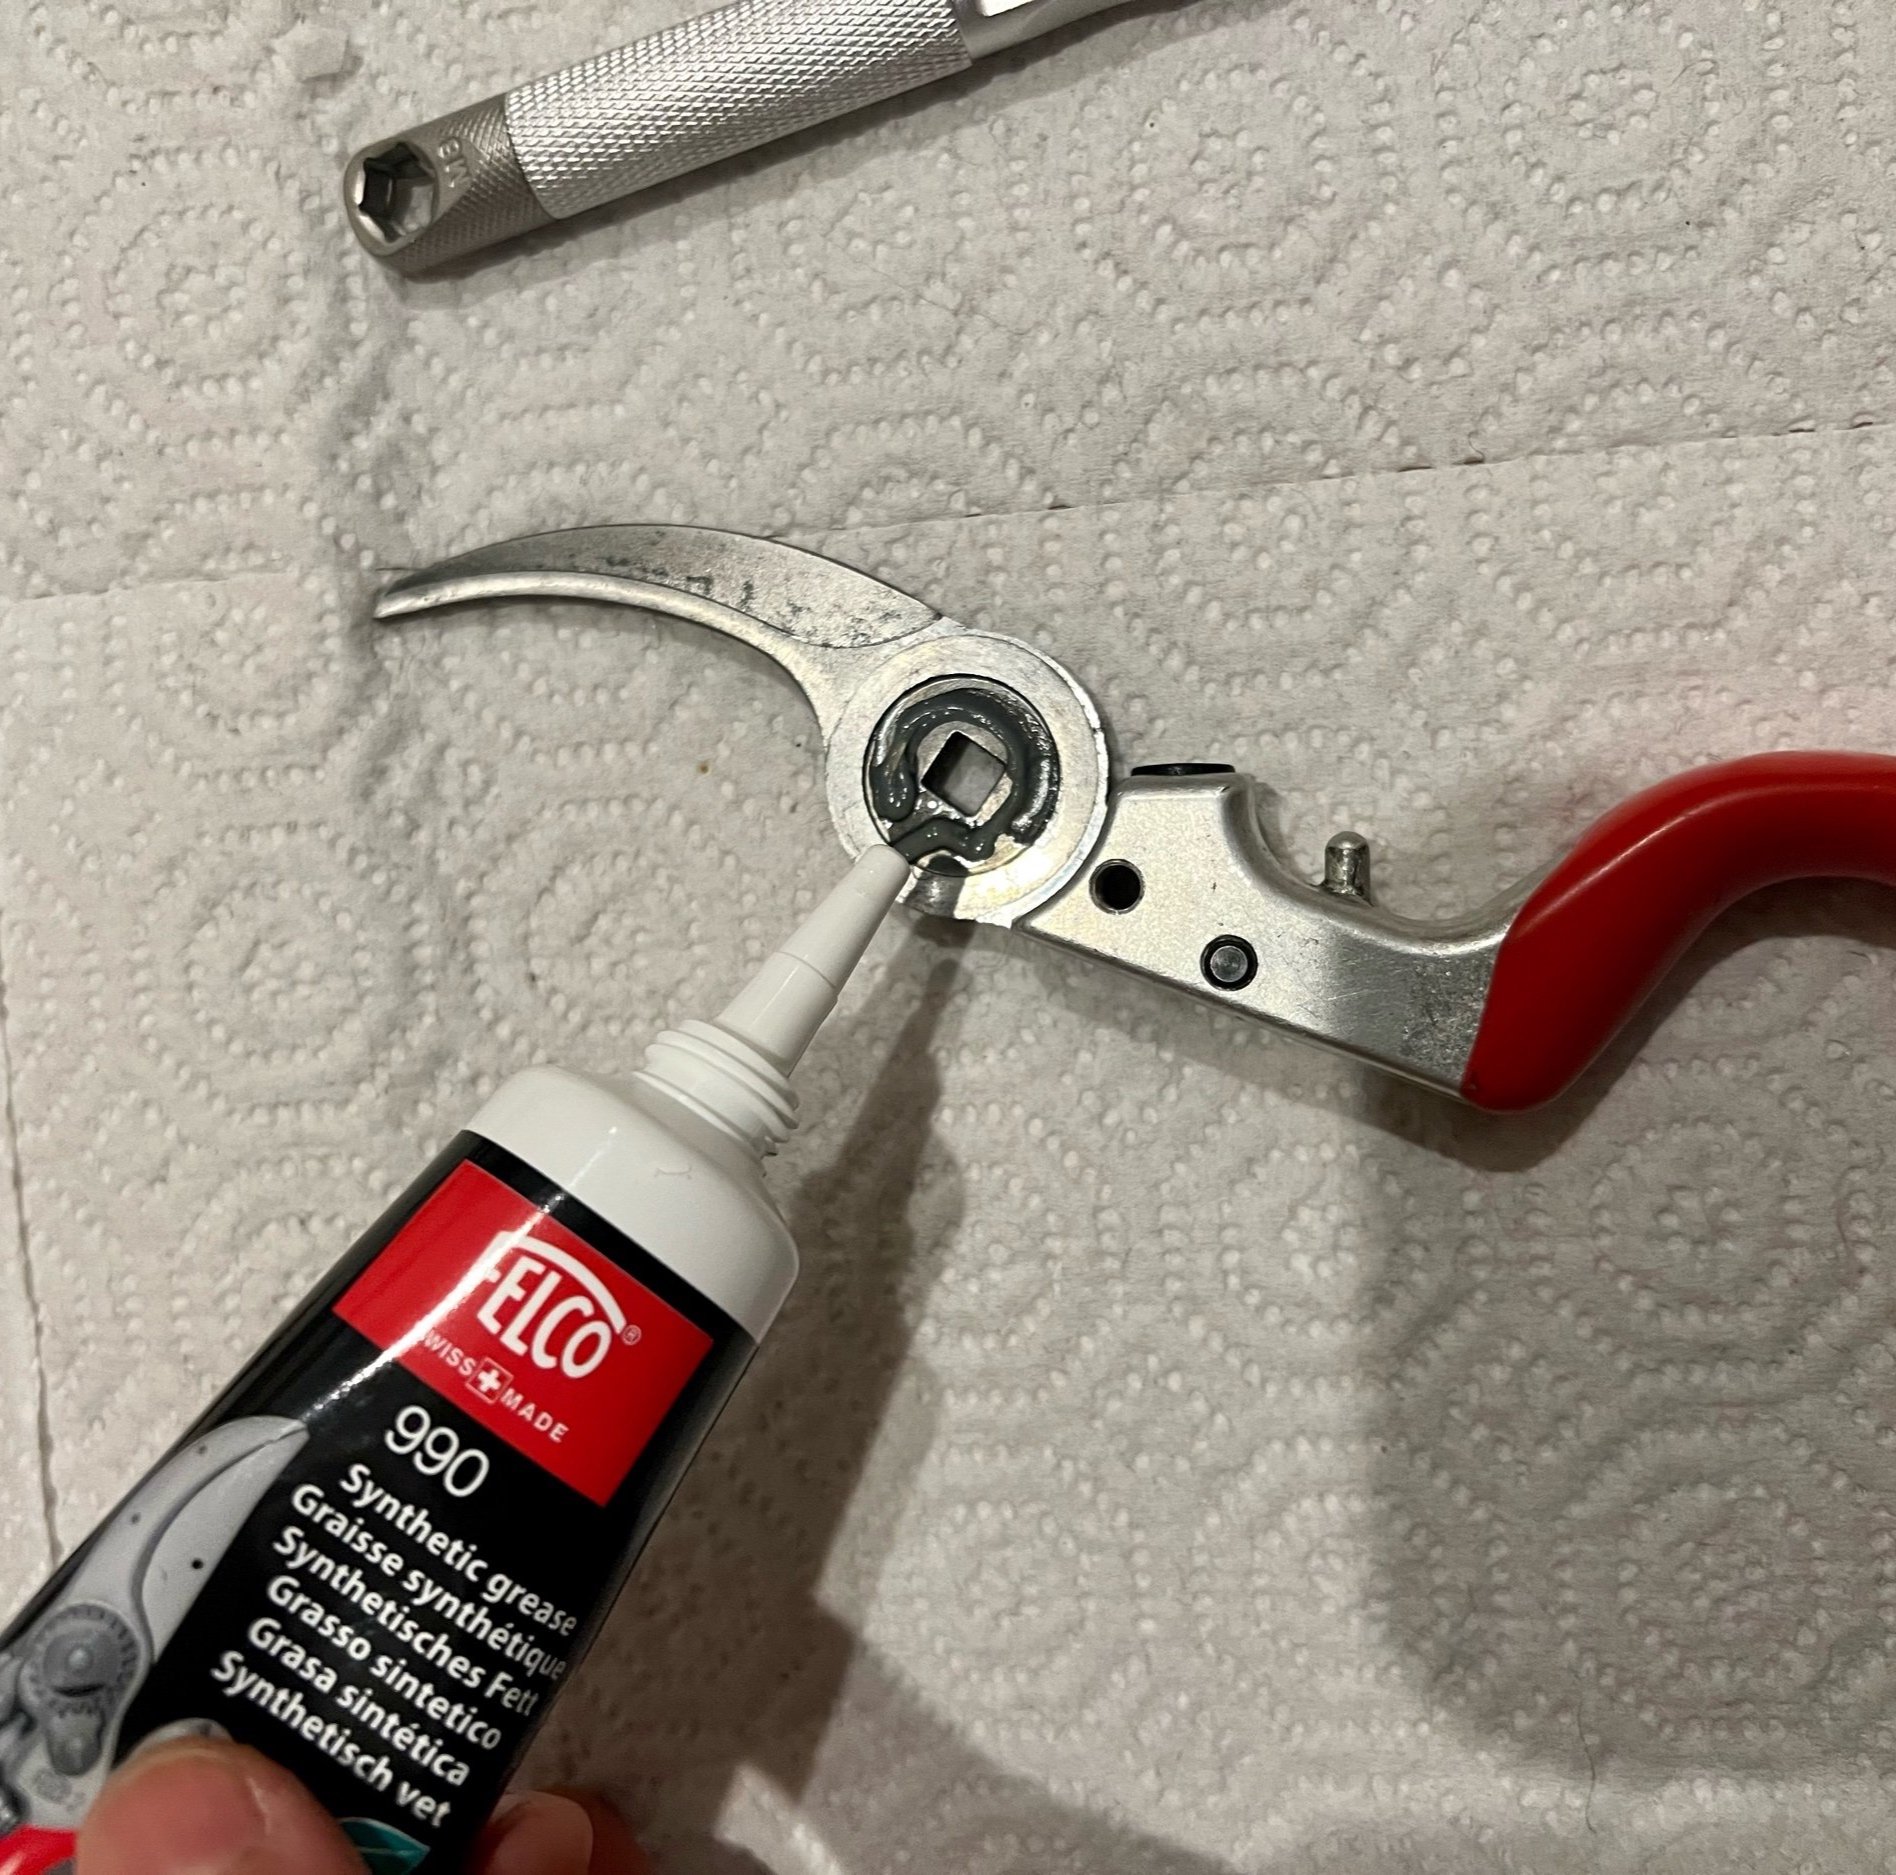
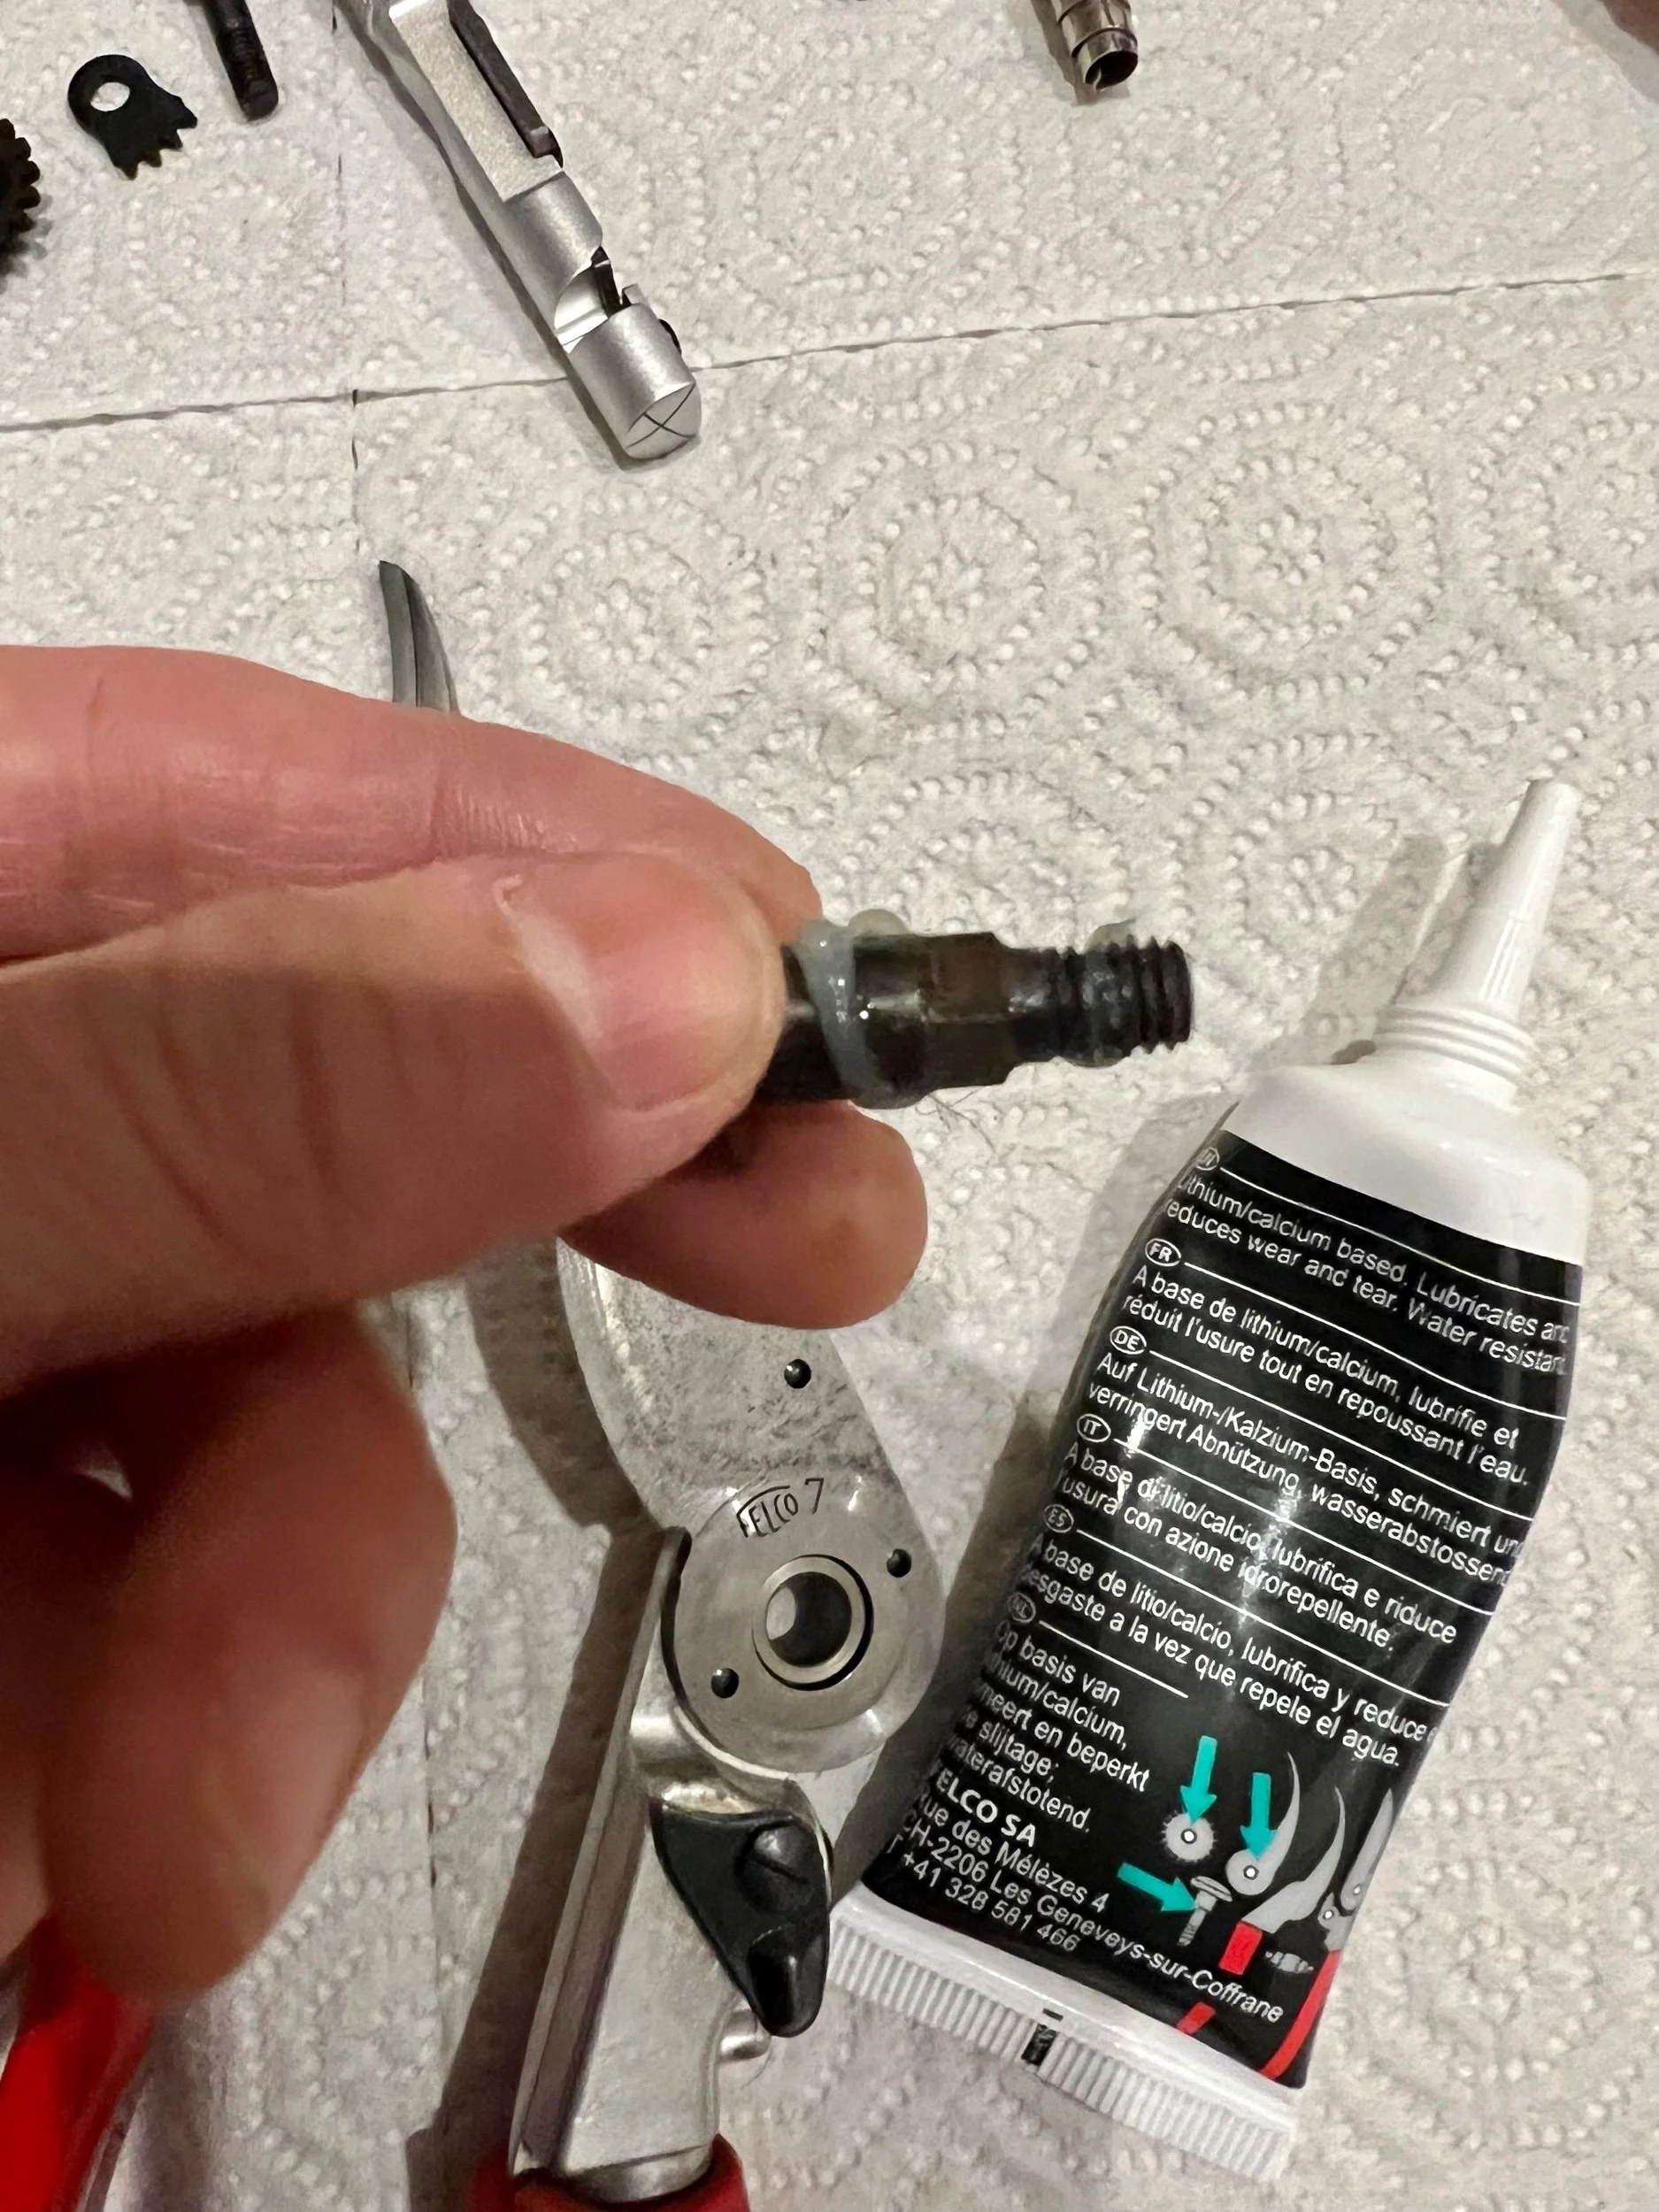
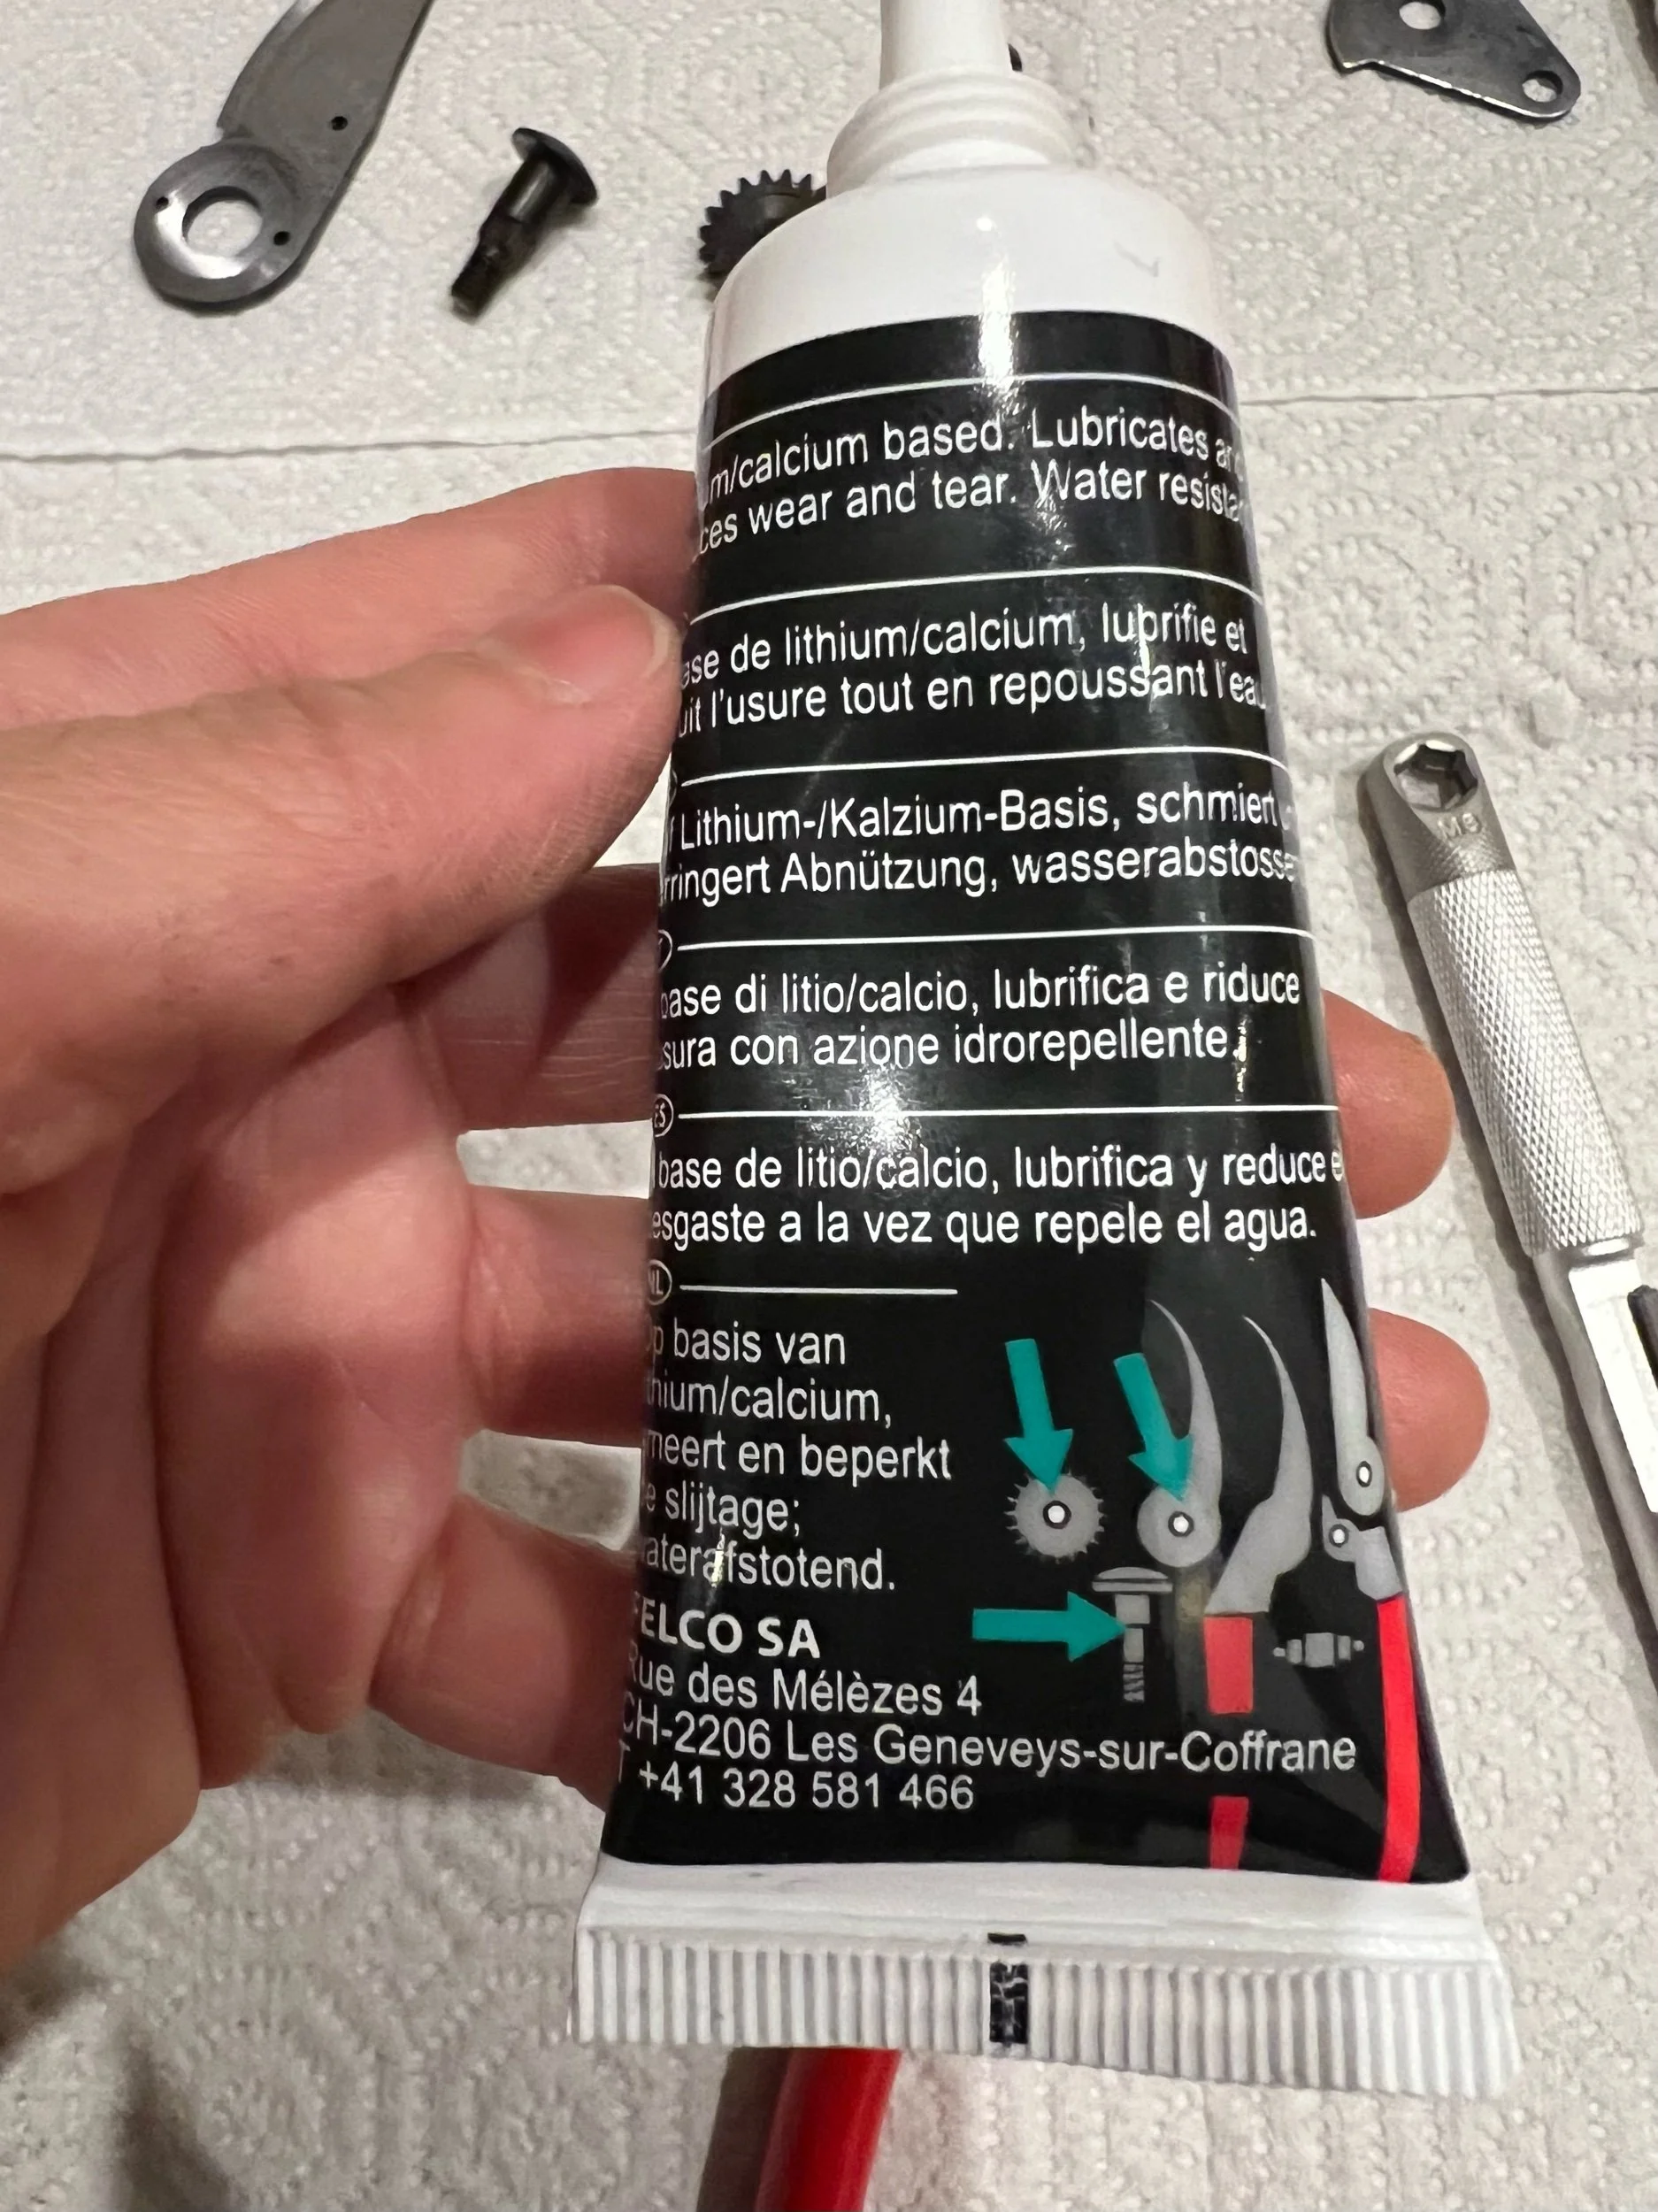
It’s very important to grease and oil relevant parts to prevent rust and ensure smooth action (oil blades frequently during the season after quick clean/wipe down). You should apply grease in the following areas: the circular well of the counterblade (see photo), the bolt and toothed nut. The back of the 990 tube has a diagram.
Spray the blade and all metal parts with 980 spray and wipe excess away. You can also use honing oil, canola or other veggie oil as well.
Reassembly
Just follow disassembly in reverse order. Make sure that the toothed segment is lined up/centered with the toothed nut. Tighten screws and check the action is to your liking.


Ready for action!
This baby is ready for another great season and so am I!
